About This Koala Amigurumi Pattern
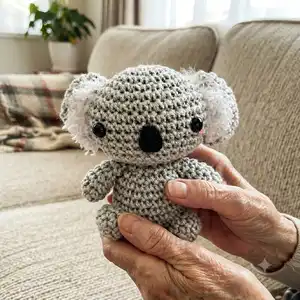
This pattern creates a small, approximately 7 cm tall koala amigurumi using simple single crochet stitches and basic shaping. Youll make a head, body, two hands, two legs and two ears, then assemble and add fluffy ear details with acrylic yarn. The pattern is photo-supported and perfect for quick handmade gifts.
Instructions include exact rounds, material and abbreviation lists, and step-by-step assembly photos. Ideal for crocheters who want a compact, adorable project with a soft, shaggy ear finish.
Why You'll Love This Koala Amigurumi Pattern
I absolutely love this pattern because it turns simple stitches into a tiny, expressive koala with minimal fuss. I enjoy how quickly the pieces come together—you can see progress round-by-round and finish a complete toy in an afternoon. I like adding the fluffy ear detail because it adds personality and texture that make the koala feel finished and special. I hope you feel the same joy making and gifting this little companion as I did designing it.
Switch Things Up
I love changing yarn colors to create different personalities — swap the gray for beige, pastel blue, or even a two-tone head for a playful look.
I often make it larger or smaller by changing yarn weight and hook size; bulky yarn and a 4.0–5.0 mm hook gives a cuddly version, while fingering yarn and a 1.75–2.5 mm hook makes a tiny keychain pal.
I sometimes replace safety eyes with embroidered eyes for a fully washable toy or for little ones under three years old.
For extra detail, embroider little eyelashes, a smile, or eyebrows to change expression and character.
Try fuzzy or boucle yarn for the body to create a plush textured koala instead of the smooth cotton shown in the pattern.
I like to add tiny accessories like a crocheted scarf, hat, or a leaf to hold — they make great photo props and gift presentation.
To make the koala posable, I insert a short piece of wire in each arm before stuffing and bending it gently to hold a pose.
Experiment with different nose materials — felt as shown, or embroider a stitched nose for a softer flat look.
For seasonal variations, use holiday colors and add miniature decorations like a tiny bow or bell around the neck.
I recommend testing one ear shag before doing both so you can control fluff density and trimming style for consistency.
Common Mistakes & How to Fix Them
✗ Placing safety eyes in the wrong round can ruin facial placement; insert safety eyes between rnd 8 and rnd 9 as instructed to keep the correct expression and spacing.
✗ Not stuffing evenly causes lumps or a flat shape; stuff gradually, shaping the head and body by adding small amounts of fiberfill as you work and before closing.
✗ Sewing parts without pinning leads to asymmetry; always pin head, arms and legs in place and check position from multiple angles before stitching.
✗ Tying knots for shaggy ears too tightly or sparsely changes the look; knot the white acrylic yarn every 4 ply as shown and repeat about 6-7 knots per ear to achieve a balanced shaggy effect.
✗ Cutting the shaggy yarn unevenly looks messy; trim carefully after brushing and then neaten with small scissors for an even fluffy edge.


