🧢 Beautiful ✨ Detailed πŸ’ Adorable

Herringbone Texture Crochet Blanket Pattern

Herringbone Texture Crochet Blanket Pattern
4.7β˜… Rating
12-15 Hours Time Needed
1.7K Made This
βœ‚οΈ

Beginner Friendly Level

Perfect for those just starting their crochet journey, with clear instructions and simple techniques

⏱️

Multi-Day Project

A rewarding 12+ hour journeyβ€”perfect for dedicated crafters who love detailed work.

πŸ€—

Soft Hug

Gentle, plush, and full of warmth, creating a sense of comfort and coziness wherever they find a home.

About This Herringbone Texture Crochet Blanket Pattern

This pattern creates a textured herringbone-style crochet blanket worked in jumbo ribbon yarn for a soft, cozy finish. The stitch sequence is built on a 120-chain foundation and uses a simple 4-row repeat to form the attractive textured fabric. Includes measurements, gauge, and a two-round edging to finish the blanket neatly.

Herringbone Texture Crochet Blanket Pattern crochet pattern - detailed view of completed project

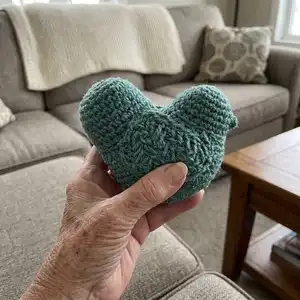
Worked with Caron Jumbo Twirl yarn and a 6.5 mm hook, this easy pattern produces a blanket approximately 44" x 56". The instructions include a reversed single crochet round for a polished edge.

Why You'll Love This Herringbone Texture Crochet Blanket Pattern

I absolutely love this pattern because it creates such an impressive textured fabric with a minimal stitch vocabulary. The herringbone-like texture looks much more complex than it actually is, so I get a lot of satisfaction from making it. The jumbo yarn makes it work up quickly and gives a plush, cozy result that is perfect for snuggling. I also enjoy that the edging is simple but gives a professional finish, so the blanket looks store-bought but handmade.

Herringbone Texture Crochet Blanket Pattern step 1 - construction progress Herringbone Texture Crochet Blanket Pattern step 2 - assembly progress Herringbone Texture Crochet Blanket Pattern step 3 - details and accessories Herringbone Texture Crochet Blanket Pattern step 4 - final assembly and finishing

Switch Things Up

I love experimenting with colors for this blanket and often alternate two different Canal Ribbon skeins held together for a marled effect.

Try switching to a variegated or speckled ribbon yarn for a subtle color variation that highlights the herringbone texture in an interesting way.

If you prefer a lighter blanket, use a DK or worsted weight yarn and a smaller hook; just make a gauge swatch and adjust the starting chain to maintain pattern repeat multiple.

For a chunkier, ultra-cozy version, use a bulkier ribbon yarn or hold two strands together and increase hook size for a plush finish.

I sometimes add a wider border by working extra rows of the pattern before starting the edging to create a framed look that showcases the texture.

To make a baby-sized blanket, reduce the initial chain in multiples that fit the stitch repeat and work fewer row repeats until you reach the desired baby blanket size.

Consider adding a contrasting color for the edging to make the border pop and frame the textured body of the blanket nicely.

If you want a reversible look, practice placing the tr and tr2tog slightly differently or use a different edging technique to harmonize both sides.

For gifting, consider embroidering a small corner label with the recipient's initials using a contrasting yarn for a personalized touch I always enjoy adding.

I also like turning this blanket into a lapghan by extending the length with additional row repeats β€” it makes a great couch throw and is simple to customize.

Common Mistakes & How to Fix Them

βœ— Skipping the note about working tr and tr2tog in front of the work can change texture and stitch alignment; follow the note and work these stitches in front of the work to keep the pattern consistent. βœ— Not checking gauge leads to a final blanket that is too small or too large; make a gauge swatch of 11 sc and 12 rows = 4" [10 cm] and adjust hook size if necessary. βœ— Failing to keep the chain foundation straight creates uneven edges; count chains carefully and keep tension even across the entire 120-chain foundation. βœ— Forgetting to turn and follow the row-end instructions precisely will shift the pattern repeat; always turn where directed and work the final stitches in each row exactly as stated to maintain pattern alignment. βœ— Not fastening off and weaving in ends securely may cause the edging to come loose; fasten off after the edging rounds and weave in ends securely to prevent unraveling.

Herringbone Texture Crochet Blanket Pattern

Make a cozy Herringbone Texture Crochet Blanket using Caron Jumbo Twirl yarn. This easy, textured blanket pairs a simple repeating pattern with a herringbone-like surface that looks intricate but stitches up quickly. Perfect for gifting or snuggling, the pattern includes full row-by-row instructions and a clean two-round edging. Get comfy, pick your favorite color, and enjoy a satisfying multi-day crochet project.

Beginner Friendly 12-15 Hours

Materials Needed for Herringbone Texture Crochet Blanket Pattern

β€” Main Fabric

  • 01
    Caron Jumbo Twirl (12 oz/340 g; 578 yds/528 m) - Canal Ribbon (83001) - 4 balls or 2300 yds/2090 m total
  • 02
    Use the color shown or choose your own Canal Ribbon colorway

β€” Tools Required

  • 01
    Crochet hook size U.S. K/10 1/2 [6.5 mm] Susan Bates Silvalume crochet hook or size needed to obtain gauge
  • 02
    Susan Bates yarn needle
  • 03
    Scissors
  • 04
    Stitch markers (optional)
  • 05
    Measuring tape for gauge and blanket measurement
  • 06
    Pins for blocking (optional)

Progress Tracker

0% Complete

β€” Measurements :

Info :

Approx 44" x 56" [112 x 142 cm].

β€” Gauge :

Info :

11 sc and 12 rows = 4" [10 cm].

β€” Instructions :

Info :

Note: Work all tr and tr2tog in front of work (not around sts).

Info :

Ch 120. See diagram on page 2.

Round 1 :

1st row: (RS). 1 sc in 2nd ch from hook. 1 sc in each of next 2 ch. *Ch 1. Skip next ch. 1 sc in each of next 3 ch. Rep from * to end of chain. 119 sts.

Round 2 :

2nd row: Ch 3 (counts as dc). 1 dc in each st and ch-1 sp to end of row. Turn.

Round 3 :

3rd row: Ch 1. 1 sc in first dc. 1 tr in next skipped ch 2 rows below. Skip next dc (behind tr). *1 sc in next dc. Ch 1. Skip next dc. 1 sc in next dc. Tr2tog. Skip next dc (behind Tr2tog). Rep from * to last 5 sts. 1 sc in next dc. Ch 1. Skip next dc. 1 sc in next dc. 1 tr in same skipped ch 2 rows below as last tr. Skip next dc (behind tr). 1 sc in top of ch 3. Turn.

Round 4 :

4th row: As 2nd row.

Round 5 :

5th row: Ch 1. 1 sc in first dc. 1 tr in next skipped dc 2 rows below. Skip next dc (behind tr). *1 sc in next dc. Ch 1. Skip next dc. 1 sc in next dc. Tr2tog. Skip next dc (behind Tr2tog). Rep from * to last 5 sts. 1 sc in next dc. Ch 1. Skip next dc. 1 sc in next dc. 1 tr in same skipped dc 2 rows below as last tr. Skip next dc (behind tr). 1 sc in top of ch 3. Turn.

Info :

Rep 2nd to 5th rows for pat until work from beg measures approx 56" [1425 cm], ending on a 3rd or 5th row of pat. Fasten off.

β€” Edging :

Round 1 :

Edging: 1st rnd: (RS). Join yarn with sl st in any corner of Blanket. Ch 1. Work 3 sc in same sp. Work sc evenly around outer edges, working 3 sc in each corner. Join with sl st in first sc.

Round 2 :

2nd rnd: Ch 1. Working from left to right instead of from right to left as usual, work 1 reverse sc in each sc around. Join with sl st in first sc. Fasten off.

β€” Diagrams and Stitch Key :

Info :

See reduced sample of pattern diagram on page 2 and stitch key for symbol definitions (chain (ch), single crochet (sc), double crochet (dc), treble crochet (tr), treble crochet 2 together (tr2tog)).

Assembly Instructions

  • Join yarn with a slip stitch in any corner to begin Edging 1st rnd, then work 3 sc in the same space to form a finished corner.
  • Work single crochet evenly around the outer edges, placing 3 sc in each corner to maintain squared corners and even tension.
  • For the 2nd rnd of edging, work reverse single crochet (working from left to right instead of right to left) to create a neat, rolled edge; join with sl st and fasten off.
  • Weave in all ends securely with a yarn needle after the edging is complete and block the blanket to finished measurements for a smooth, even appearance.

Important Notes

  • πŸ’‘Work all tr and tr2tog in front of work (not around stitches) as noted to ensure the correct herringbone texture.
  • πŸ’‘Use the recommended hook size or adjust to obtain gauge of 11 sc and 12 rows = 4" [10 cm] to achieve correct blanket dimensions.
  • πŸ’‘Fasten off and weave in ends after finishing edging to prevent unraveling and ensure a tidy finish.
  • πŸ’‘Measure regularly as you repeat the pattern rows so you can stop when the blanket reaches approximately 56" [142 cm].

This Herringbone Texture Crochet Blanket is a delightful and cozy make that adds instant warmth to any room. The textured pattern looks intricate but works up easily with jumbo ribbon yarn, making it both satisfying and practical. Perfect for gifting or your own snuggle sessions, this blanket is a lovely mix of texture and simplicity. 🧢✨

You ask,

we answer.

FAQs

What size will the finished piece be?

The finished blanket measures approximately 44" x 56" [112 x 142 cm] when worked to gauge with the suggested yarn and hook.

Can I use different yarn weights for this pattern?

You can substitute yarn, but changing yarn weight will affect finished size and texture; make a gauge swatch and adjust hook size to match 11 sc and 12 rows = 4" [10 cm].

Do I need special skill to work the tr2tog or reverse sc edging?

This pattern is rated easy; basic stitches are used, but note the instruction to work tr and tr2tog in front of the work and the reverse single crochet edging, which may require practice if you are very new to crochet.

How long does this project typically take to complete?

Most crocheters will spend about 12-15 hours on this blanket, depending on speed and how much time you spend each session.