🧢 Beautiful ✨ Detailed πŸ’ Adorable

How to Crochet the Perfect Granny Square Pattern

How to Crochet the Perfect Granny Square Pattern
4.8β˜… Rating
2-3 Hours Time Needed
2.7K Made This
βœ‚οΈ

Beginner Friendly Level

Perfect for those just starting their crochet journey, with clear instructions and simple techniques

⏱️

Bite-Sized Project

Finishes in 2-4 hoursβ€”perfect for an afternoon of creative relaxation.

🏑

Cozy Accent

A warm touch for your space that transforms ordinary corners into inviting nooks filled with handmade charm.

About This How to Crochet the Perfect Granny Square Pattern

This pattern teaches you how to crochet a perfect granny square using a chainless starting double crochet (CSDC) and a chainless starting single crochet (CSSC) option. You will learn both the stitches and two joining methods so your squares finish cleanly without a starting chain ridge. The pattern is versatile and works with any yarn weight so you can size your square by changing yarn and hook.

How to Crochet the Perfect Granny Square Pattern crochet pattern - detailed view of completed project

Includes clear round-by-round instructions for each round and visual guidance shown in the original pattern photos. Also explains invisible join and color change tips so your finished squares look professional.

Why You'll Love This How to Crochet the Perfect Granny Square Pattern

I absolutely love this pattern because it solves a really common frustration: the bulky starting chain ridge that can make granny squares look uneven. I enjoy how the chainless starting stitches make the center neat and tidy while still being easy to work. The instructions are straightforward and adaptable, so I find myself making squares in different yarn weights for many projects. Most of all, I love that it opens up options for seamless joining and color changes that keep the finished piece looking polished.

How to Crochet the Perfect Granny Square Pattern step 1 - construction progress How to Crochet the Perfect Granny Square Pattern step 2 - assembly progress How to Crochet the Perfect Granny Square Pattern step 3 - details and accessories How to Crochet the Perfect Granny Square Pattern step 4 - final assembly and finishing

Switch Things Up

I love experimenting with color β€” try alternating two colors every round for a striped granny square or change colors every other round for a more subtle effect.

I sometimes use a bulky yarn and larger hook to make oversized, cozy squares that become a chunky blanket when joined.

For a dainty look, I switch to fingering or sport weight yarn with a smaller hook to create mini squares perfect for coasters or garlands.

I often change the corner spacing by making ch-3 corners instead of ch-2 to create a more open lacy square.

I like to mix textures: pair a smooth cotton with a fuzzy acrylic for squares that have visual and tactile contrast.

Try decorative joins like a crab stitch or reverse single crochet along the seams for a raised, finished edge.

I sometimes embroider a small motif in the center of the square after making a few rounds for a unique focal point.

For wearable projects, I join squares with flexible seams so the finished garment drapes nicely instead of feeling stiff.

I also recommend swapping to a variegated yarn for only the outer rounds to add subtle pops of color while keeping the center solid.

Finally, I often block my squares lightly to square them up before joining; this simple step can make a big difference in the final appearance.

Common Mistakes & How to Fix Them

βœ— Skipping the stitch counts after each round can lead to uneven sides; count your stitches at the end of each round to ensure you have the correct total. βœ— Pulling the chainless starting loop too tight will make it hard to insert the hook; keep the loop slightly stretched and relaxed for easier insertion. βœ— Not working the hdc at the end of each round will misplace the corner center; always work the hdc in the top of the beginning CSDC to finish the corner correctly. βœ— Using wildly different tension between rounds makes the square go out of shape; maintain consistent tension and match your hook to the yarn weight for best results.

How to Crochet the Perfect Granny Square Pattern

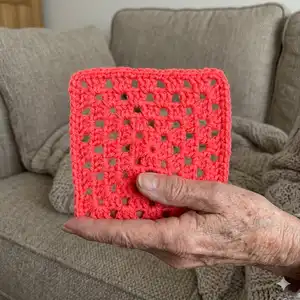
Make a classic, perfectly squared granny square using a chainless starting double crochet and optional invisible join techniques. This pattern teaches a neat chainless start that removes the starting chain ridge so your squares lie flat. You can make these in any yarn, any size, and easily customize colors and joins to suit your project.

Beginner Friendly 2-3 Hours

Materials Needed for How to Crochet the Perfect Granny Square Pattern

β€” Main Fabric

  • 01
    Yarn of your choice (any weight category can be used; thickness and desired size determine yarn quantity)
  • 02
    Multiple colors of yarn if making multicolored squares (amount depends on number of rounds and desired size)

β€” Tools Required

  • 01
    Crochet hook in a size appropriate for the thickness of the yarn you are using
  • 02
    Scissors
  • 03
    Yarn needle or blunt tapestry needle
  • 04
    Optional: stitch markers

Progress Tracker

0% Complete

β€” Special Stitches :

CSDC :

Stretch loop on hook until it is slightly longer than a regular double crochet (see 1st photo). Holding the top of the loop still with your finger, yarn over with the stretched loop on your hook (not the working yarn) 1 time. (See arrow in 1st photo, see finished step in 2nd photo.) Insert the hook into the same stitch the loop is coming from (see 3rd photo). Yarn over, pull up a loop of yarn (see 4th photo). *Yarn over, pull through 2 loops on hook* 2 times (see 5th & 6th photos).

CSSC :

Stretch loop on hook slightly (see 1st photo). Insert hook in the same stitch the loop is coming from (see 2nd photo). Yarn over, pull up a loop (see 3rd photo). Yarn over, pull through 2 loops on hook (see 4th photo).

β€” Granny Square :

Info :

Ch 4. sl st in 4th ch from hook to form a ring (see arrow in 1st photo, finished step in 2nd photo).

Round 1 :

CSDC in ring, 2 dc in ring (see 3rd photo below). *ch 2, 3 dc in ring.* Repeat between *and* 2 more times (see 4th photo below). Ch 1, hdc in top of CSDC from beg of round (see 5th photo below). This hdc creates part of the corner ch sp, but makes the round end at the very center of the corner ch sp. You should have 20 sts, counting each dc and each ch as a stitch and counting the hdc as a stitch.

Round 2 :

CSDC in same corner ch sp, 2 dc in same sp (see 1st photo below). *ch 1, sk nxt 3 sts, (3 dc, ch 2, 3 dc) in nxt corner ch sp.* Repeat between * and * 2 more times (see 2nd photo below). Ch 1, sk nxt 3 sts, 3 dc in nxt corner ch sp (same ch space we began the round from). Ch 1, hdc in top of CSDC from beg of round (see 3rd photo below). This hdc creates part of the corner ch sp, but makes the round end at the very center of the corner ch sp. You should have 36 sts, counting each dc and each ch as a stitch and counting the hdc as a stitch.

Round 3 :

CSDC in same corner ch sp, 2 dc in same sp (see 1st photo below). *ch 1, sk nxt 3 sts, 3 dc in nxt ch-1 sp, ch 1, sk nxt 3 sts, (3 dc, ch 2, 3 dc) in nxt corner ch sp.* Repeat between * and * 2 more times (see 2nd photo below). Ch 1, sk nxt 3 sts, 3 dc in nxt ch-1 sp. Ch 1, sk nxt 3 sts, 3 dc in nxt corner ch sp (same ch space we began the round from). Ch 1, hdc in top of CSDC from beg of round (see 3rd photo below). This hdc creates part of the corner ch sp, but makes the round end at the very center of the corner ch sp. You should have 52 sts, counting each dc and each ch as a stitch and counting the hdc as a stitch.

Round 4 :

CSDC in same corner ch sp, 2 dc in same sp. *(ch 1, sk nxt 3 sts, 3 dc in nxt ch-1 sp) 2 times. ch 1, sk nxt 3 sts, (3 dc, ch 2, 3 dc) in nxt corner ch sp.* Repeat between * and * 2 more times. (Ch 1, sk nxt 3 sts, 3 dc in nxt ch-1 sp) 2 times. Ch 1, sk nxt 3 sts, 3 dc in nxt corner ch sp (same ch space we began the round from). Ch 1, hdc in top of CSDC from beg of round. This hdc creates part of the corner ch sp, but makes the round end at the very center of the corner ch sp. You should have 68 sts, counting each dc and each ch as a stitch and counting the hdc as a stitch.

Round 5 :

CSDC in same corner ch sp, 2 dc in same sp. *(ch 1, sk nxt 3 sts, 3 dc in nxt ch-1 sp) 3 times. ch 1, sk nxt 3 sts, (3 dc, ch 2, 3 dc) in nxt corner ch sp.* Repeat between * and * 2 more times. (Ch 1, sk nxt 3 sts, 3 dc in nxt ch-1 sp) 3 times. Ch 1, sk nxt 3 sts, 3 dc in nxt corner ch sp (same ch space we began the round from). Ch 1, hdc in top of CSDC from beg of round. This hdc creates part of the corner ch sp, but makes the round end at the very center of the corner ch sp. You should have 84 sts, counting each dc and each ch as a stitch and counting the hdc as a stitch.

Round 6 :

CSSC in same corner ch sp, sc in same sp. *sc in ea st and ea ch sp across to nxt corner ch sp, 3 sc in corner ch sp.* Repeat between *and* 2 more times. Sc in ea st and ea ch sp across to the same corner ch sp we began the round in, sc in that corner ch sp (see 3rd photo below).

Info :

If you want to use the yarn tail to sew your granny squares together, you can join by slip stitching into the CSSC from beg of round. Leave a tail long enough for your seam, cut the yarn and tie off.

Info :

If you don't want to use the yarn tail to sew your granny squares together, use this invisible join method. Cut the yarn, leaving about a 6 inch tail. Stretch the loop on your hook until the end of the tail comes out (see 1st photo below). Thread that tail through your yarn needle. Skip the CSSC from beg of round, and insert the needle from back to front through the nxt sc of the round (the one after the CSSC). Pull the needle through. Now, insert the needle down through the top of the last stitch of the round, in the same place where the tail was coming from (see 3rd photo below). Pull the needle through, and adjust the stitch you just made if necessary. Take a small stitch on the back of the sc round and make a knot, if desired. Weave in ends.

Info :

If you want, you can continue to make the granny square as large as you like. After you've completed Round 5, all following rounds will be essentially the same. For each following round, always work the sequence β€œ(ch 1, sk nxt 3 sts, 3 dc in nxt ch-1 sp)” one more time than you did on the round before.

Info :

You can also make the granny squares multicolored, with as many or as few colors as you like.

To Change Colors :

Once you've finished the last round of the previous color, tie off. Insert the hook into the same corner ch sp that you tied off in. Pull up a loop of the new color yarn. Ch 1, and pull that chain stitch very tight. Work the chainless starting stitch for your round into the same corner ch sp, as specified in the pattern. Pull the yarn tail to tighten the chain stitch again and make it disappear. Continue around according to pattern instructions.

Assembly Instructions

  • Join squares using the yarn tail by slip stitching into the CSSC from the beginning of the round; leave a tail long enough for your seam, cut yarn and tie off.
  • Use the invisible join method: cut yarn leaving about a 6 inch tail, stretch loop on hook until tail appears, thread tail through needle, skip CSSC and insert needle from back to front through the next sc, then insert needle down through top of last stitch where tail came from and pull through; adjust and knot if needed.
  • Pin squares together before sewing to ensure alignment, especially matching corners and stitch counts for a flat join.
  • Weave in all ends after joining and secure any knots on the back side to keep the front neat.

Important Notes

  • πŸ’‘Work the hdc in the top of the beginning CSDC at the end of each round to place the round end at the center of the corner chain space.
  • πŸ’‘Count your stitches after each round to ensure you have the correct number (20, 36, 52, 68, 84, etc.) to keep the square even.
  • πŸ’‘When changing colors, pull the chain stitch very tight after starting the new color to make the chain disappear and keep a clean corner.

This granny square pattern is a versatile classic designed to look perfect from the center out. It uses chainless starting stitches for a flat, tidy center and includes joining and color-change techniques to keep your work professional. Make single-color or multicolored squares to build blankets, bags, and decor. 🧢✨

You ask,

we answer.

FAQs

What size will the finished square be?

The finished size depends on your chosen yarn weight and hook; changing yarn weight and hook size will increase or decrease the square size.

Can I use this pattern with any yarn weight?

Yes, you can use any yarn weight, but the final size will vary; choose a hook size appropriate for your yarn and adjust for desired gauge.

Do I need to know special stitches to make this?

You will need to learn the chainless starting double crochet (CSDC) and chainless starting single crochet (CSSC), both explained in the pattern with step-by-step instructions.

How do I join squares invisibly?

The pattern includes an invisible join method: cut yarn leaving a 6 inch tail, stretch loop until the tail appears, thread tail through a needle, skip the CSSC and insert the needle from back to front through the next sc, then down through the top of the last stitch where the tail came from and pull through; adjust and weave in ends.