๐Ÿงถ Beautiful โœจ Detailed ๐Ÿ’ Adorable

Hogwarts House Scarf Pattern

Hogwarts House Scarf Pattern
4.2โ˜… Rating
5-7 Hours Time Needed
3.5K Made This
โœ‚๏ธ

Intermediate Level

Ideal for those with basic crochet experience, featuring slightly more advanced stitches and techniques to expand your skills.

โฑ๏ธ

Weekend Treat

Takes 5-7 hours, making it an enjoyable project to finish over a couple of days.

๐Ÿงฃ

Snug Essential

Everyday comfort with practical charm, designed for both functionality and style through changing seasons.

About This Hogwarts House Scarf Pattern

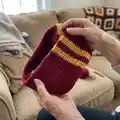
This pattern creates a warm circular Hogwarts House scarf worked in the round with alternating dark and light house stripes. It includes complete instructions for casting on, knitting in the round, changing colors, finishing, blocking, and adding tassel fringe. The design is adaptable to Gryffindor, Slytherin, Ravenclaw and Hufflepuff colorways.

Hogwarts House Scarf Pattern crochet pattern - detailed view of completed project

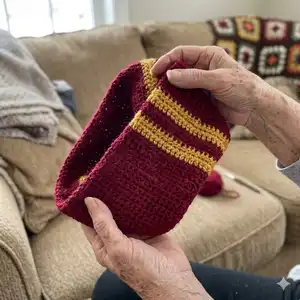
You will work equal amounts of light and dark colored yarn in 22-row stripes to produce a 65-70" scarf. Clear finishing and fringe instructions are included to create a polished finished piece.

Why You'll Love This Hogwarts House Scarf Pattern

I absolutely love this pattern because it combines a classic striped design with simple circular knitting to create a highly wearable statement piece. I love how the 22-row stripes give a bold house identity without complicated colorwork. I enjoy the satisfaction of working in the round for a seamless tube that wears beautifully around the neck. The finishing steps โ€” blocking and precise tassel placement โ€” really elevate the final scarf and make it feel like a thoughtful handmade gift.

Hogwarts House Scarf Pattern step 1 - construction progress Hogwarts House Scarf Pattern step 2 - assembly progress Hogwarts House Scarf Pattern step 3 - details and accessories Hogwarts House Scarf Pattern step 4 - final assembly and finishing

Switch Things Up

I love swapping the color pairings to create subtle or bold variations; try cream with navy for a vintage look or charcoal with mustard for a modern palette.

You can make the scarf chunkier by using a bulkier yarn and larger circular needle for a warm, oversized version.

For a super-fine, delicate scarf, choose fingering weight yarn and smaller needles to make a lightweight neck wrap instead.

I often change the stripe length from 22 rows to 14 or 30 rows to make narrower or wider stripes that change the visual rhythm of the scarf.

To create a reversible look, plan the color joins so the tails are woven carefully and the inside is tidy; this makes the tube look great from every angle.

If you want an open scarf instead of a tube, work the same stripe sequence flat on straight needles and seam the long edges or leave it open.

Consider adding embroidered house initials or a small appliqued crest to a single stripe for a personalized touch that stands out.

I sometimes mix yarn textures, using a slight halo or slub for the contrast color to add subtle depth to the stripes.

For travel-friendly minis, use a lighter yarn and smaller needles to make a pocket-sized keychain scarf or a doll accessory using the same stripe logic.

When making tassels, experiment with different numbers of strands or wrapping them with a contrasting thread for a decorative band at the top of each tassel.

Common Mistakes & How to Fix Them

โœ— Not slipping the marker before joining the round can twist the work and make the scarf uneven; slip the marker onto the needle before joining to ensure your tube starts untwisted. โœ— Cutting color tails too short when changing colors will make weaving in ends difficult; leave a 2-inch (5.1 cm) tail of contrast color and trim the main color to the same length for easier finishing. โœ— Skipping blocking can cause uneven width and wavy edges after finishing; block the scarf by stretching it width-wise until the entire thing is the same width for a polished look. โœ— Adding tassels without measuring can make uneven fringe lengths at the ends; use a 7.5 inch (19 cm) template like a book or cardboard to measure and cut consistent fringe pieces. โœ— Failing to align color changes on the same side fold can make stripes look mismatched; when drying and folding, align all color changes along one side fold so stripes are less noticeable.

Hogwarts House Scarf Pattern

Make a cozy Hogwarts House scarf to show your house pride. This striped circular scarf knits in the round with alternating house and contrast colors, finished with tidy tassels. The pattern is straightforward and perfect for gifting or wearing to class reunions or movie nights. Follow the full instructions for materials, gauge, finishing and fringe.

Intermediate 5-7 Hours

Materials Needed for Hogwarts House Scarf Pattern

โ€” Main Fabric

  • 01
    Equal amounts of light and dark colored yarn (enough to make a 65-70" / 165.1-177.8 cm scarf)
  • 02
    Main color [MC] options: scarlet for Gryffindor, green for Slytherin, blue for Ravenclaw, black for Hufflepuff
  • 03
    Contrast color [CC] options: gold for Gryffindor; grey for Slytherin & Ravenclaw (film); bronze for Ravenclaw (book); yellow for Hufflepuff
  • 04
    Each stripe is a little more than 3" (7.6 cm) long; total of ten dark and nine light stripes when following pattern

โ€” Tools Required

  • 01
    US 6 (4 mm) circular needle 12-16" (30.5 cm - 40.6 cm) or US 8 (5 mm) 12-16" (size dependent on gauge)
  • 02
    Equal amounts of light and dark colored yarn
  • 03
    Size J (6 mm) or K (6.5 mm) crochet hook, for pulling fringe through ends
  • 04
    Circular stitch marker, to mark beginning of each round
  • 05
    Yarn needle
  • 06
    Scissors
  • 07
    Blocking surface or towels for drying

Progress Tracker

0% Complete

โ€” Supplies :

Info :

us 6 (4 mm) or us 8 (5 mm) 12-16" (30.5 cm - 40.6 cm) circular needle, size dependent on gauge. equal amounts of light and dark colored yarn. size j (6 mm) or k (6.5 mm) crochet hook, for pulling fringe through ends. circular stitch marker, to mark beginning of each round. yarn needle.

โ€” Gauge :

Info :

20 sts and 24 rows per 4" (10 cm)

โ€” Scarf Measurements :

Info :

65-70" (165.1 cm - 177.8 cm) long and 7-8" (17.8 cm - 20.3 cm) wide. each stripe is a little more than 3" (7.6 cm) long.

โ€” Instructions :

Step 1 :

Cast on 70 stitches in the main color [mc] (scarlet for gryffindor, green for slytherin, blue for ravenclaw, black for hufflepuff).

Step 2 :

Before joining the ring, slip the marker onto the needle.

Step 3 :

Join to work in the round, taking care not to twist the cast-on edge, and knit in the round for 22 rows.

Step 4 :

After the 22 rows, tie the contrast color [cc] (gold for gryffindor, grey for slytherin & ravenclaw (film), bronze for ravenclaw (book), yellow for hufflepuff) around the dark yarn on the inside of the tube, leaving a 2-inch (5.1 cm) tail of cc; trim the mc to have the same length tail.

Step 5 :

Now, knit 22 rows in the lighter yarn (the contrast color).

Step 6 :

Alternate knitting 22 rows of mc, then 22 rows of cc until you have knitted ten dark and nine light stripes.

Step 7 :

Cast off.

โ€” Finishing :

Info :

Weave the yarn tails from cast-on and cast-off into the scarf.

Info :

Wash the scarf according to your yarn's instructions; dry it flat on the floor/table on top of towels. Be sure to align all the color changes along one side fold of the scarf (they're less noticeable that way).

Info :

Block the scarf by stretching it width-wise until the entire thing is the same width.

โ€” Fringe :

Info :

When the scarf is dry, it's time to add the fringe. Use the US hardcover of Sorcerer's Stone as a good size to measure fringe with; if you don't have a copy, use a piece of cardboard 7.5 inches wide. Wrap the yarn around the book width-wise to create wound pieces, then cut the wound yarn at the edge so it forms several individual pieces of yarn.

Info :

To make one tassel, take 7 pieces of yarn and fold them in half together. Push the crochet hook through both thicknesses of scarf in the first row of knitting at one end, loop the folded ends of the yarn around the hook, and pull the yarn loops halfway through the scarf. Remove the hook, pass the cut yarn ends through the loop, and tighten the tassel.

Info :

There are five light and six dark tassels evenly spaced on each end of the scarf; the author usually does the middle light tassel first, then the dark end tassels, and eyes the rest. Now, put on your scarf and show off.

Assembly Instructions

  • Weave the yarn tails from the cast-on and cast-off securely into the inside of the scarf to hide ends and stabilize color joins.
  • Align all the color changes along one side fold of the scarf when laying flat to dry so the stripes match neatly on folding.
  • Block the scarf by stretching it width-wise until the piece is even across the width to ensure straight edges and uniform width.
  • Measure and cut fringe pieces using a 7.5 inch template (book or cardboard) and assemble tassels by folding 7 pieces of yarn in half and attaching with a crochet hook.
  • Space tassels evenly at each end (five light and six dark per end) and secure tightly, trimming ends to even length for a tidy finish.

Important Notes

  • ๐Ÿ’กBefore joining the cast-on, slip a marker onto the needle to mark the beginning of the round and prevent a twisted join.
  • ๐Ÿ’กLeave a 2-inch (5.1 cm) tail of contrast color when tying in CC and trim the MC to match for easier weaving of ends.
  • ๐Ÿ’กDry and block the scarf flat on towels and align all color changes along one side fold to make stripes less noticeable.
  • ๐Ÿ’กUse a consistent 22-row count per stripe to achieve the intended stripe proportions and final length.

This Hogwarts House Scarf Pattern was designed to celebrate house pride with bold stripes and a clean finish. ๐Ÿงถ The circular construction creates a cozy, seamless tube that wears beautifully and blocks to a professional look. โœจ Add tidy tassels in contrasting colors to personalize and perfect your finished scarf. ๐Ÿงฃ

You ask,

we answer.

FAQs

What size will the finished piece be?

The finished scarf measures approximately 65-70" (165.1 cm - 177.8 cm) long and 7-8" (17.8 cm - 20.3 cm) wide when made as written.

Can I use different yarn weights for this pattern?

Yes, you can use different yarn weights but it will change the final size and gauge; choose an appropriate needle size and check gauge to achieve desired dimensions.

Do I need prior knitting experience for this pattern?

This pattern is rated intermediate; basic circular knitting and color change familiarity will help, though the steps are straightforward for confident beginners.

How long does this project typically take to complete?

Most knitters complete this scarf in 5-7 hours total, though time will vary with experience, yarn weight, and finishing work such as tassels and blocking.