🧶 Beautiful ✨ Detailed 💝 Adorable

Granny Clusters Crochet Skirt Pattern

Granny Clusters Crochet Skirt Pattern
4.2★ Rating
5-7 Hours Time Needed
4.0K Made This
✂️

Beginner Friendly Level

Perfect for those just starting their crochet journey, with clear instructions and simple techniques

⏱️

Weekend Treat

Takes 5-7 hours, making it an enjoyable project to finish over a couple of days.

👕

Casual Chic

Relaxed style with a modern twist, perfect for everyday wear while maintaining that handcrafted uniqueness.

About This Granny Clusters Crochet Skirt Pattern

This pattern creates a flattering, hip-length skirt worked in rounds using a granny cluster stitch and striped color pattern. You'll work a wide waistband with a casing and a crocheted drawstring for an adjustable fit. The design is written for multiple sizes and includes a clear gauge, diagrams, and finishing instructions.

Granny Clusters Crochet Skirt Pattern crochet pattern - detailed view of completed project

Easy to customize by changing colors, length, or yarn weight to suit your style. Ideal for intermediate beginners wanting to practice clusters and simple shaping.

Why You'll Love This Granny Clusters Crochet Skirt Pattern

I absolutely love this pattern because it turns a classic granny cluster into a wearable, modern skirt you can actually wear. I enjoy how the stripe pattern is simple to memorise yet creates a striking effect with contrast colors. I appreciate that the waistband finishes neatly with a practical drawstring, which keeps the skirt adjustable and comfortable. I also love that the pattern is easy to customise — you can change colors or length to make it uniquely yours.

Granny Clusters Crochet Skirt Pattern step 1 - construction progress Granny Clusters Crochet Skirt Pattern step 2 - assembly progress Granny Clusters Crochet Skirt Pattern step 3 - details and accessories Granny Clusters Crochet Skirt Pattern step 4 - final assembly and finishing

Switch Things Up

I love how easy it is to make this skirt your own by switching up colors — try ombré shades for a modern gradient look.

I sometimes swap the drawstring for an elastic waistband for a sleeker finish and easier fit adjustments.

If you want a mini or midi version, I change the number of granny cluster repeats to shorten or lengthen the skirt while maintaining the stripe pattern.

I often experiment with different yarn weights; using a sport or DK weight with a smaller hook gives a lighter drape.

I like adding a scalloped or picot edge at the hem for a feminine touch — it’s a simple finishing row after the clusters.

Try alternating color placement within the stripe pattern to create bold bands or soft pastels depending on the look you want.

I also enjoy embroidering small floral motifs onto a single-color stripe for a playful accent.

To make a cozier winter skirt, I use a bulky yarn and larger hook and add a lining for warmth and opacity.

Add pockets by sewing small rectangles into the side seams before finishing the waistband for a functional upgrade.

I recommend testing a sample of the waistband method if you prefer a sewn casing instead of crocheted eyelets — both work well, just a different finish.

Common Mistakes & How to Fix Them

✗ Skipping the gauge check; always make a 4" [10 cm] swatch of 13 sc and 14 rows to ensure the skirt fits as intended. ✗ Pulling yarn too tight when carrying unused colors; carry the color loosely along the wrong side to avoid puckering and distortion. 
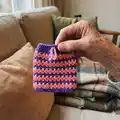
✗ Forgetting to align stitches when folding the waistband; pin the 3rd and 4th rounds to match stitches before joining to create an even casing. ✗ Not counting stitches after the Setup rnd; count the 120 (132-144-165-183-204) chains and 1 sc in each to ensure correct stitch multiples before starting clusters. 
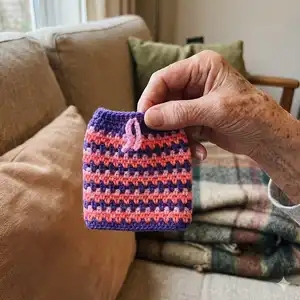
✗ Overstuffing or pulling the drawstring too tight can distort the waistband; thread the drawstring loosely and adjust tension gradually when tying.

Granny Clusters Crochet Skirt Pattern

Make a stylish, striped granny-cluster skirt using Caron Simply Soft yarn — a colorful, comfortable piece you can wear all season. This easy pattern guides you through the granny cluster stitch, waistband finishing, and a neat drawstring casing. Perfect for customizing colors and length to make a unique handmade garment you will love to wear or gift.

Beginner Friendly 5-7 Hours

Materials Needed for Granny Clusters Crochet Skirt Pattern

— Main Fabric

  • 01
    Caron Simply Soft™ (6 oz/170 g; 315 yds/288 m) - main yarn listed for the skirt
  • 02
    Contrast A: Iris (39747) - 1 ball for XS/S (277 yds/253 m); 1 ball for M (305 yds/278 m); 1 ball for L (335 yds/306 m); 2 balls for XL (368 yds/337 m); 2 balls for 2/3XL (423 yds/387 m); 2 balls for 4/5XL (508 yds/465 m)
  • 03
    Contrast B: Strawberry (COL0015) - 1 ball for XS/S (182 yds/166 m); 1 ball for M (200 yds/183 m); 1 ball for L (220 yds/201 m); 1 ball for XL (242 yds/221 m); 1 ball for 2/3XL (278 yds/254 m); 2 balls for 4/5XL (334 yds/305 m)
  • 04
    Contrast C: Blackberry (39792) - 1 ball for XS/S (153 yds/139 m); 1 ball for M (168 yds/153 m); 1 ball for L (185 yds/169 m); 1 ball for XL (203 yds/186 m); 1 ball for 2/3XL (234 yds/214 m); 1 ball for 4/5XL (281 yds/256 m)

— Tools Required

  • 01
    Crochet hook U.S. G/6 [4 mm] Susan Bates® Silvalume® or size needed to obtain gauge
  • 02
    Susan Bates® yarn needle
  • 03
    Scissors
  • 04
    Measuring tape
  • 05
    Stitch markers (recommended to mark beginning of rounds)
  • 06
    Pins for assembly
  • 07
    Tapestry needle for weave-in ends

Progress Tracker

0% Complete

— Materials :

Materials :

Caron® Simply Soft™ (6 oz/170 g; 315 yds/288 m). Contrast A Iris (39747). Contrast B Strawberry (COL0015). Contrast C Blackberry (39792). Size U.S. G/6 [4 mm] Susan Bates® Silvalume® crochet hook or size needed to obtain gauge. Susan Bates® yarn needle.

— Abbreviations :

Infos :

Approx = Approximately. Beg = Beginning. Ch = Chain(s). Cont = Continue(ity). Dc = Double crochet. Hdc = Half double crochet. Pat = Pattern. Rem = Remain(ing). Rep = Repeat. Rnd(s) = Round(s). Sc = Single crochet. Sl st = Slip stitch. Sp(s) = Space(s). St(s) = Stitches. WS = Wrong side. Yoh = Yarn over hook. BLO = back loop only. FLO = front loop only.

— Gauge :

Info :

13 sc and 14 rows = 4" [10 cm].

— Instructions :

Info :

The instructions are written for the smallest size. If changes are necessary for larger sizes the instructions will be written thus XS/S (M-L-XL-2/3XL-4/5XL). Numbers for each size are shown in the same color throughout the pattern. When only one number is given in black, it applies to all sizes.

Info :

Notes: Carry color not in use loosely up WS of work. Ch 2 at beg of rnd does not count as st.

— Stripe Pat :

Info :

With A, work 2 rnds. With B, work 2 rnds. With C, work 2 rnds. These 6 rnds form Stripe Pat.

Info :

See diagram on page 3.

— Setup and Foundation :

Setup rnd :

With A, ch 120 (132-144-165-183-204). Join with sl st to first ch to form a ring, being careful not to twist chain. Ch 1. 1 sc in each ch around. Join with sl st to first sc.

— Granny Cluster Pattern :

Round 1 :

With A, ch 2. 3 dc in same sp as sl st. Skip next 2 sc. *3 dc in next sc. Skip next 2 sc. Rep from * to end of rnd. Join with sc to top of first st.

Round 2 :

With A, ch 2. 3 dc around joining sc. *Skip next 3 dc. 3 dc between 3 dc just skipped and next 3 dc. Rep from * to end of rnd. Join with sc to top of first st.

Info :

First 2 rnds of Stripe Pat are now in place.

Info :

Keeping cont of Stripe Pat, rep 1st and 2nd rnds until work from beg measures 16 (16-17-18-20-21)" [40.5 (40.5-43-45.5-51-53.5) cm]. Break B and C.

— Waistband and Facing :

Round 1 :

With A, ch 1. Skip joining sc. 1 sc in each st around. Join with sl st to first sc. 120 (132-144-165-183-204) sc.

Round 2 :

Ch 2. Working in front loops only, 1 hdc in each sc around. Join with sl st to first hdc.

Round 3 :

Ch 2. 1 hdc in each of next 58 (64-70-80-89-100). Ch 1. Skip next hdc. 1 hdc in each of next 2 (2-2-3-3-2) hdc. Ch 1. Skip next sc. 1 hdc in each st to end of row. Join with sl st to first hdc.

Round 4 :

Ch 2. Working in back loops only, 1 hdc in each st and ch-1 sp around. Join with sl st to first hdc.

Round 5 :

Ch 2. 1 hdc in each hdc around. Join with sl st to first hdc. Fasten off.

— Drawstring :

First st :

With C, ch 2. Draw up a loop in 2nd ch from hook. Yoh and draw through 1 loop on hook - ch made. Yoh and draw through 2 loops on hook - sc made.

Rem sts :

*Draw up a loop in "ch" of previous st. Yoh and draw through 1 loop on hook (ch). Yoh and draw through 2 loops on hook. Rep from * until Drawstring measures length to fit waist measurement and approx 12" [30.5 cm] extra length to tie. Fasten off.

— Finishing :

Info :

Fold Waistband between 3rd and 4th rnds, ensuring sts are aligned. With WS facing, join A with sl st to any unworked loop from sts worked in 1st rnd.

Info :

Ch 1. Working up through unworked loops from 2nd rnd, and through both loops of sts worked in 5th rnd, work in sl st to create waistband casing around top of Skirt. Join with sl st to first sl st. Fasten off.

Info :

Using ch-1 sps worked in 3rd rnd of Waistband as eyelets, thread drawstring through Waistband casing.

Assembly Instructions

  • Fold the Waistband between the 3rd and 4th rnds, aligning stitches, and join A with a slip stitch to any unworked loop from rounds worked in the Setup rnd to secure the fold.
  • Create the waistband casing by working sl st through the unworked loops from the 2nd rnd and through both loops of stitches worked in the 5th rnd, join with slip stitch and fasten off.
  • Thread the crocheted drawstring through the ch-1 spaces (eyelets) made in the 3rd rnd of the Waistband and adjust for fit, leaving approx 12" [30.5 cm] extra length to tie.
  • Break contrasts B and C when indicated after reaching the measured length, and fasten off ends securely; weave in all yarn tails with a yarn needle.
  • Check alignment and fit, pin if needed, and press gently on WS if desired; ensure waistband is even before finishing and threading the drawstring.

Important Notes

  • 💡Carry unused colors loosely along the wrong side to avoid puckering and keep tension even.
  • 💡Ch 2 at the beginning of rounds does not count as a stitch; follow pattern counts carefully.
  • 💡Measure your work frequently and stop to check the skirting measurement before breaking colors to ensure correct length.
  • 💡Pin and align the waistband before joining to create an even casing and tidy finish.
  • 💡Work the front-loop and back-loop rounds as specified for the waistband to ensure correct texture and fit.

This Granny Clusters Crochet Skirt is an easy, modern take on classic granny stitch stripes, designed to be cozy and customizable. 🧶 Make it in bright contrasts or soft pastels to suit your wardrobe and mood. ✨ Wear it casually or dress it up — handmade style that feels personal and joyful. 🎀

You ask,

we answer.

FAQs

What size will the finished skirt fit?

The pattern is written to fit multiple hip measurements; refer to the size chart and finished hip measurements in the pattern and choose the size matching your hip measurement.

Can I use a different yarn weight?

Yes, you can substitute a different yarn weight, but this will change the finished size; be sure to make a gauge swatch and adjust hook size to match the gauge of 13 sc and 14 rows = 4" [10 cm].

Is this pattern suitable for beginners?

Yes — the pattern is rated Easy and is suitable for beginners comfortable with basic stitches (sc, hdc, dc) and working in rounds, plus carrying colors loosely for stripes.

How long does it take to complete the skirt?

Most crocheters finish this skirt in about 5-7 hours, depending on experience, size chosen, and how much time is spent on finishing and customization.