🧢 Beautiful ✨ Detailed πŸ’ Adorable

French Countryside Blanket Pattern

French Countryside Blanket Pattern
4.9β˜… Rating
12-15 Hours Time Needed
2.3K Made This
βœ‚οΈ

Beginner Friendly Level

Perfect for those just starting their crochet journey, with clear instructions and simple techniques

⏱️

Multi-Day Project

A rewarding 12+ hour journeyβ€”perfect for dedicated crafters who love detailed work.

πŸ€—

Soft Hug

Gentle, plush, and full of warmth, creating a sense of comfort and coziness wherever they find a home.

About This French Countryside Blanket Pattern

This pattern creates the French Countryside Blanket using a pretty Paris Stitch that gives a textured, flower-like repeat. The design is written for a medium size blanket and includes clear guidance for changing sizes with helpful tables. The pattern also includes a full border routine with photo-referenced placement instructions to finish your edges neatly.

French Countryside Blanket Pattern crochet pattern - detailed view of completed project

Worked with a DK / Light (3) weight yarn and a 4.5mm hook, the blanket measures approximately 48 x 50 inches. Full yarn specifications and substitution suggestions are included to help you choose alternatives.

Why You'll Love This French Countryside Blanket Pattern

I absolutely love this pattern because the Paris Stitch creates a beautiful texture with very little fuss, and it looks far more complicated than it actually is. I enjoy how quickly the repetitive rows work up, giving a lovely rhythm to crochet time and constant visual progress. The border instructions are also a favourite β€” they frame the blanket so neatly and make the finished piece look professionally made. Finally, I love that it is so easy to customize the size and yarn, so I can make one for any season or recipient.

French Countryside Blanket Pattern step 1 - construction progress French Countryside Blanket Pattern step 2 - assembly progress French Countryside Blanket Pattern step 3 - details and accessories French Countryside Blanket Pattern step 4 - final assembly and finishing

Switch Things Up

I love how easy it is to customize this blanket by changing yarn colorways β€” try soft pastels for a baby blanket or deep jewel tones for a grown-up throw.

Want a smaller or larger blanket? Adjust the starting chains using Table 1 and change the number of rows using Table 2 to reach your desired width and length.

If you want a chunkier blanket, use a bulkier yarn and a larger hook; the Paris Stitch will become larger and squishier for a cosy look.

For a dainty mini or baby version, use a lighter fingering yarn and a smaller hook to create a fine, lacy result that still shows the Paris Stitch texture.

Try striping the blanket every few rows for a modern look β€” alternate two or three colors and repeat evenly for balanced bands across the blanket.

If you like a fringe finish, add it to two opposite sides after you finish the border for a boho feel; attach fringe evenly and test length on the sample edge first.

To make a reversible version, experiment with slightly different stitch placement for the border rows or use an ornamental slip-stitch round that looks neat on both sides.

I sometimes add a contrasting corner square or crocheted flower to one corner as a custom signature β€” small motifs can be sewn on after blocking for a personal touch.

Swap the border: instead of the Paris Stitch round + slip stitch round, try a scallop or picot edge if you prefer a decorative finish that stands out.

Always make a swatch when changing yarn or hooks so you can adjust your stitch counts and ensure the blanket size remains as intended; I usually measure multiple swatches to confirm drape and gauge.

Common Mistakes & How to Fix Them

βœ— Skipping the turning chain or miscounting the 4th chain from your hook at the start; always count the chains carefully and double-check the starting dc placement.
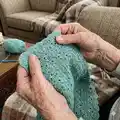
 βœ— Not identifying the correct small side spaces for the border placement; refer to the photos and locate the smaller (third) space at the end of each row before placing Paris Stitches. βœ— Making the last row exactly like the others which can disrupt border placement; follow the instruction to omit the last dc in the turning ch for the final row so the border lines up. βœ— Failing to maintain consistent tension while working the Paris Stitch rows; practice a few sample rows and make a swatch to check your gauge and adjust hook size as needed. βœ— Overstuffing or uneven shaping when adding decorative finishes (like fringe) can tug the fabric; add finishing touches lightly and evenly to preserve blanket drape.

French Countryside Blanket Pattern

Create a cozy, textured throw inspired by the gentle hills of the French countryside. This pattern uses the easy Paris Stitch to produce a delicate, lacy-but-warm fabric that's perfect for gifting or snuggling. You'll find clear instructions for the blanket body and a step-by-step border to finish it beautifully. Suitable for crocheters who want a relaxing, satisfying project with a professional result.

Beginner Friendly 12-15 Hours

Materials Needed for French Countryside Blanket Pattern

β€” Main Fabric

  • 01
    Ouma Ralie Feels Like Cashmere from Kismet Yarns - Seafoam Green - 9 x 100g (recommended for this medium size blanket)
  • 02
    DK / Light (3) weight yarn (273 yards / 250 meters per 100g skein) - unit weight 100 grams
  • 03
    Suggested alternative yarns listed: Rico Essentials Acrylic Antipilling DK; King Cole Cherished Baby DK; Stylecraft Bambino DK; Lion Brand Jeans; Lion Brand Mandala Ombre; Lion Brand Jamie; Lion Brand Vanna's Style; Schachenmayr Original Soft and Easy; Schachenmayr Bravo; Red Heart Baby Hugs Light; Scheepjes Softfun; Scheepjes Colour Crafter; Scheepjes Softfun Denim
  • 04
    Fibers for original yarn: 100% Acrylic

β€” Tools Required

  • 01
    Crochet hook size 4.5mm (H) - used for the pattern
  • 02
    Crochet hook size 4mm (G) - listed as alternate crochet hook size for substitutions
  • 03
    Knitting needle size US 4-7 or 3.5-4.5mm (listed in yarn substitution details as reference)
  • 04
    Scissors (for cutting yarn ends)
  • 05
    Yarn needle for weaving in ends and finishing
  • 06
    Measuring tape to check gauge and finished dimensions

Progress Tracker

0% Complete

β€” Special Stitches :

Paris Stitch :

Each (2 dc, ch 2, sc) makes one Paris Stitch

CORNER :

For the CORNER, make: (dc, ch 1) x 3, dc, sl st in the indicated st

β€” Instructions :

Info :

Instructions are written for a medium size blanket, consult Table 1 on page 3 for number of starting chains for other blanket sizes.

β€” Blanket :

Info :

With a 4.5mm H, make 222 ch

Row 1 :

(RS) 2 dc in 4th ch from H (photo 1-2), ch 2, sc in next ch (photo 2-3), *skip 2 ch, 2 dc in next ch, ch 2, sc in next ch*, rep from * to * until last ch, dc in last ch (photo 4-5), turn [ 55 Paris Stitches]

Row 2 :

ch 2, *(2 dc, ch 2, sc) in ch2-sp (photo 6-7)*, rep from * to * until end of row, dc around turning ch (photo 8-9).

Info :

Repeat Row 2 until your desired length (the blanket in the photo has 103 rows).

Last Row :

(RS) rep Row 2, but don't make the last dc in turning ch,

β€” Border :

Info :

The border will consist of one round of Paris stitches and one round of slip stitches. The last row made for the body of the blanket, will count as the first side (top side) of the border, detailed instructions with photo's will help you to place the stitches for the other 3 sides of the blanket.

Round 1 :

Left Side: The first corner will be made in the first dc of the 2 dc indicated by the purple arrow in the photo 10 (the red arrow indicates where you normally would have made the last dc of the row, which is omitted in the last row): for the CORNER, make: (dc, ch 1) x 3, dc, sl st in the indicated st (photo 11), turn so that the left side is now on top (photo 12), locate the space on the left side made by the last dc at the end of each row (it is the smaller (third) space, not the big space, indicated by the white arrows in photo 12), make a Paris st in each of these spaces until the next corner (it works out as 1 Paris st for every 2 rows, photo 13), don't make a Paris st in the last sp, make a CORNER in the last sp (photo 14-15)

Bottom :

turn so that the bottom is now on top, make a Paris st in the bottom of the same ch where the 2 dc of row 1 was made (photo 16-17) until the next corner, make a CORNER in the ch2-sp at the end of this side (photo 18-19)

Right Side :

locate the space indicated by the arrows in photo 20-21 (it is the dc at the end of each row, one of the smaller spaces), make a Paris st in each of these spaces (photo 21, it works out as very third space) until the end of this side, make a CORNER in the last space before the ch2-starting-chain of the top row (photo 22-23),

Round 2 :

sl st in the BLO of each st around (insert your H from the top into each st, photo 24-26, the first 2 sl sts will be in the ch2-starting-chain, see arrows in photo 27), fasten off.

Info :

Weave in yarn ends.

Assembly Instructions

  • Treat the last worked row of the blanket as the top side of the border, then work the border around the remaining three sides following the photo-referenced instructions for corner placement.
  • For each corner of the border make: (dc, ch 1) x 3, dc, sl st in the indicated stitch to form a neat 90 degree corner before continuing along the next side.
  • On each side work Paris Stitches into the indicated side spaces (left side uses the smaller third space at the end of each row; bottom uses the chain position under the first 2-dc; right side uses the small dc-end spaces), placing 1 Paris Stitch approximately every 2 rows on sides and approximately every 3 rows where indicated.
  • After completing one round of Paris Stitches around all sides and corners, work one round of slip stitches in the BLO of each stitch around, inserting your hook from the top into each stitch to neaten the edge, then fasten off.
  • Weave in all yarn ends securely with a yarn needle and block or lightly steam the blanket if desired to open the stitch texture and even the border.

Important Notes

  • πŸ’‘Work a gauge swatch to confirm your tension: the pattern tension listed on page 2 is 9 rows and 5 Paris stitches = 4.25 x 4.25 inches / 11 x 11 cm.
  • πŸ’‘Use the tables provided (Table 1 and Table 2) to change starting chains or number of rows if you want a different width or length for the blanket.
  • πŸ’‘Follow the photo references when placing border Paris Stitches and corners, the left-side, bottom and right-side spaces are slightly different and shown in the photos.

This French Countryside Blanket Pattern blends an easy-to-work Paris Stitch with a thoughtful border to create a beautiful, homey throw. The pattern is perfect for gifting or cozying up on chilly evenings, and it adapts easily to different sizes and yarns. Enjoy making something handmade with love β€” happy crocheting! 🧢🧡

You ask,

we answer.

FAQs

What size will the finished piece be?

The finished blanket made with the recommended yarn and 222 starting chains will be approximately 48 inches x 50 inches (123 cm x 127 cm).

Can I use different yarn weights for this pattern?

Yes, you can substitute similar DK / Light (3) weight yarns listed in the yarn substitutions section, but different weights will change the final size and gauge; make a swatch to adjust hook size as needed.

Do I need prior crochet experience for this pattern?

This pattern is beginner friendly; it uses basic stitches (dc, sc, ch) plus a simple Paris Stitch repeat, so basic crochet knowledge is recommended for best results.

How long does this project typically take to complete?

Most crocheters complete this medium size blanket in about 12-15 hours, though time may vary depending on experience, speed, and whether you make a larger or smaller size.