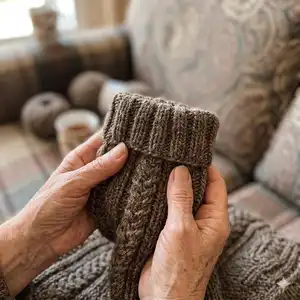
Make a classic, cozy childrens turtleneck sweater worked from the bottom up with cables and ribbed side panels. This pattern guides you through circular knitting, sleeve set-in and three-needle bind-off shoulders with detailed charts. Youll find clear stitch charts, increase rounds and finishing instructions to create a durable, warm sweater for growing kids. Suitable for knitters who enjoy textured pattern work and careful shaping.
Progress Tracker
0% Complete
— Overview :
Info :
The "Crossbill" childrens sweater is worked from the bottom up in one piece in the round. At armhole level, work is divided into Front and Back, which are finished separately. Shoulder seams are closed using the three-needle bind-off method. Sleeves are worked separately from the bottom up in the round, then sewn in.
— Needles and Materials :
Info :
Yarn Merino DK by cowgirlblues (100% merino wool; 50 g = 85 m) or Quince and Co. Lark (100% wool, 50 g = 123 m) or Mondial Superwool (100% merino wool, 50 g = 125 m). Circular needles 3 mm [US2.5] and 4 mm [US6] or other appropriate size to obtain gauge. Stitch markers; cable needle, tapestry needle, stitch holder, spare circular, extra cords or a piece of auxiliary yarn.
— Sizes :
Info :
Sizes shown in order: 12 mos; 18-24 mos; 3 yrs (4 yrs; 5 yrs; 6-7 yrs) (8-9 yrs; 10-12 yrs; 12-14 yrs). Please follow the size order in all instructions and charts.
— Gauge :
Info :
28 sts and 32 rows/rounds = 10x10 cm [4x4 in], in Main Pattern on 4 mm [US6] needles, after blocking and stretched.
— Main Part - Begin of work :
Round 1 :
Using 3 mm [US2.5] needles and preferred cast-on method, cast on 144; 148; 164 (172; 188; 196) (204; 236; 260) sts, place BoR marker to indicate the beginning of the round, and join into the round without twisting.
Info :
While working the next round, place markers at the same time as follows to divide the round into sections.
Round 2 :
Front: Work the 10; 12; 12 (8; 8; 12) (8; 8; 12) sts of the Side Panel, work (p2, k2) a total of 2; 2; 3 (1; 2; 2) (3; 2; 3) time(s), work Row 1 of Chart #1 a total of 1; 1; 1 (2; 2; 2) (2; 3; 3) time(s), work Row 1 of Body Center Pattern Chart, work Row 1 of Chart #2 a total of 1; 1; 1 (2; 2; 2) (2; 3; 3) time(s), work (k2, p2) a total of 2; 2; 3 (1; 2; 2) (3; 2; 3) time(s).
Round 3 :
Back: Work the 10; 12; 12 (8; 8; 12) (8; 8; 12) sts of the Side Panel, work (p2, k2) a total of 2; 2; 3 (1; 2; 2) (3; 2; 3) time(s), work Row 1 of Chart #1 a total of 1; 1; 1 (2; 2; 2) (2; 3; 3) time(s), work Row 1 of Body Center Pattern Chart, work Row 1 of Chart #2 a total of 1; 1; 1 (2; 2; 2) (2; 3; 3) time(s), work (k2, p2) a total of 2; 2; 3 (1; 2; 2) (3; 2; 3) time(s).
Info :
Continue in the established order, repeating the Ribbing round according to the chart a total of 14; 14; 16 (16; 16; 18) (18; 18; 18) times, then work Decrease Round as follows for Front and Back sections (see pattern directions).
Round 4 :
Front: Work the 10; 12; 12 (8; 8; 12) (8; 8; 12) sts of the Side Panel, work (p2, k2) a total of 2; 2; 3 (1; 2; 2) (3; 2; 3) time(s), work Row 2 of Chart #1 a total of 1; 1; 1 (2; 2; 2) (2; 3; 3) time(s), work 22 sts for Row 2 of Body Center Pattern Chart, work Row 2 of Chart #2 a total of 1; 1; 1 (2; 2; 2) (2; 3; 3) time(s), work (k2, p2) a total of 2; 2; 3 (1; 2; 2) (3; 2; 3) time(s).
Round 5 :
Back: Work the 10; 12; 12 (8; 8; 12) (8; 8; 12) sts of the Side Panel, work (p2, k2) a total of 2; 2; 3 (1; 2; 2) (3; 2; 3) time(s), work Row 2 of Chart #1 a total of 1; 1; 1 (2; 2; 2) (2; 3; 3) time(s), work 22 sts for Row 2 of Body Center Pattern Chart, work Row 2 of Chart #2 a total of 1; 1; 1 (2; 2; 2) (2; 3; 3) time(s), work (k2, p2) a total of 2; 2; 3 (1; 2; 2) (3; 2; 3) time(s).
Info :
Change to 4 mm [US6] needles and continue in earlier established pattern, following the appropriate charts. You should now have a total of 164; 168; 184 (200; 216; 224) (232; 272; 296) sts.
Info :
Repeat Rounds 4-7 of the appropriate charts until the piece has either reached a height of 21; 23; 25 (27; 35; 37) (41; 43; 45) cm [8.3; 9.1; 9.8 (10.6; 13.8; 14.6) (16.1; 17; 17.7) in], or is 5 cm [2 in] shorter than desired overall garment length from cast-on edge to division into Front and Back, ending with a Round 4.
— Continue with Side Panel increases :
Info :
Continue with Side Panel increases as follows (follow the increase charts on pages 14-16 for each size): Work specified sts of the Side Panel from the increase chart for the size worked, then work pattern sequences and rows of charts as indicated. After completing all rows of the appropriate increase charts, divide work into Front and Back as follows: remove BoR marker, work 12; 13; 13 (11; 11; 13) (11; 11; 13) sts of the Side Panel, transfer the next 96; 98; 106 (114; 122; 126) (130; 150; 162) sts (Back) to a stitch holder, piece of auxiliary yarn or spare cord for holding.
Info :
Continue to work over the sts of the only Front in the following order, working a WS row next: Work 12; 13; 13 (11; 11; 13) (11; 11; 13) sts according to Increase Chart #5; work the following 72; 72; 80 (92; 100; 100) (108; 128; 136) sts in earlier established pattern, Row 5 of Body Center Pattern Chart and Charts #1 and #2, work 12; 13; 13 (11; 11; 13) (11; 11; 13) sts according to Increase Chart #6.
Info :
From here on, continue in back-and-forth rows with turning, repeating Rows 4-7 of Body Center Pattern Chart and Charts #1 and #2, and following Charts #5; 7; 7 (3; 3; 7) (3; 3; 7) and #6; 8; 8 (4; 4; 8) (4; 4; 8) for increases at the beginning and end of the row—in Rows 20-23.
Info :
Work over the sts of the Front in the established pattern to a height of 11; 11.5; 12 (12.5; 13; 13.5) (14; 14.5; 15) cm [4.3; 4.5; 4.8 (4.9; 5.1; 5.3) (5.5; 5.7; 5.9) in] from division into Front and Back.
Info :
At the same time, when piece has reached a height of 6; 6.5; 7 (7.5; 6; 6.5) (7; 7.5; 8) cm [2.4; 2.6; 2.8 (3; 2.4; 2.6) (2.8; 3; 3.1) in] from division, bind off the middle 10; 10; 10 (14; 14; 14) (16; 16; 16) sts for the neckline, then finish up the resulting pieces separately, working both at the same time and each from its own ball of yarn. You should now have 48; 48; 52 (56; 60; 60) (63; 73; 77) sts for each one of the two shoulders.
— Bind off sts for neckline shaping (Front) :
Round 1 :
For the left half of the Front: at the beginning of every WS row bind off as follows: 4 sts – once, 3 sts – 1; 2; 2 (1; 2; 2) (1; 2; 2) time(s), 2 sts – 2; 1; 3 (1; 2; 1) (2; 2; 2) time(s), 1 st – 2; 2; 0 (5; 2; 4) (4; 2; 2) times.
Info :
You should now have a total of 35; 34; 36 (42; 44; 44) (48; 57; 61) sts for each shoulder.
Info :
At a height of 11; 11.5; 12 (12.5; 13; 13.5) (14; 14.5; 15) cm [4.3; 4.5; 4.8 (4.9; 5.1; 5.3) (5.5; 5.7; 5.9) in] from division into Front and Back, begin shaping the shoulder sloping as follows; while working the shoulder sloping, you can instead of the cable crossings for 2/2 cables just work 4 knit sts.
— Right half of the Front shoulder shaping :
Row 1 (RS) :
Work 7; 7; 7 (9; 9; 9) (11; 11; 11) sts in established pattern, turn work to wrong side. Slip 1 stitch purl-wise to the right needle, lead the working yarn behind the stitch, over the right needle. Pull the working yarn taut so both legs of the stitch sit on the right needle.
Row 2 (WS) :
Continue on the WS of the fabric, work to the end of the row in earlier established pattern.
Row 3 :
Work in earlier established pattern to the Double Stitch, knit both legs of the Double Stitch together as one, work 7; 7; 7 (9; 9; 9) (11; 11; 11) sts in earlier established pattern, turn work to wrong side. Slip 1 stitch purl-wise to the right needle, lead the working yarn behind the stitch, over the right needle. Pull the working yarn taut so both legs of the stitch sit on the right needle.
Row 4 :
Continue on the WS of the fabric, work to the end of the row in earlier established pattern.
Row 5 :
Continue on the RS of the fabric, work to the end of the row in earlier established pattern, knitting both legs of the Double Stitch together as one. Work the next WS row in established pattern. Place the shoulder sts on a stitch holder or spare cord, and put them temporarily aside.
— Left half of the Front :
Row 1 (RS) :
Work the row in earlier established pattern, turn work to wrong side.
Row 2 (WS) :
Work 7; 7; 7 (9; 9; 9) (11; 11; 11) sts in established pattern, turn work to right side. Slip 1 stitch knit-wise, lead the working yarn behind the stitch, over the right needle. Pull the working yarn taut so both legs of the stitch sit on the right needle.
Row/Round 3 :
Continue on the RS of the fabric, work to the end of the row in earlier established pattern.
Row 4 :
Work 14; 14; 14 (18; 18; 18) (22; 22; 22) sts in established pattern, turn work to right side. Slip 1 stitch knit-wise, lead the working yarn behind the stitch, over the right needle. Pull the working yarn taut so both legs of the stitch sit on the right needle.
Row 5 :
Continue on the RS of the fabric, work to the end of the row in earlier established pattern. In the next WS row, work in earlier established pattern to the end of the row, purling both legs of the Double Stitch together as one. Place the shoulder sts on a stitch holder or spare cord, and put them temporarily aside.
— Continue over Back only :
Info :
Continue to work over the sts of the Back only, working a WS row next. Join new working yarn at the beginning of the row, and continue working in the following order according to Increase Chart #5 and Chart #6 as required for size, repeating back-and-forth rows and increases until specified stitch counts are reached. Work until Back has reached height specified for division into Front and Back and bind off middle sts for neckline as instructed.
Info :
Bind off sts for neckline shaping as follows: For the left half of the Back: at the beginning of every RS row. For the right half of the Back: at the beginning of every WS row. 2 sts – once, 1 st – once. You should now have 35; 34; 36 (42; 44; 44) (48; 57; 61) sts for each shoulder.
Info :
At a height of 11; 11.5; 12 (12.5; 13; 13.5) (14; 14.5; 15) cm from division into Front and Back, begin shaping the shoulder sloping following the same Double Stitch and slip methods as used on the Front. Work RS and WS rows as specified, then place shoulders on holders.
Info :
Close the shoulder seams using the 3-needle bind-off method: Place the two needles with the stitches that need to be joined parallel to each other, wrong sides facing each other and right sides out. Insert a third needle into the first stitch of the front needle and the first stitch of the back needle at the same time and knit these 2 sts together as one. Repeat until only 1 stitch remains on the third (right) needle. Break the working yarn and pull the tail through the last loop to secure the stitch.
— Right sleeve :
Round 1 :
Using 3 mm [US2.5] needles and preferred cast-on method, cast on 44; 46; 46 (50; 50; 54) (54; 54; 58) sts, place BoR marker to indicate the beginning of the round, and join into the round without twisting.
Info :
While working the next round, place markers at the same time to divide the round into sections for Side Panel and sleeve center and to mark positions described: Work 10; 12; 12 (8; 8; 12) (8; 8; 12) sts of the Side Panel, place marker 1, then work the sleeve center pattern and place markers 2 and 3 as instructed in the pattern text.
Info :
Continue working in established pattern, repeating Row 1 of Center of the Sleeve Pattern from Chart #1; after working in this manner for 8; 8; 10 (10; 10; 10) (10; 12; 12) rounds, work Increase Round (Row 2 of Chart #1), then work Row 3, then change to 4 mm [US6] needles and continue. You should now have a total of 48; 50; 50 (54; 54; 58) (58; 58; 62) sleeve sts.
— Work the following order for sleeve :
Info :
Slip BoR marker to right needle, work Side Panel sts, slip marker 1 to right needle, work in established pattern to marker 2, slip marker 2 to right needle, work sleeve center sts, slip marker 3 to right needle, work established pattern to BoR marker.
— Increase Rounds (Sleeve) :
Increase Rounds 1-5 :
Work in earlier established pattern, work the center pattern of the sleeve from the appropriate following row of the chart.
Increase Round 6 :
Slip BoR marker to right needle, work the sts of the Side Panel in earlier established pattern, slip marker 1 to right needle, pfb, work in established pattern to marker 2, slip marker 2 to right needle, work sleeve center sts from the appropriate row of the chart, slip marker 3 to right needle, continue in established pattern to 2 sts before BoR marker, pfb, p1. Repeat Rounds 1-6 another 2 times.
Increase Round 7 :
Slip BoR marker to right needle, work the sts of the Side Panel in earlier established pattern, slip marker 1 to right needle, p2, k1, p2, work in established pattern to marker 2, slip marker 2 to right needle, work sleeve center sts from the appropriate row of the chart, slip marker 3 to right needle, continue in established pattern to 5 sts before BoR marker, p2, k1, p2.
Increase Rounds 8-11 :
Work in earlier established pattern, work the center pattern of the sleeve from the appropriate following row of the chart.
Increase Round 12 :
Slip BoR marker to right needle, work the sts of the Side Panel in earlier established pattern, slip marker 1 to right needle, p2, k1, LLI, work in established pattern to marker 2, slip marker 2 to right needle, work sleeve center sts from the appropriate row of the chart, slip marker 3 to right needle, continue in established pattern to 3 sts before BoR marker, RLI, k1, p2. Move BoR marker 4 sts to the right, and marker 1 – 4 sts to the left.
Info :
Repeat Increase Rounds 1–12, as noted between asterisks ** until there are 60; 64; 64 (68; 72; 72) (76; 80; 84) sts on the needles, then continue in the established order over an unchanged stitch count without further increases.
Info :
When sleeve has either reached a length of 15; 18; 20 (22; 25; 27) (29; 32; 35) cm [5.9; 7; 7.9; 9; 9.8; 10.6] (11.4; 12.6; 13.8) in from begin of work, or is 4 cm [1.6 in] shorter than desired sleeve length, work sleeve cap shaping with short-row-shaping as follows (rows given below).
Row 1 (RS) :
Work in established pattern to 7 sts before BoR marker, turn work to wrong side, slip 1 stitch purl-wise to the right needle, lead the working yarn behind the stitch, over the right needle. Pull the working yarn taut so both legs of the stitch sit on the right needle, then continue on the WS of the fabric.
Row 2 (WS) :
Work in established pattern to 7 sts before marker 1, turn work to right side. Slip 1 stitch knit-wise, lead the working yarn behind the stitch, over the right needle. Pull the working yarn taut so both legs of the stitch sit on the right needle, then continue on the RS of the fabric.
Row 3 :
Work in established pattern to 5 sts before the Double Stitch, turn work to wrong side, slip 1 stitch purl-wise to the right needle, lead the working yarn behind the stitch, over the right needle. Pull the working yarn taut so both legs of the stitch sit on the right needle, then continue on the WS of the fabric.
Row 4 :
Work in established pattern to 5 sts before the Double Stitch, turn work to right side. Slip 1 stitch knit-wise, lead the working yarn behind the stitch, over the right needle. Pull the working yarn taut so both legs of the stitch sit on the right needle, then continue on the RS of the fabric.
Info :
While shaping the sleeve cap with short rows, you can omit the last 2/2 cable crossings and instead work 4 knit sts. Repeat Rows 3 and 4 once more, then resume working in the round in established pattern. Remove markers, work 6 rounds even over an unchanged stitch count, then bind off all sts.
Info :
Work the Left Sleeve the same way.
— Neckline Finishing :
Info :
Using 3 mm [US2.5] needles, pick up and knit a multiple of 5 sts around the neckline. Continue working in the following order: *(p3, k2) repeat from * to end of round. Work 3 cm [1.2 in] in established pattern.
Round :
Work the next round as follows: *(p2tog, p1, k2, p3, k2) repeat from * to end of round. In the following round, work all sts as they appear – knit sts in knit, and purl sts in purl.
Round :
Work the next round as follows: *(p2, k2, p2tog, p1, k2) repeat from * to end of round. From here on, work “p2, k2” ribbing until collar has either reached a height of 20 cm [8 in] or other desired height.
Info :
To retain neckline elasticity, use a sewn bind-off to bind off the neckline sts. Moisten the sweater, and block it until completely dry. Hide all ends.
— Charts and Stitch Pattern Notes :
Info :
Main Pattern charts indicate the order of work. Charts show all rows. Read charts from bottom to top and from right to left in the round; in rows, RS rows from right to left, WS rows from left to right. Chart keys: square = knit, dash = purl, shaded = no stitch. See charts #1-#6 and Body Center Pattern Chart for row-by-row instructions. Use the chart legends for 4-st RC and 4-st LC cable crossings and for RLI and LLI increases. Each chart includes Row/Round written instructions for Rows 1-7 and additional rows as printed in the charts section.
This Crossbill childrens sweater pattern blends classic cables with practical shaping for a durable, warm knit your child will love. The pattern includes full charts, increase sequences and step-by-step finishing instructions so you can achieve professional results. Block and finish with care for a polished heirloom-quality garment. 🧶🧵