🧢 Beautiful ✨ Detailed πŸ’ Adorable

EZ Criss-Cross Baby Blanket Pattern

EZ Criss-Cross Baby Blanket Pattern
4.2β˜… Rating
5-7 Hours Time Needed
1.7K Made This
βœ‚οΈ

Beginner Friendly Level

Perfect for those just starting their crochet journey, with clear instructions and simple techniques

⏱️

Weekend Treat

Takes 5-7 hours, making it an enjoyable project to finish over a couple of days.

πŸ€—

Soft Hug

Gentle, plush, and full of warmth, creating a sense of comfort and coziness wherever they find a home.

About This EZ Criss-Cross Baby Blanket Pattern

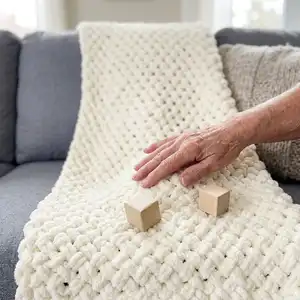
This pattern creates a soft 32" x 40" criss-cross baby blanket using Bernat Alize Blanket-EZ yarn. The technique uses looped stitches held from the working yarn to form a textured braided look. It is perfect for beginners who want an impressive textured project without complex stitch patterns.

EZ Criss-Cross Baby Blanket Pattern crochet pattern - detailed view of completed project

The blanket is made by counting foundation loops and working repeating criss-cross rows until you reach the desired length. Finishing includes a simple bind-off row and weaving in the yarn tail.

Why You'll Love This EZ Criss-Cross Baby Blanket Pattern

I absolutely love this pattern because the finished blanket looks intricate while remaining delightfully simple to make. The criss-cross texture is tactile and cozy, making it ideal for babies and snuggling. Working with looped blanket yarn is fast and satisfying, so you see progress quickly. I also enjoy how forgiving the stitch pattern is β€” small tension differences won’t show as much as in finer yarns. Making this blanket always feels like a quick, rewarding afternoon of crafting.

EZ Criss-Cross Baby Blanket Pattern step 1 - construction progress EZ Criss-Cross Baby Blanket Pattern step 2 - assembly progress EZ Criss-Cross Baby Blanket Pattern step 3 - details and accessories EZ Criss-Cross Baby Blanket Pattern step 4 - final assembly and finishing

Switch Things Up

I love customizing this blanket by changing the color to match a nursery or gift recipient β€” try soft pastels or bold jewel tones.

I sometimes make it larger or smaller by adjusting the number of foundation loops; add or subtract loops in multiples that keep the pattern aligned.

If you want a thicker blanket, I switch to a super-bulky alternate loop yarn and work the same steps for an extra-plush result.

For a lighter, more delicate version, use a thinner loop-style yarn and a smaller hook to scale the size down.

I like to add a simple crochet border after finishing the bind off to give a tidy edge β€” a few rounds of single crochet or a scalloped edge works nicely.

Try color blocking by changing yarn color and working several rows in one color before switching to another for stripes.

I also personalize blankets with a small crocheted applique sewn to a corner, like a heart or star, for a custom touch.

To make it gift-ready, I tie a ribbon around the folded blanket and attach a handmade tag with care instructions.

I sometimes add small tassels or pom-poms to opposite corners for a playful finish; just be sure they are securely attached.

When altering size or yarn, I always check gauge by measuring a small sample of rows so my final blanket matches the intended dimensions.

Common Mistakes & How to Fix Them

βœ— Not counting the 50 foundation loops precisely can change the width of your blanket; count carefully and recount before beginning the 1st row. βœ— Turning the work between rows will ruin the criss-cross texture and orientation; follow the instruction 'Do not turn work' exactly. βœ— Pulling loops inconsistently can make the pattern look uneven; keep the loop pulls even and consistent for a uniform texture. βœ— Leaving the last stitch worked instead of leaving it unworked on certain rows will shift your stitch pattern; follow the exact instruction to leave the last stitch unworked when stated. βœ— Cutting the loop thread too short at bind off makes finishing difficult; leave enough yarn to tie a secure tail and weave in the ends properly.

EZ Criss-Cross Baby Blanket Pattern

Make a plush, cozy baby blanket with a simple criss-cross texture using super-bulky Bernat Alize Blanket-EZ yarn. This easy pattern uses a unique looped stitch technique so you can create a lovely, tactile blanket without complicated stitches. Perfect for gifting or snuggling, it produces a soft, warm finish that both you and baby will love.

Beginner Friendly 5-7 Hours

Materials Needed for EZ Criss-Cross Baby Blanket Pattern

β€” Main Fabric

  • 01
    Bernat Alize Blanket-EZ (6.4 oz / 180 g; 18 yds / 16 m) Cream (37013) - 4 balls

β€” Tools Required

  • 01
    Scissors (for cutting thread at bind off)
  • 02
    Yarn needle for tying and weaving in ends
  • 03
    Measuring tape to check blanket length

Progress Tracker

0% Complete

β€” Measurements :

Info :

Approximately 32" x 40" [81.5 x 101.5 cm]

β€” Instructions :

Infos :

Notes: Right side of work is facing at all times. 'Working yarn' is held behind stitches throughout. Loops from working yarn are always pulled through stitches from back to front of work.

Info :

Count 50 loops for foundation row, noting yarn end is at far left and all loops are facing upwards.

Round 1 :

1st row: Working from right to left, cross 50th loop in front of 49th loop. Pull next loop from working yarn up from behind through 49th loop. Pull next loop from working yarn up from behind through 50th loop. *Cross next loop of foundation row in front of 2nd loop of foundation row. Holding crossed loops in position, pull next loop from working yarn up from behind through next loop. Pull next loop from working yarn up from behind through next loop. Repeat from * to end of row. Do not turn work. 50 stitches in row.

Round 2 :

2nd row: Working from left to right, skip first stitch of row just worked. Cross 2nd stitch in front of 3rd stitch. Holding crossed stitches in position, pull loop from working yarn up from behind through 3rd stitch. Pull next loop from working yarn up from behind through 2nd stitch. *Cross next 2 stitches. Holding crossed stitches in position, pull next loop from working yarn up from behind through next stitch. Pull next loop from working yarn up from behind through next stitch. Repeat from * to end of row. Do not turn work.

Info :

Pull next loop from working yarn up from behind through next stitch. Pull next loop from working yarn up from behind through next stitch. Repeat from * to last stitch. Leave last stitch unworked. Do not turn work.

Round 3 :

3rd row: Working from right to left, cross unworked stitch in front of 2nd stitch. Holding crossed stitches in position, pull next loop from working yarn up from behind through 2nd stitch. Pull next loop from working yarn up from behind through first stitch. *Cross next 2 stitches. Holding crossed stitches in position, pull next loop from working yarn up from behind through next stitch. Pull next loop from working yarn up from behind through next stitch. Repeat from * to end of row. Do not turn work.

Info :

Repeat 2nd and 3rd rows until Blanket measures approximately 40" [101.5 cm], ending on a 2nd row.

Bind off row :

Bind off row: Working in same direction as last row, pull 2nd stitch through 1st stitch. Pull 3rd stitch through 2nd stitch. Pull 4th stitch through 3rd stitch. Continue in this manner to end of row. Cut thread at base of loop (thread used to create the loop) to create a yarn 'tail'. Tie to secure and weave in ends.

Assembly Instructions

  • Count exactly 50 loops for the foundation row, ensuring the yarn end is at the far left and all loops face upwards before beginning the 1st row.
  • Work the 1st, 2nd and 3rd rows as described, keeping the right side of work facing at all times and holding the working yarn behind stitches throughout.
  • Repeat the 2nd and 3rd rows until the blanket measures approximately 40" [101.5 cm], making sure the pattern ends on a 2nd row.
  • Bind off in the same direction as the last worked row, cut the thread at the base of the last loop to create a yarn tail, tie securely and weave in ends with a yarn needle.

Important Notes

  • πŸ’‘Keep the right side of the work facing you at all times; do not turn the work between rows.
  • πŸ’‘Hold the working yarn behind the stitches during the whole process so loops form in front consistently.
  • πŸ’‘Maintain even tension when pulling loops through to keep a uniform criss-cross texture across the blanket.
  • πŸ’‘Leave the last stitch unworked on rows where instructed to preserve the stitch alignment and edge.

This EZ Criss-Cross Baby Blanket pattern uses loopy blanket yarn to create a lovely braided texture that is soft and snuggly. Perfect for baby showers or a cozy corner of your home, the blanket is quick to work up and really impressive. Make one in classic cream or play with color for a personalized touch. 🧢✨

You ask,

we answer.

FAQs

What size will the finished piece be?

The finished blanket measures approximately 32" x 40" (81.5 x 101.5 cm) when using the recommended yarn and following the pattern exactly.

Can I use different yarn weights for this pattern?

You can substitute yarn, but the stitch and look rely on looped blanket yarn; using a different weight will change the texture and final size significantly.

Do I need prior crochet experience for this pattern?

This pattern is rated beginner friendly β€” basic ability to pull loops and follow the step-by-step crossings is recommended.

How long does this project typically take to complete?

Most crocheters complete this blanket in about 5-7 hours, though time may vary depending on experience and working speed.