About This Little Frog Amigurumi Pattern
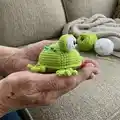
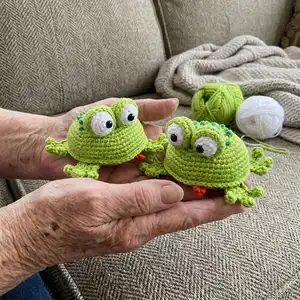
This pattern creates a sweet pocket-sized frog amigurumi worked mostly in single crochet with small pieces that are sewn together. It uses DK cotton yarn and a 2.0 mm hook to produce a firm fabric ideal for small details. The instructions include eyes, eyelids, tiny paws, a tongue and finishing touches like embroidered spots.
Clear round-by-round instructions are provided for each piece and full assembly steps are included. Suitable for crocheters familiar with increases, decreases and simple puff stitches.
Why You'll Love This Little Frog Amigurumi Pattern
I absolutely love this pattern because it turns simple stitches into a personality-packed tiny frog that brings instant joy. I enjoy making the small parts like the eyelids and little paws because they let me practice shaping and fine detail. The pattern is compact and satisfying to finish quickly, so I can gift frogs right away. Stitching the embroidered spots is my favorite finishing touch — it always makes each frog unique.
Switch Things Up
I love customizing this pattern by changing colors — try pastel greens for a softer look or bright neons for a playful frog.
To make a larger frog, use worsted weight yarn and a larger hook; to make a mini keychain frog use thinner yarn and a smaller hook.
I often swap the safety eyes for embroidered pupils or tiny felt circles for a different expression and child-safe finish.
You can vary the number and placement of french-knot spots to create different patterns on the frog’s back.
If you want posable limbs, add a short piece of wire inside each leg before finishing and sewing the feet in place.
For a seasonal twist, make tiny accessories: a little party hat, bow, or a crocheted lily pad to sit on.
Try using variegated or speckled yarn for a textured, mottled skin effect without changing stitches.
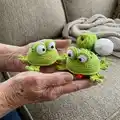
Make a matching set in graduated sizes by adjusting yarn weight and hook size to create siblings or family frogs.
Replace the puff stitch on the paws with small sewn-on felt circles or beads if you prefer a flatter paw detail.
I sometimes embroider a tiny heart on the belly or add a loop at the top for a hanging ornament — small changes add big charm.
Common Mistakes & How to Fix Them
✗ Crocheting too loosely will create holes where stuffing shows through; maintain tight, consistent tension and use the recommended 2.0 mm hook or a smaller one if needed.
✗ Forgetting to leave a long tail for sewing can make assembly difficult; always leave enough yarn when finishing pieces so you can sew them securely into place.
✗ Not stuffing gradually can cause lumps and uneven shaping; stuff a little at a time while you join the belly and back so the shape remains smooth.
✗ Skipping the step of inserting eyes before closing the eye rounds will make placement hard; place the safety eyes into the magic ring while the eye is still open for correct positioning.
✗ Rushing the joining step between belly and back can misalign edges; pin or hold the pieces wrong sides together and crochet SC around the edge slowly to ensure even alignment.