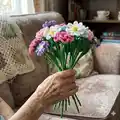
🧶 Beautiful ✨ Detailed 💝 Adorable

Crochet Flower Bouquet Amigurumi Pattern

Crochet Flower Bouquet Amigurumi Pattern
4.1★ Rating
12-15 Hours Time Needed
1.9K Made This
✂️

Intermediate Level

Ideal for those with basic crochet experience, featuring slightly more advanced stitches and techniques to expand your skills.

⏱️

Multi-Day Project

A rewarding 12+ hour journey—perfect for dedicated crafters who love detailed work.

🏡

Cozy Accent

A warm touch for your space that transforms ordinary corners into inviting nooks filled with handmade charm.

About This Crochet Flower Bouquet Amigurumi Pattern

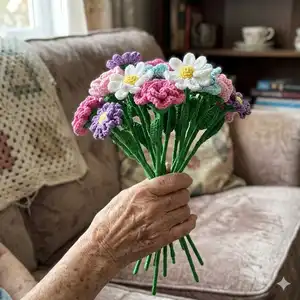
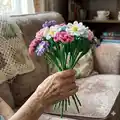
This pattern creates a delicate bouquet of 25 crochet flowers including roses, daisies, blue flowers, buds and carnations. Each flower is built from separate parts—central piece, petals, sepals and leaves—then assembled onto wired stems. The instructions include photo steps, charts for motifs and guidance for winding and gluing stems for a neat finish.

Crochet Flower Bouquet Amigurumi Pattern crochet pattern - detailed view of completed project

You will need cotton yarn, a fine 2.0 mm hook, floral wire and glue to assemble the bouquet. The tutorial includes clear charts and step-by-step photo instructions for every part of the flowers and leaves.

Why You'll Love This Crochet Flower Bouquet Amigurumi Pattern

I absolutely love this pattern because it turns simple crochet stitches into a beautiful, lasting bouquet that never wilts. I enjoy the meditative process of making each petal and watching them form into a blossom as I assemble the pieces. The wired stems and glue technique make the flowers sturdy and gift-ready, which I find so satisfying. I also love that you can customize colors and yarn thickness to make unique bouquets for every occasion.

Crochet Flower Bouquet Amigurumi Pattern step 1 - construction progress Crochet Flower Bouquet Amigurumi Pattern step 2 - assembly progress Crochet Flower Bouquet Amigurumi Pattern step 3 - details and accessories Crochet Flower Bouquet Amigurumi Pattern step 4 - final assembly and finishing

Switch Things Up

I love how easy it is to customize these flowers—changing yarn color or weight completely transforms the look. Try pastel shades for a soft vintage bouquet or bold brights for a pop of color.

If you want mini versions, use thinner cotton thread and a smaller hook to make tiny flowers for a corsage or brooch. Conversely, use thicker yarn and a bigger hook to create large statement blooms for home decor.

I often add embroidered veins on the leaves or a few French knots in the center for extra texture. Little touches like beads or small buttons in the flower center can give each piece unique charm.

Try mixing metal or floral tape instead of winding yarn around the wire for a different stem finish—floral tape gives a matte, florist-style stem that looks very professional.

You can combine the flowers into themed bouquets: use all blues and whites for a winter arrangement or warm yellows and oranges for an autumn display. Play with combinations until you find a palette you love.

For posability, insert thin wire into a thicker floral wire or use two wires twisted together so stems bend and hold shapes for vases and arrangements. I do this when I want my bouquets to drape naturally.

Want an even easier project? Make only the small 5-petal flowers or the daisies and assemble several onto shorter stems for a quick, charming arrangement.

I sometimes crocheted tiny hats or ribbons to go on the stems to match gift wrapping—it's a sweet finishing detail that personalizes gifts.

Try adding fragrance by lightly scenting the finished bouquet with linen spray; since these are cotton, they take scent nicely without damage.

Don't hesitate to experiment with stitch counts in petals to create fuller or sparser petals—small adjustments make a big difference in the overall silhouette.

Common Mistakes & How to Fix Them

✗ Skipping placement tests for the sepal and stem can lead to stems not fitting; test the magic ring hole and adjust before final assembling. ✗ Winding yarn on the wire too loosely results in visible gaps; apply glue sparingly and wind tightly, securing the yarn to the edge of the wire as you go. ✗ Not counting chains and stitches in the leaf rows causes uneven shaping; count each stitch in every row and follow the stitch sequence precisely. ✗ Using the wrong hook size for your yarn changes flower size dramatically; match hook size to yarn thickness and make a small sample before starting the full bouquet.

Crochet Flower Bouquet Amigurumi Pattern

Make a charming bouquet of 25 handmade crochet flowers you can keep or gift. This pattern guides you through roses, daisies, small blue flowers, buds, carnations, sepals and leaves with clear step-by-step photos and charts. You will learn how to make sturdy wired stems, assemble parts and finish each flower neatly. Suitable for crafters who enjoy detailed projects and beautiful floral results.

Intermediate 12-15 Hours

Materials Needed for Crochet Flower Bouquet Amigurumi Pattern

— Main Fabric

  • 01
    Cotton yarn YarnArt 'Begonia' 169m/50g (used in photos)
  • 02
    Green yarn for leaves, stems and sepals, quantity approx. 50g
  • 03
    Bright pink yarn for roses, approx. 50g
  • 04
    White yarn and yellow yarn for daisies, approx. 25g white and 10g yellow
  • 05
    Two shades of blue yarn for blue flowers, small amounts of each (20-30g)
  • 06
    Soft pink yarn for buds, small amount (~20g)
  • 07
    Purple yarn for carnations, small amount (~25g)

— Tools Required

  • 01
    Crochet hook size 2.0 mm (used in photos)
  • 02
    Scissors
  • 03
    Yarn needle for sewing
  • 04
    Stitch markers (optional)
  • 05
    Polyester stuffing (not required for flat flowers)
  • 06
    Floral wire (1.1 mm thick recommended), stems 10 inches (25 cm) long
  • 07
    Pliers for cutting wire
  • 08
    Measuring tape
  • 09
    Silicone glue, universal glue or hobby glue

Progress Tracker

0% Complete

— General Info :

Info :

The bouquet includes 25 flowers: 5 roses, 5 daisies, 5 blue flowers, 5 buds and 5 carnations. Stems 10 inches (25 cm) tall. Use yarn thickness to change flower size; thicker yarn creates larger flowers.

Info :

Colors used: for leaves, stems and sepals - green; for roses - bright pink; for daisies - white and yellow; for blue flowers - two shades of blue; for buds - soft pink; for carnations - purple.

Info :

Necessary materials: yarn (two colors are used for photo tutorial - yellow and green), hook (2.0 mm pictured), scissors, a needle, floral wire, measuring tape, pliers, glue.

— Stem (preparing wired stem) :

Info :

I will make each flower 25 cm (10 inches) long. Using pliers, cut required length of wire for the stem. For stem use flower wire 1.1 mm thick and 10 inch (25 cm) long. Can also use flower wire 0.8 or 0.9 mm thick.

Step 1 :

Apply glue to the edge of the wire and fasten the yarn firmly. Gradually apply glue to the wire and wind the yarn.

Step 2 :

Continue winding yarn along wire covering it completely; fasten and trim the yarn at the end. The wired stem is ready.

— Leaf :

Row 1 :

firmly fix the yarn on the edge of the wire, cut the yarn; CH 7

Row 2 :

CH 1, SC 1 in the first chain (I perform the second row in the back side of the chains, it’s just more convenient for me, you perform as convenient for you)

Row 2 (details) :

HDC 1 in the second chain, DC 1 in the third chain, DC 2 in the fourth chain, TR 2 in the fifth chain, DTR 3 in the sixth chain, DTR 7 in the seventh chain.

Row continuation :

then we perform stitches in the same chains, according to the stitches that have already been made - the edge of the yarn that sticks out can be pressed to each subsequent chain so it will be fixed and add solid to the middle part of the leaf.

Row next :

Continue stitches on the opposite side mirroring the first half: DTR 3 in the same chain where DTR 3 have already been made, TR 2 in the same chain where TR 2 have already been made, DC 2 in the same chain where DC 2 have already been made, DC 1 in the same chain where DC 1 have already been made, HDC 1 in the next chain, SC 1 in last chain.

Finish :

CH 1, ST in the first SC of this row; done. Fasten and trim the ends of the yarn. (the same leaves are made for each type of flower)

Info :

If cotton yarn is used, the leaf can be easily ironed.

— Sepal :

Row 1 :

magic ring, CH 1, SC 14 in the magic ring (14)

Row 2 :

CH 3 from the first SC, DC 1 in the first SC (start shaping petals for sepal)

Row 2 continued :

DC 2 in the second SC, repeat DC around to form 7 sepal points as in chart. ST in the place of the beginning of this row. Fasten and trim the ends. If cotton yarn is used the sepal can be ironed.

— Rose (petal ribbon for rose) :

Row 1 :

CH 41

Row 2 :

CH 2, HDC 1 in the second chain, HDC 1 in the fourth chain, HDC 1 in the fifth chain, repeat HDC across the row (HDC in each chain until end)

Row 3 :

(since the second row began with CH 2, the last (forty-fifth) HDC of the third row should be performed in the second chain of the beginning of the second row) CH 3 from the first HDC, DC 1 in the first HDC, repeat until end of row

Row 4 :

DC 1 in the first HDC, CH 3, DC 1 in first HDC, continue shaping the ruffled petal edge by repeating sequence across to form petals. Turn out a twisted ribbon by repeating until the end of the row.

Row 5 :

CH 1, picture shows a scalloped edging: make arches and DC 9 under each arch of CH 3, SC 1 into next chain, repeat to create many petals; finish and trim yarn.

Assembly prep :

All parts + glue. Determine the edge of the wire on which the yarn began to be wound. Apply glue to first petal and areas shown, then gradually wind the ribbon on the stem, apply glue and wind further, close the stem well so that it is not visible.

Assembly step :

Start winding the rose ribbon on the stem with the first petal, close the stem well so it is not visible; apply glue to the edge of the wire where the yarn began to be wound and wind the rose around the stem. Fasten and trim the ends.

— Flower (small 5-petal flower) :

Row 1 :

magic ring, CH 1, SC 10 in the magic ring; tighten the magic ring, ST in the first SC of this row.

Row 2 (first layer of the flower) :

CH 3 from the first SC. TR 2 in the second SC, CH 2, TR 2 in the fourth SC to form a petal; repeat to make 5 petals. ST in the beginning of this row.

Row 3 :

Make three more petals in the same way for the second layer (TR clusters under arches), ST in the beginning of this row; fasten and trim the yarn. Done.

— The central part of the flower :

Row 1 :

magic ring, CH 1, SC 6 in the magic ring (6)

Row 2 :

CH 1, SC 2 in the first SC, repeat SC 2 in each SC to form a small disk

Finish :

Tighten the magic ring, fasten and trim the edges of the yarn. The central part will be glued into the center of the layered petals.

— Rose (chart shown) :

Info :

Use the rose chart (graphic) to determine ruffle placement; the rose is created by forming a long scalloped ribbon and winding it around the stem as above.

— Flower (yellow large flower / carnation style ribbon) :

Row 1 :

CH 41, Row 2: CH 2, HDC 1 in each chain across; Row 3: CH 2 from first HDC, continue pattern to end repeating shaping arches; Row 4: CH 3 from first HDC and form scallop petals as shown in photos; Row 5: CH 1 and DC 9 under arches to create many petals; finish and trim yarn; fasten and trim the ends then glue to stem.

— Assembly :

Attach central part :

Glue the central small disk into the center of the petal layers and then glue the sepal under the flower to hide the stem base.

Glue and wind :

Determine the edge of the wire on which the yarn began to be wound (usually this edge looks worse). It is on this edge that I recommend winding the rose. Apply glue to the first petal and on the areas shown in photos, then start winding the ribbon onto the stem, apply glue and wind further to form the bloom.

Attach leaves :

Apply glue to the narrow edge of the leaf and glue to the stem as shown. Position leaves below the flower and hold until set. Repeat for all stems.

Final :

Trim any visible yarn ends, press lightly (iron for cotton pieces) if needed to shape leaves and sepals, and arrange flowers into a bouquet.

Assembly Instructions

  • Determine the start edge of the wired stem where the yarn began and use that edge when winding the flower ribbon so the seam is hidden; apply glue to the petal edge and wind the petal ribbon around the stem to form the bloom.
  • Glue the central disk into the middle of the layered petals, then glue and attach the sepal under the flower head to hide the stem base and secure the flower.
  • Attach leaves to the stem by applying glue to the narrow edge of the leaf and pressing it to the stem, positioning leaves below the flower for a natural look.
  • For roses, wind the long scalloped ribbon around the stem tightly, applying glue as needed and closing the stem core so it is not visible; fasten and trim yarn ends after winding.
  • Pin parts in place before final glue to ensure symmetrical placement, then firmly press and allow glue to dry thoroughly before arranging the bouquet.

Important Notes

  • 💡Use a fine 2.0 mm hook with YarnArt 'Begonia' cotton for similar results; change hook size as needed when using different yarn weights.
  • 💡Test the size of the magic ring hole for the sepal to be sure the stem fits; tighten or expand the ring slightly if necessary before finishing the sepal.
  • 💡Apply glue sparingly and wind yarn tightly on the wire for a neat stem finish; allow glue to set before trimming and assembling flowers.

This crochet bouquet pattern teaches you how to craft 25 beautiful flowers with wired stems and detailed petals—perfect for keepsakes or gifts. The pattern contains photo steps, charts and assembly guidance so you can make elegant roses, daisies, buds and more. Make a bouquet in your favorite colors and enjoy a thoughtful handmade gift or charming home accent. 🧶🌸
You ask,

we answer.

FAQs

What size will the finished piece be?

The finished wired stems are approximately 25 cm (10 inches) tall; flower diameters vary by design and yarn thickness but generally range from 4.5 cm to 6 cm for the examples shown.

Can I use different yarn weights for this pattern?

Yes, you can use different yarn weights; thicker yarn and a larger hook will create larger flowers, while thinner yarn yields smaller, more delicate flowers. Adjust stem length and wire thickness accordingly.

Do I need prior crochet experience for this pattern?

This pattern is rated intermediate; basic crochet stitches (sc, hdc, dc, tr, dtr) and comfort with reading charts and following photo tutorials are recommended.

How long does this project typically take to complete?

Most crafters will spend 12-15 hours to complete a full 25-flower bouquet including wiring, winding and assembly; time varies with experience and number of flowers made.