Create a festive set of crocheted Christmas baubles and charming bird ornaments with step-by-step instructions. This pattern combines simple amigurumi shaping with decorative embroidery and beading to give each ornament a handcrafted, heirloom quality. You will love the playful mix of stripes, textures and tiny details that make each piece special and gift-ready.
Progress Tracker
0% Complete
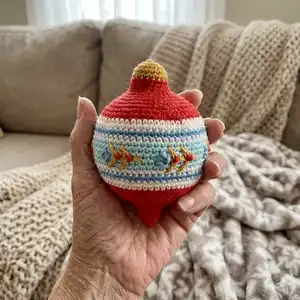
— Christmas Bauble #1 :
Info :
Start in Coral Red.
Round 1 :
6 sc in a MR (6 st)
Round 2 :
inc in all 6 st (12 st)
Round 3 :
(sc, inc) repeat 6 times (18 st)
Round 4 :
sc; (inc, 2 sc) repeat 5 times, inc, sc (24 st)
Round 5 :
(3 sc, inc) repeat 6 times (30 st)
Round 6 :
2 sc, (inc, 4 sc) repeat 5 times, inc, 2 sc (36 st)
Round 7 :
(5 sc, inc) repeat 6 times (42 st)
Round 8 :
3 sc; (inc, 6 sc) repeat 5 times, inc, 3 sc (48 st)
Round 9 :
(7 sc, inc) repeat 6 times (54 st)
Round 10 :
4 sc, (inc, 8 sc) repeat 5 times, inc, 4 sc (60 st)
Round 11 :
sc in every st around (60 st)
Info :
From now on, continue in the stripe pattern (see diagram).
Round 12-21 :
sc in every st around (60 st) (10 rounds)
Info :
Change to Coral Red.
Round 22 :
sc in every st around (60 st)
Round 23 :
4 sc, (dec, 8 sc) repeat 5 times, dec, 4 sc (54 st)
Round 24 :
(7 sc, dec) repeat 6 times (48 st)
Round 25 :
3 sc, (dec, 6 sc) repeat 5 times, dec, 3 sc (42 st)
Round 26 :
(5 sc, dec) repeat 6 times (36 st)
Round 27 :
2 sc, (dec, 4 sc) repeat 5 times, dec, 2 sc (30 st)
Round 28 :
(3 sc, dec) repeat 6 times (24 st)
Round 29 :
sc; (dec, 2 sc) repeat 5 times, dec, sc (18 st)
Info :
Stuff your work very, very firmly. It should be as firm as a tennis ball.
Round 30-32 :
sc in every st (18 st) (3 rounds)
Round 33 :
dec repeat 9 times (9 st)
Info :
Fasten off leaving a tail about 15 cm long and cut the yarn. Using a tapestry needle, weave the yarn tail through the front loops of each of the nine stitches and pull tight to close. Make a loop for hanging out of the yarn tail.
Info :
Using scraps of yarn in different colors, decorate the center part of your bauble with embroidery (see diagram).
— Christmas Bauble #2 :
Round 1 :
6 sc in a MR (6 st)
Round 2 :
(sc, inc) repeat 3 times (9 st)
Round 3 :
sc in every st around (9 st)
Round 4 :
(2 sc, inc) repeat 3 times (12 st)
Round 5 :
sc in every st around (12 st)
Round 6 :
(3 sc, inc) repeat 3 times (15 st)
Round 7 :
(4 sc, inc) repeat 3 times (18 st)
Round 8 :
sc; (inc, 2 sc) repeat 5 times, inc, sc (24 st)
Round 9 :
(3 sc, inc) repeat 6 times (30 st)
Round 10 :
2 sc; (inc, 4 sc) repeat 5 times, inc, 2 sc (36 st)
Round 11 :
(5 sc, inc) repeat 6 times (42 st)
Round 12 :
3 sc; (inc, 6 sc) repeat 5 times, inc, 3 sc (48 st)
Round 13 :
(7 sc, inc) repeat 6 times (54 st)
Round 14 :
4 sc; (inc, 8 sc) repeat 5 times, inc, 4 sc (60 st)
Info :
From now on, continue in the stripe pattern (see diagram below).
Round 15-26 :
sc in every st around (60 st) (12 rounds)
Info :
Note: You can change the size and shape of your ornament by adding a few rounds without decs/incs here and there.
Round 27 :
4 sc, (dec, 8 sc) repeat 5 times, dec, 4 sc (54 st)
Round 28 :
(7 sc, dec) repeat 6 times (48 st)
Round 29 :
3 sc, (dec, 6 sc) repeat 5 times, dec, 3 sc (42 st)
Round 30 :
(5 sc, dec) repeat 6 times (36 st)
Round 31 :
2 sc, (dec, 4 sc) repeat 5 times, dec, 2 sc (30 st)
Round 32 :
(3 sc, dec) repeat 6 times (24 st)
Round 33 :
sc; (dec, 2 sc) repeat 5 times, dec, sc (18 st)
Round 34-36 :
sc in every st (18 st) (3 rounds)
Info :
Stuff your work very, very firmly. It should be as firm as a tennis ball.
Info :
Change to Mustard Yellow.
Round 37-39 :
sc in every st (18 st) (3 rounds)
Round 40 :
dec repeat 9 times (9 st)
Info :
Fasten off leaving a tail about 15 cm long and cut the yarn. Using a tapestry needle, weave the yarn tail through the front loops of each of the nine stitches and pull tight to close. Make a loop for hanging out of the yarn tail. Using scraps of yarn in different colors, decorate the center part of your bauble with embroidery (see diagram). Add a few buttons in matching colors, if desired.
— Chicken Ornament - Body :
Info :
Start in Blue. Leave a yarn tail to create a loop for hanging in Round 1.
Round 1 :
6 sc in a MR (6 st) (leave a yarn tail to create a loop for hanging)
Round 2 :
inc in all 6 st (12 st)
Round 3 :
(sc, inc) repeat 6 times (18 st)
Round 4 :
sc, (inc, 2 sc) repeat 5 times, inc, sc (24 st)
Round 5 :
(3 sc, inc) repeat 6 times (30 st)
Round 6 :
2 sc, (inc, 4 sc) repeat 5 times, inc, 2 sc (36 st)
Round 7 :
(5 sc, inc) repeat 6 times (42 st)
Round 8 :
3 sc, (inc, 6 sc) repeat 5 times, inc, 3 sc (48 st)
Round 9 :
(7 sc, inc) repeat 6 times (54 st)
Round 10 :
4 sc, (inc, 8 sc) repeat 5 times, inc, 4 sc (60 st)
Round 11-20 :
sc in every st around (60 st) (10 rounds)
Round 21 :
4 sc, (dec, 8 sc) repeat 5 times, dec, 4 sc (54 st)
Round 22 :
(7 sc, dec) repeat 6 times (48 st)
Round 23 :
3 sc, (dec, 6 sc) repeat 5 times, dec, 3 sc (42 st)
Round 24 :
(5 sc, dec) repeat 6 times (36 st)
Round 25 :
2 sc, (dec, 4 sc) repeat 5 times, dec, 2 sc (30 st)
Round 26 :
(3 sc, dec) repeat 6 times (24 st)
Round 27 :
sc, (dec, 2 sc) repeat 5 times, dec, sc (18 st)
Info :
Stuff your work very, very firmly. It should be as firm as a tennis ball.
Info :
Change to Dark Blue.
Round 28-30 :
sc in every st (18 st) (3 rounds)
Round 31 :
dec repeat 9 times (9 st)
Info :
Fasten off leaving a tail about 15 cm long and cut the yarn. Using a tapestry needle, weave the yarn tail through the front loops of each of the nine stitches and pull tight to close. Make a loop for hanging out of the yarn tail.
— Chicken Ornament - Head :
Info :
Start in Dark Blue.
Round 1 :
4 sc in a MR (4 st)
Round 2 :
(inc, sc) repeat 2 times (6 st)
Round 3 :
sc in every st around (6 st)
Info :
Change to Off-White.
Round 4 :
inc, 3 sc, 2 inc (9 st)
Round 5 :
inc, 6 sc, 2 inc (12 st)
Round 6 :
inc, 9 sc, 2 inc (15 st)
Round 7 :
(4 sc, inc) repeat 3 times (18 st)
Round 8 :
(5 sc, inc) repeat 3 times (21 st)
Round 9 :
3 sc; (inc, 6 sc) repeat 2 times, inc, 3 sc (24 st)
Round 10 :
(7 sc, inc) repeat 3 times (27 st)
Round 11 :
4 sc; (inc, 8 sc) repeat 2 times, inc, 4 sc (30 st)
Round 12 :
(9 sc, inc) repeat 3 times (33 st)
Round 13 :
5 sc; (inc, 10 sc) repeat 2 times, inc, 5 sc (36 st)
Info :
Change to Baby Blue.
Round 14 :
Working BLO, (11 sc, inc) repeat 3 times (39 st)
Round 15 :
6 sc; (inc, 12 sc) repeat 2 times, inc, 6 sc (42 st)
Round 16 :
(13 sc, inc) repeat 3 times (45 st)
Round 17 :
7 sc; (inc, 14 sc) repeat 2 times, inc, 7 sc (48 st)
Round 18 :
(15 sc, inc) repeat 3 times (51 st)
Round 19 :
8 sc; (inc, 16 sc) repeat 2 times, inc, 8 sc (54 st)
Round 20 :
Working FLO, slst, (skip 1 st, 5 hdc in the same st, skip 1 st, slst) repeat 13 times, slst
Info :
Fasten off, cut the yarn. Stuff the head, sew it to the body at approx. 45° angle. Using scraps of red yarn, embroider 5 french knots on the head (3 over the beak and 2 under it) to give the chicken its features. Give it some eyes as well (beads, tiny buttons, embroidery).
— Chicken Ornament - Tail :
Info :
In Dark Blue. To make the tail, you need to crochet three identical parts ("feathers") which will be then joined together.
Round 1 :
6 sc in a MR (6 st)
Round 2 :
inc in all 6 st (12 st)
Round 3-5 :
sc in every st around (12 st) (3 rounds)
Info :
Fasten off, cut the yarn. For Part 3, follow the instructions for Parts 1, 2, however don't fasten off, as you will now join the parts together.
Round 6 :
Working on Part 3, 6 sc; join Part 2 with a sc, 5 more sc along Part 2; join Part 1 with a sc, 11 more sc along Part 1, 6 sc along Part 2, 6 sc along Part 3. Now the "feathers" are joined and you have 36 sc in the round (36 st)
Round 7-11 :
sc in every st around (36 st) (5 rounds)
Info :
Fasten off, cut the yarn. Using scraps of yarn in different colors, decorate the tail according to your liking. Sew the tail to the body on the same axis as the head.
— Chicken Ornament - Wings (make 2) :
Round 1 :
6 sc in a MR (6 st)
Round 2 :
inc in all 6 st (12 st)
Round 3 :
(sc, inc) repeat 6 times (18 st)
Round 4 :
sc, (inc, 2 sc) repeat 5 times, inc, sc (24 st)
Round 5-7 :
sc in every st around (24 st) (3 rounds)
Round 8 :
(7 sc, inc) repeat 3 times (27 st)
Round 9-11 :
sc in every st around (27 st) (3 rounds)
Round 12 :
(7 sc, dec) repeat 3 times (24 st)
Round 13 :
sc in every st around (24 st)
Round 14 :
(6 sc, dec) repeat 3 times (21 st)
Round 15 :
sc in every st around (21 st)
Round 16 :
(5 sc, dec) repeat 3 times (18 st)
Round 17 :
sc in every st around (18 st)
Round 18 :
(4 sc, dec) repeat 3 times (15 st)
Round 19 :
(3 sc, dec) repeat 3 times (12 st)
Round 20 :
(2 sc, dec) repeat 3 times (9 st)
Round 21 :
(sc, dec) repeat 3 times (6 st)
Info :
Fasten off leaving a tail about 10 cm long and cut the yarn. Using a tapestry needle, weave the yarn tail through the front loops of each of the six stitches and pull tight to close. Weave in the end. Decorate the wings with embroidery, beads and small buttons in different colors. Sew the wings to the sides of the body.
— Chicken Ornament - Face Patch :
Instruction :
Ch 9; starting from the 2nd ch from the hook, 7 sc, 3 sc in the last ch; working on the other side of the chain, 6 sc, inc (18 st). Fasten off, cut the yarn, hide the tail on the wrong side of the work. You may leave a long tail for sewing, but since this part is so very small, it will be more convenient to divide the yarn into strands and use a single one to make the stitches almost invisible.
— Chicken Ornament - Beak :
Round 1 :
4 sc in a MR (4 st)
Round 2 :
(inc, sc) repeat 2 times (6 st)
Round 3 :
sc in every st around (6 st)
Info :
Fasten off, cut the yarn. As this part is very small, it's highly recommended to use a thread or a single strand of yarn in the matching colour for sewing. Alternatively, you may use a pyramid-shaped button instead of a crocheted part.
— Northern Cardinal - Body :
Round 1 :
6 sc in a MR (6 st)
Round 2 :
inc in all 6 st (12 st)
Round 3 :
(sc, inc) repeat 6 times (18 st)
Round 4-5 :
sc in every st around (18 st)
Info :
Change to Coral Red.
Round 6 :
sc; (inc, 2 sc) repeat 5 times, inc, sc (24 st)
Round 7 :
(3 sc, inc) repeat 6 times (30 st)
Round 8 :
2 sc; (inc, 4 sc) repeat 5 times, inc, 2 sc (36 st)
Round 9 :
(5 sc, inc) repeat 6 times (42 st)
Round 10 :
3 sc; (inc, 6 sc) repeat 5 times, inc, 3 sc (48 st)
Round 11 :
(7 sc, inc) repeat 6 times (54 st)
Round 12 :
4 sc; (inc, 8 sc) repeat 5 times, inc, 4 sc (60 st)
Round 13-19 :
sc in every st around (60 st) (7 rounds)
Round 20 :
skip 12 sts, sc in the 13th st, 47 sc (48 st)
Info :
You've just divided your work in two unequal parts (60 - 48 + 12); keep working around the larger one.
Round 21 :
sc in every st around (48 st)
Round 22 :
7 sc; (dec, 14 sc) repeat 2 times, dec, 7 sc (45 st)
Round 23 :
sc in every st around (45 st)
Round 24 :
(13 sc, dec) repeat 3 times (42 st)
Round 25 :
sc in every st around (42 st)
Round 26 :
6 sc; (dec, 12 sc) repeat 2 times, dec, 6 sc (39 st)
Round 27 :
sc in every st around (39 st)
Round 28 :
(11 sc, dec) repeat 3 times (36 st)
Round 29 :
sc in every st around (36 st)
Info :
Flatten your work; using a strand of yarn in matching color, sew the 12 sts gap closed, stitch to stitch. This will be the base for sewing the tail. Start gradually stuffing the body.
Round 30 :
5 sc; (dec, 10 sc) repeat 2 times, dec, 5 sc (33 st)
Round 31 :
sc in every st around (33 st)
Round 32 :
(9 sc, dec) repeat 3 times (30 st)
Round 33 :
sc in every st around (30 st)
Round 34 :
4 sc; (dec, 8 sc) repeat 2 times, dec, 4 sc (27 st)
Round 35 :
sc in every st around (27 st)
Round 36 :
(7 sc, dec) repeat 3 times (24 st)
Round 37 :
sc in every st around (24 st)
Round 38 :
3 sc; (dec, 6 sc) repeat 2 times, dec, 3 sc (21 st)
Round 39 :
sc in every st around (21 st)
Round 40 :
(5 sc, dec) repeat 3 times (18 st)
Round 41 :
sc in every st around (18 st)
Info :
Stuff your work very firmly. Leave the upper part (the last 6-9 rounds of the work) unstuffed as it will form the bird's crest.
Round 42 :
2 sc; (dec, 4 sc) repeat 2 times, dec, 2 sc (15 st)
Round 43 :
sc in every st around (15 st)
Round 44 :
(3 sc, dec) repeat 3 times (12 st)
Round 45 :
sc in every st around (12 st)
Round 46 :
sc; (dec, 2 sc) repeat 2 times, sc (9 st)
Round 47 :
sc in every st around (9 st)
Round 48 :
(dec, sc) repeat 3 times (6 st)
Info :
Fasten off leaving a tail about 10 cm long and cut the yarn. Using a tapestry needle, weave the yarn tail through the front loops of each of the six stitches and pull tight to close. Bend the unstuffed upper part of the head to the side and sew it with a couple of stitches in the position like the photos. Weave in your yarn tail once complete.
— Northern Cardinal - Tail :
Round 1 :
6 sc in a MR (6 st)
Round 2 :
inc in all 6 st (12 st)
Round 3 :
(sc, inc) repeat 6 times (18 st)
Round 4 :
(5 sc, inc) repeat 3 times (21 st)
Round 5 :
3 sc; (inc, 6 sc) repeat 2 times, inc, 3 sc (24 st)
Round 6-8 :
sc in every st around (24 st) (3 rounds)
Round 9 :
(6 sc, dec) repeat 3 times (21 st)
Round 10-12 :
sc in every st around (21 st) (3 rounds)
Round 13 :
(5 sc, dec) repeat 3 times (18 st)
Round 14-15 :
sc in every st around (18 st) (2 rounds)
Round 16 :
(4 sc, dec) repeat 3 times (15 st)
Round 17-18 :
sc in every st around (15 st) (2 rounds)
Info :
Make a slst, fasten off leaving a long yarn tail for sewing. Flatten the tail and decorate both sides with embroidery and/or beads/small buttons. Sew the tail to the back of the bird's body, parallel to the base (between rounds 21 and 28).
— Star :
Info :
We will create two halves of the star, and join them together. They may differ in color and decor. Half a star. Start in White. Work in the BLO for rounds 2-10, stuff the toy during assembly.
Round 1 :
6 sc in a MR (6 st)
Round 2 :
inc in all 6 st (12 st)
Round 3 :
(1 sc, inc) repeat 6 times (18 st)
Round 4 :
(2 sc, inc) repeat 6 times (24 st)
Round 5 :
(3 sc, inc) repeat 6 times (30 st)
Round 6 :
(4 sc, inc) repeat 6 times (36 st)
Round 7 :
(5 sc, inc) repeat 6 times (42 st)
Round 8 :
(6 sc, inc) repeat 6 times (48 st)
Round 9 :
(7 sc, inc) repeat 6 times (54 st)
Round 10 :
(8 sc, inc) repeat 6 times (60 st)
Info :
Don't cut the yarn. Start to crochet the rays of the star. There are five of them. Crochet in rows. At the end of each row, do not chain 1 and turn, instead you will simply turn your work, and crochet into the second stitch from the hook.
Row 1 :
Working BLO, sc in all 12 st
Info :
Cut and hide the yarn end. Go back to round 10. Join the White yarn and repeat instructions 1-12, 4 more times, for a total of 5 rays. On the second star half, after making the 5th triangle point, you could keep the yarn and not to cut it, and use it to join the two halves together.
Info :
Go back to round 2. Join the Turquoise yarn to the beginning of the 2nd rnd and crochet FLO sl st in a spiral to the end of the 10th rnd.
Info :
With a slip stitch connect the spiral in a circle, change the yarn to Coral color. Turn your work and crochet in a spiral on round 10.
Round 1 :
Working FLO, 1 ch, 2 hdc in each stitch (120 st)
Round 2 :
sc in all 120 st
Round 3 :
sl st in all 120 st
Info :
Cut and hide the yarn end.
Info :
Once you have completed two halves of the star, join them together with pins. Using your white yarn, sc through both sides of each half to join them. At the top of each star's ray, complete 3sc in one stitch, and when working in the space between each ray at the bottom of the work, add 2 sc - this is to ensure there are no holes. Cut and hide the yarn end. Make a loop for hanging out of the yarn tail. Using scraps of yarn in different colors, decorate your star with embroidery. Add a few buttons in matching colors, if desired.
This festive set of crochet ornaments makes a bright, handmade addition to any tree or gift package. Each bauble and bird is designed to be embroidered and beaded so no two pieces are exactly alike. Use leftovers and scraps to make colourful, eco-friendly decorations that sparkle through the holidays. 🧶🎁