About This Zig-Zag Blanket Pattern
This pattern creates a textured Zig-Zag Blanket using puff stitches and double-held sport yarn to achieve a thick, cozy fabric. The instructions cover three common blanket sizes and explain how to change colors smoothly for a gradient effect. Clear step-by-step photos and directions make it easy to follow.
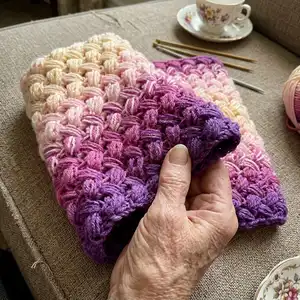
Designed for beginners, this pattern uses simple double crochet and puff stitch repeats to form the chevron-like texture. You can customize colors and size for a unique handmade gift or home accent.
Why You'll Love This Zig-Zag Blanket Pattern
I absolutely love this pattern because it transforms basic stitches into a stunning textured blanket with minimal fuss. I enjoy how the double-held yarn gives the fabric a squishy, luxurious feel without complicated shaping or stitchwork. The color placement chart makes it easy to create soft gradients that look professionally blended. I also appreciate that the pattern is sized for newborn, crib, and throw options so you can choose the perfect project for any occasion.
Switch Things Up
I love how easy it is to personalize this blanket by changing the color rhythm; try repeating each color for more rows to create wider stripes.
I often switch yarn weights to make different sizes — using a bulkier yarn with a larger hook gives me a chunky, quick-to-make throw.
I sometimes work single-strand instead of double to create a lighter, more delicate baby blanket; adjust the starting chain and rows to match your gauge.
For a boho look, add a long fringe along the short edges after finishing and weaving in ends.
I like to experiment with a simple single crochet border in a contrasting color for a clean finish that frames the puff texture nicely.
If you want an even softer drape, I substitute a blend yarn (alpaca or wool mix) while keeping the puff stitch sequence the same.
I sometimes add a thin sewn fabric backing for extra warmth and durability when gifting, matching the color scheme for a professional result.
Want a modern palette? I’ll swap the four colors for monochrome tones, shifting from light to dark for a chic ombre effect.
I also try small modifications like changing the ch-1 to ch-2 after puffs to slightly alter the spacing and openness of the texture on purpose.
To make it portable, I sometimes reduce the stitch count and hook up a mini version for a car or stroller blanket — the pattern principles stay identical.
Common Mistakes & How to Fix Them
✗ Starting with the wrong chain count; check the required starting chain for your chosen size (83, 128, or 146) before you begin.
✗ Not holding yarn double as instructed leads to a thinner fabric; hold two strands together throughout to achieve the intended texture and gauge.
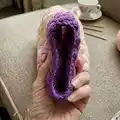
✗ Changing both yarn threads at once when switching colors causes messy ends; replace one thread at a time and weave ends as instructed.
✗ Failing to tighten the puff stitch top makes irregular puffs; make the ch 1 to tighten each puff stitch so the top sits neatly.
✗ Skipping the ch-1 after a puff stitch can distort the row alignment; always make ch 1 to tighten the top of the puff stitch before continuing.