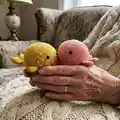
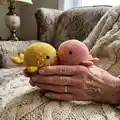
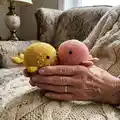
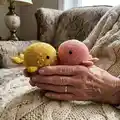
About This Wallace and Wanda Whales Amigurumi Pattern
This pattern creates two sweet amigurumi whales—Wallace (with color dots) and Wanda (solid color). You will crochet the body from top to bottom, then make separate fins and a tail to attach. The instructions include a Fair Isle color dot pattern for Wallace and clear assembly directions.
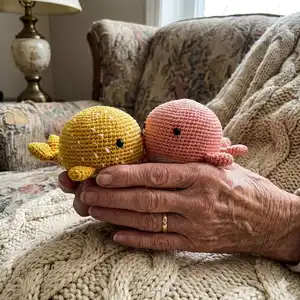
The pattern uses DK cotton yarn and a 2.75 mm hook for a neat, tight fabric and measures approximately 6.5 inches long. Detailed rounds and finishing instructions make assembly straightforward and satisfying.
Why You'll Love This Wallace and Wanda Whales Amigurumi Pattern
I absolutely love this pattern because it combines simple amigurumi shaping with a playful Fair Isle dot technique that makes each whale unique. The construction is clean and methodical—worked top to bottom—so you can see the shape forming as you go. I also enjoy how easily the pattern adapts to different yarns and sizes for totally different looks. The finishing and assembly instructions give a polished result that feels special to gift or display.
Switch Things Up
I love how easy it is to customize these whales by simply changing the yarn color palette; try pastels for a nursery feel or bold brights for a playful look.
I sometimes swap the DK cotton for a worsted yarn and a larger hook to create a chunkier, bigger whale that's super cuddly.
I often replace safety eyes with embroidered eyes for a child-safe toy or for a softer expression.
For Wallace's dots, experiment with different dot colors or sizes by altering the Fair Isle repeat to make unique patterns.
I like to add tiny crocheted accessories like a bow or a tiny cap to personalize each whale as a gift.
Try using variegated yarn for the body to create a marbled, watercolor effect with very little extra effort.
If you want a keychain size, use fingering weight yarn and a 2.0 mm hook and stop after fewer rounds to make a mini whale.
To make the whale poseable, I sometimes insert a small length of wire into the tail before sewing it on so it can be angled slightly.
I recommend playing with eye placement and mouth embroidery; small shifts can make the whale look curious, sleepy, or smiling.
Try making a family of whales in graduated sizes and colors to create a charming display or a themed gift set.
Common Mistakes & How to Fix Them
✗ Skipping stitch markers when working continuous rounds will make it hard to find the start of a round; place a marker at the first stitch and move it each round to avoid losing your place.
✗ Forgetting to stuff as you go can create uneven shaping and lumps at the end; stuff gradually and firmly throughout shaping and overstuff slightly before finishing sections.
✗ Not counting stitches after increases and decreases causes incorrect stitch counts later; count at the end of each round, especially after shaping rounds.
✗ Pulling the yarn too tightly when carrying strands for color dots can cause puckering; carry the unused strand loosely and work over it every few stitches to secure it.
✗ Skipping the invisible decrease recommendation may leave visible gaps; use an invisible decrease when closing to avoid holes and create a smooth finish.