🧶 Beautiful ✨ Detailed 💝 Adorable

Crochet Granny Cross-Body Bag Pattern

Crochet Granny Cross-Body Bag Pattern
4.5★ Rating
5-7 Hours Time Needed
3.2K Made This
✂️

Beginner Friendly Level

Perfect for those just starting their crochet journey, with clear instructions and simple techniques

⏱️

Weekend Treat

Takes 5-7 hours, making it an enjoyable project to finish over a couple of days.

Stylish Touch

An elegant detail to elevate any look, combining traditional techniques with contemporary design sensibilities.

About This Crochet Granny Cross-Body Bag Pattern

This pattern creates a cheerful cross-body bag made from four granny square motifs joined together and finished with edging, a crocheted strap, and a zipper. The self-striping Red Heart All in One Granny Square yarn gives bold, coordinated color changes without switching skeins. You will work 5 rounds per motif, assemble the motifs, add a top edging, crochet a strap and sew in a zipper for a polished bag. The finished bag is roomy and stylish for everyday use.
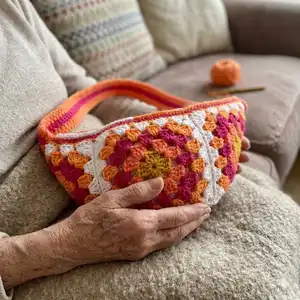
Crochet Granny Cross-Body Bag Pattern crochet pattern - detailed view of completed project

Designed for easy motif work and straightforward assembly, this pattern is perfect for practicing joining and finishing techniques. The self-striping yarn makes color planning simple and the project sews up quickly for a satisfying weekend make.

Why You'll Love This Crochet Granny Cross-Body Bag Pattern

I absolutely love this pattern because it turns simple granny squares into a chic, functional bag that people actually use. I enjoy how the self-striping yarn creates surprising color placements without any extra effort. I love the assembly steps — joining motifs in the back loops gives a unique texture and a clean finish. I also appreciate that the strap is crocheted to match the bag so the whole piece feels cohesive and handmade.

Crochet Granny Cross-Body Bag Pattern step 1 - construction progress Crochet Granny Cross-Body Bag Pattern step 2 - assembly progress Crochet Granny Cross-Body Bag Pattern step 3 - details and accessories Crochet Granny Cross-Body Bag Pattern step 4 - final assembly and finishing

Switch Things Up

I love customizing this bag by swapping the color palette — try cool blues and greens for a calming version or pastels for a softer look.

You can make the bag larger or smaller by changing the number of motifs: add more squares across for a wider bag or stack for depth.

If you want a sturdier bag, consider using a heavier-weight yarn and a larger hook, then line the bag with fabric for extra structure.

I sometimes replace the zipper with a magnetic snap or a decorative buttoned flap for a different closure style.

Try making a shorter strap by reducing the foundation chains and checking the strap position before sewing to make a shoulder bag instead of a cross-body.

Embellish the finished bag with tassels, pom-poms or embroidered motifs to add personality and texture.

If you prefer minimal seams, experiment with whipstitching motifs together or using mattress stitch instead of single crochet joins.

For a luxe finish, add a fabric lining and small interior pockets; I usually choose a cotton lining that complements the yarn colors.

I also enjoy combining different granny square patterns—swap rounds or corner treatments for a patchwork look that stays cohesive with the same yarn colors.

If you want a quick gift version, make mini versions by using lighter yarn and a smaller hook to create a small pouch or coin purse from the same motif idea.

Common Mistakes & How to Fix Them

✗ Starting motifs from the wrong color section can leave you short of yarn for edging and strap; begin motifs with Color 1 (shortest color rep) from center of pull-skein and leave a 4" [10 cm] tail to weave in. ✗ Not checking gauge leads to squares that are too big or small and a bag that does not line up correctly; make the motif gauge swatch and adjust hook size to match the approx 6" [15 cm] square. ✗ Joining motifs without aligning stitches causes uneven seams; hold wrong sides together with stitches aligned and join at ch-2 corners, working in back loops only for consistent seaming. ✗ Overstuffing the bag when checking shape can distort seams and edges; check shape as you assemble and avoid stretching while sewing in the zipper to keep edges neat.
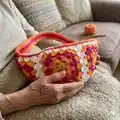
Crochet Granny Cross-Body Bag Pattern

Make a bright, playful cross-body bag worked from granny square motifs for a fun, wearable accessory you will love to use and gift. This pattern uses self-striping "All in One Granny Square" yarn so color changes are effortless and the bag sews together quickly. You will make four granny motifs, join them, add a neat top edging, strap and zipper for a professional finish. Perfect for experimenting with color and a great project to build your motif and finishing skills.

Beginner Friendly 5-7 Hours

Materials Needed for Crochet Granny Cross-Body Bag Pattern

— Main Fabric

  • 01
    Red Heart® All in One™ Granny Square (8.8 oz/250 g; 417 yds/381 m) - self-striping yarn
  • 02
    Color: Citrus Twist (2002) - 1 ball (makes 3 Granny Squares + 160 yds/146 m for Edging and Strap) or 250 yds/228 m total

— Tools Required

  • 01
    Size U.S. I/9 (5.5 mm) Susan Bates® Silvalume® crochet hook or size needed to obtain gauge
  • 02
    Coats® zipper, 12" [30.5 cm] long
  • 03
    Coats® sewing thread
  • 04
    Susan Bates® steel yarn needle
  • 05
    Tape measure
  • 06
    Scissors (implied for finishing)
  • 07
    Stitch markers (recommended)

Progress Tracker

0% Complete

— Motif :

Info :

Make 4.

Info :

Notes: Ch 3 at beg of rnd counts as double crochet (dc). Ch 6 at beg of rnds counts as dc and ch-3 sp. Join all rnds with slip stitch (sl st) to 3rd ch of ch-6 unless otherwise indicated.

Info :

With Color 1, ch 4. Join with sl st to first ch to form ring. See diagram.

Round 1 :

(RS). Ch 6. (3 dc. Ch 3) 3 times in ring. 2 dc in ring. Join.

Round 2 :

Sl st in ch-3 sp. Ch 6. 3 dc in same ch-3 sp. *Ch 1. (3 dc. Ch 3. 3 dc) in next ch-3 sp. Rep from * twice more. Ch 1. 2 dc in first ch-3 sp. Join.

Round 3 :

Sl st in ch-3 sp. Ch 6. 3 dc in same ch-3 sp. *Ch 1. 3 dc in next ch-1 sp. Ch 1. (3 dc. Ch 3. 3 dc) in next ch-3 sp. Rep from * twice more. Ch 1. 3 dc in last ch-1 sp. Ch 1. 2 dc in first ch-3 sp. Join.

Round 4 :

Sl st in ch-3 sp. Ch 6. 3 dc in same ch-3 sp. *(Ch 1. 3 dc) in each ch-1 sp to next ch-3 sp. Ch 1.** (3 dc. Ch 3. 3 dc) in next ch-3 sp. Rep from * twice more, then from * to ** once. 2 dc in first ch-3 sp. Join.

Round 5 :

Sl st in ch-3 sp. Ch 6. 3 dc in same ch-3 sp. *(Ch 1. 3 dc) in each ch-1 sp to next ch-3 sp. Ch 1. (3 dc. Ch 3. 3 dc) in next ch-3 sp. Rep from * twice more, then from * to ** once. 2 dc in first ch-3 sp. Join.

Round 6 :

Fasten off.

Info :

Motifs begin with Color 1 (shortest color rep) from center of pull-skein, leaving a 4" [10 cm] tail to weave in. Each color aligns with 1 round (rnd) in the Motif with 5 colors in total. If too much color is left at end of rnd, pull back some stitches (sts) and slightly loosen gauge to re-work sts and finish at color change. If too little color is left, pull back some sts and slightly tighten gauge to re-work sts and finish at color change. When Motif is complete, cut yarn where Color 5 (longest color rep) ends, leaving a tail for weaving in. Begin next Motif with Color 1 and repeat 5 rnds for each Motif.

— Measurements :

Info :

Approx 17" [43 cm] wide x 6½" [16.5 cm] deep, excluding Strap.

— Gauge :

Info :

Motif = Approx 6" [15 cm] square.

— Assembly :

Info :

Notes: Join Motifs tog using just white sections of yarn. To work edging and Strap, use yarn as 'self-striping' yarn, allowing colors to change as they appear.

Item Name (Join Motifs) :

Hold WS of 2 Motifs tog with sts aligned. Join white yarn with sl st in ch-2 corners of aligned Motifs at top right. Ch 1. Working in back loops only, work 1 sc in each dc through both thicknesses. Fasten off.

Info :

Join Motifs as shown in diagram.

Item Name (Top edging) :

1st rnd: (RS). Join yarn (any section of color) with sl st to top edge of Bag at right corner. Ch 1. Work 1 single crochet (sc) in each st around. Join with sl st to first sc.

Round 2 :

Ch 1. 1 sc in each sc around. Join with sl st to first sc.

Round 3 :

Ch 1. 1 sc in each sc around. Join with sl st to first sc. Fasten off.

Item Name (Strap) :

With any color section of yarn, ch 109.

Round 1 :

2 dc in 4th ch from hook. *Skip next 2 ch. 3 dc in next ch. Rep from * to last 3 ch. Skip next 2 ch. (3 dc. Ch 2. 3 dc) in last ch. Working along opposite side of ch, work 3 dc in each ch-2 sp (working around foundation ch), to last ch. 3 dc in first ch of rnd (same ch as first 2 dc). Ch 2. Join with sl st to top of ch 3.

Round 2 :

Ch 1. 1 sc in same sp as joining sl st. 1 sc in each dc around. Join with sl st to first sc. Fasten off.

Item Name (Finish Strap) :

Sew Strap to Bag along top edge at either end as shown.

Item Name (Finishing) :

Using sewing thread and needle, sew in zipper along top edge opening.

Assembly Instructions

  • Hold wrong sides of motifs together with stitches aligned and join through ch-2 corners at the top right using white yarn and slip stitch before working a single crochet seam in back loops only through both thicknesses.
  • Work the top edging by joining yarn to the right corner of the bag, working 1 single crochet in each stitch around, then 2 more rounds of single crochet to create a neat top finish.
  • Crochet the strap from a foundation chain of 109 chains, work the first rnd across both sides of the chain as written, then fasten off and sew the strap to the top edge of the bag at either end as shown in the diagram.
  • Sew the 12" zipper into the top opening using Coats® sewing thread and a sewing needle, taking care to align the edges and keep the finished edge flat and neat.

Important Notes

  • 💡Join Motifs together using the white sections of the yarn to create a consistent seam color and neat appearance.
  • 💡To allow the yarn to change colors naturally when working edging and strap, use the yarn as self-striping without cutting at each color change.
  • 💡Work the joining single crochet in back loops only for a secure seam that also creates a decorative ridge on the wrong side of the bag.
  • 💡Fasten off and weave in tails after completing each motif and after sewing in the zipper to prevent loose ends from showing.

This cheerful Citrus Twist cross-body bag is an instant mood-lifter, made from four colorful granny motifs and finished with a neat edged opening and zipper. 🧶 The pattern is easy to follow and perfect for gifting or everyday use. ✨ Keep experimenting with color placement to make each bag uniquely yours!

You ask,

we answer.

FAQs

What size will the finished piece be?

The finished bag measures approximately 17" [43 cm] wide x 6½" [16.5 cm] deep, excluding the strap.

Can I use different yarn weights for this pattern?

You can substitute yarn weight, but gauge and final size will change significantly; choose an appropriate hook and make a motif swatch to match the 6" [15 cm] motif gauge before proceeding.

Do I need prior crochet experience for this pattern?

This pattern is beginner friendly and uses basic granny techniques, but knowledge of double crochet, slip stitch and joining motifs will help you follow instructions easily.

How long does this project typically take to complete?

Most crocheters finish this project in about 5-7 hours, though time may vary depending on experience, color changes and finishing time for sewing the zipper.