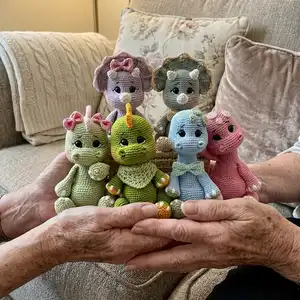
Create two adorable triceratops friends with this full crochet pattern. You will make detailed heads, bodies, horns, tails and charming outfits with clear step-by-step instructions. The pattern includes yarn and tool lists plus embroidery and finishing tips to get expressive faces. Perfect for gifting or adding to your handmade toy collection.
Progress Tracker
0% Complete
— Head :
Round 1 :
Use the line in color QUARRY (2mm needle). AM of 8 sc (8)
Round 2 :
Inc in each sc (16)
Round 3 :
[1 sc and 1 inc] 8x (24)
Round 4 :
[2 sc and 1 inc] 8x (32)
Round 5 :
[3 sc and 1 inc] 8x (40)
Round 7 :
[4 sc and 1 inc] 8x (48)
Round 9 :
[5 sc and 1 inc] 8x (56)
Round 10 :
[6 sc and 1 inc] 8x (64)
Round 11-18 :
sc over sc - [8 rows] (64)
Round 19 :
24 sc, 16 inc, 24 sc (80)
Round 20-27 :
sc over sc - [8 rows] (80)
Round 28 :
[3 sc and 1 dec] 16x (64)
Round 29 :
sc over sc (64)
Round 30 :
[1 dec and 2 sc] 16x (48)
Round 31 :
sc over sc (48)
Round 32 :
[1 sc and 1 dec] 16x (32)
Info :
Close with sl st and cut a longer thread so you can sew the head to the body. Place the eyes between rows 16 and 17 separated by 6 sc visible between them. Be careful when placing the eyes, it's important to take into account the increases on round 19 so they don't get crooked. Leave the eyes centered in the increase part of row 19. (TIP: when placing the locks, press them until the second step of the eyes, this way they will be deeper, nicer and safer).
— White of Eyes :
Info :
Use double Amigurumi yarn in color WHITE to make the whites of the eyes. 1- Introduce the needle in the open part of the head (leave a piece of thread to be able to tie a few knots at the end), leave with it right in the corner of the eye (tip: try to leave with the needle in the middle of the corner of the eye). (See picture 1).
Info :
2- Introduce the needle right in the corner of the lower part of the eye and leave with it in the open part of the head. (See images 2 and 3).
Info :
3- Now leave with the needle in the corner of the second eye (tip: try to leave with the needle in the middle of the corner of the eye).
Info :
4- Introduce the needle right in the corner of the lower part of the eye and leave with it in the open part of the head and then pull the two threads a little and tie 2 knots. (See images 4, 5, 6 and 7).
— Black Eye Embroidery :
Info :
Use the double Cléa yarn in the color BLACK to make the black eye embroidery. 1- Introduce the needle in the open part of the head (leave a piece of thread to be able to tie a few knots at the end), leave with it right in the corner of the eye (tip: try to leave with the needle in the middle of the corner of the eye). Look at images 1 and 2.
Info :
2- Introduce the needle right in the corner of the upper part of the eye and leave with it in the open part of the head. (Look at the pictures 3).
Info :
3- Now leave with the needle in the corner of the second eye (tip: try to leave with the needle in the middle of the corner of the eye, as shown in image 5).
Info :
4- Introduce the needle right in the corner of the upper part of the eye and leave with it in the open part of the head and then pull the threads a little and tie 2 knots. (See images 8).
— Eyelash :
Info :
YOU ONLY NEED TO DO THE EYELASHES IF THE PET IS THE GIRL VERSION. Use the Cléa yarn in the color BLACK to do the eyelashes. (Do not use the double wire). 1- Insert the needle into the open part of the head (leave a piece of thread so you can tie some knots at the end), go out with it right in the middle where we made the details with the Off White and Black line of the eyes. (See picture 1).
Info :
2- Introduce the needle with a space of one stitch in the row above the middle of the black embroidery. (See picture 2).
Info :
3- Take the thread to do the same process on the other eyes, then join the ends of the thread and tie two knots (Look at the pictures).
— Eyebrows :
Info :
Use the Cléa yarn in the color BLACK to do the eyebrows (Do not use the double wire). 1- Insert the needle into the open part of the head (leave a piece of thread so you can tie some knots at the end), take it out on the second row above the eyes, skip 3 dc and insert the hook in a row above. (See images 1 and 2).
Info :
2- Now do the same process on the other side of the eyes (See images 4, 5, 6 and 7). Bring the two ends of the yarn together and tie a few knots.
— Face Expression :
Info :
To join the eyes, use a piece of thread QUARRY. Watch the video for how to join the eyes and make them more sunken, this part is very important to leave your pet with a more delicate and charming expression (DO NOT SKIP THIS STEP).
— Head Horns :
Round 1 :
Use the line in color OFF WHITE (2mm needle). AM of 6 sc (6)
Round 2 :
[1 sc and 1 inc] 3x (9)
Round 4 :
[2 sc and 1 inc] 3x (12)
Round 5 :
sc over sc (12). Close with sl st and finish the thread. Sew the horns between rows 6 to 10 of the head.
— Snout Horn :
Round 1 :
Use the line in color OFF WHITE (2mm needle). AM of 6 sc (6)
Round 2 :
[1 sc and 1 inc] 3x (9)
Round 4 :
[2 sc and 1 inc] 3x (12)
Round 5 :
[2 sc and 1 inc] 4x (16)
Round 6 :
sc over sc (16). Close with sl st and cut a larger thread for sewing. Sew the horn between rows 19 to 24 of the head, before starting to sew, center the horn between the eyes, place some pins and then start sewing.
— Crown :
Round 1 :
Start with the color line QUARRY (2mm needle). Make 36 ch, skip the first ch and from the second ch make [5 sc and 1 triple inc] 5x, 5 sc (45)
Round 3 :
6 sc, 1 triple inc, [7 sc and 1 triple inc] 4x, 6 sc (55)
Round 5 :
Turn the work, make 1 ch, 7 sc, 1 triple inc, [9 sc and 1 triple inc] 4x, 7 sc (65). Close with sl st and finish the thread.
Round 6 :
Now attach the thread in the color QUARRY on the side right in the corner, do 5 sc on the side of the crown, then 65 sc, go down the other side with 5 sc, make 1 ch and cut a larger thread for sewing. Fasten the thread in color PINKISH in the first dc from the top of the last row and do 1 dc, skip 3 dc and in the next one do 8 dc in the same place, skip 3 dc and in the next one do 1 dc, repeat until you complete 8 fans, after the last fan, skip 3 dc and make 1 dc, make 1 ch and finish the thread.
Info :
Then attach the thread in color QUARRY in the direction we made the first triple increase, right in the middle of it and make 6 sl st vertically (see the image), then make 1 ch and finish the thread. Do this detail 5 times, always starting in the middle of the increases on the first row.
— Crown Seaming :
Info :
Use the tapestry needle to sew the crown to the head. Sew the crown between rows 1 to 18 of the head, leaving a distance of 7 sc on each side of the eyes.
— Body :
Round 1 :
Use the line in color QUARRY (2mm needle). AM of 8 sc (8)
Round 2 :
Inc all around (16)
Round 3 :
[1 sc and 1 inc] 8x (24)
Round 4 :
[2 sc and 1 inc] 8x (32)
Round 5 :
[3 sc and 1 inc] 8x (40)
Round 6 :
[4 sc and 1 inc] 8x (48)
Round 7 :
[5 sc and 1 inc] 8x (56)
Round 8 :
[6 sc and 1 inc] 8x (64)
Round 9-20 :
sc over sc (64) - [12 rows]
Round 21 :
16 sc, 16 dec, 16 sc (48)
Round 22-25 :
sc over sc (48) - [4 rows]
Round 26 :
[4 sc and 1 dec] 8x (40)
Round 27-30 :
sc over sc (40) - [4 rows]
Round 31 :
[3 sc and 1 dec] 8x (32)
Round 32-33 :
sc over sc all around (32) - [2 rows]. Close with sl st and finish the thread.
— Legs :
Round 1 :
Start with the color line PINKISH (2mm needle). Make 6 ch, skip the first ch, from the second ch make 4 sc, in the last ch 3 sc in the same place, at the bottom of the ch make 3 sc, in the last ch 1 inc (12)
Round 2 :
1 inc, 3 sc, 3 inc, 3 sc, 2 inc (18)
Round 3 :
1 sc and 1 inc, 3 sc, [1 sc and 1 inc] 3x, 3 sc, [1 sc and 1 inc] 2x (24)
Round 4 :
2 sc and 1 inc, 3 sc, [2 sc and 1 inc] 3x, 3 sc, [2 sc and 1 inc] 2x (30). Change to color QUARRY 5- sc over sc in BLO (30)
Round 5-7 :
sc over sc (30) - [2 rows]
Round 8 :
4 sc, [1 dec and 1 sc] 6x, 8 sc (24)
Round 9 :
[2 sc and 1 dec] 6x (18)
Round 10 :
sc over sc (18)
Round 11 :
6 sc, [1 inc] 6x, 6 sc (24)
Round 12 :
6 sc, [1 sc and 1 inc] 6x, 6 sc (30)
Round 13 :
[1 inc] 2x, 24 sc, [1 inc] 4x (36)
Round 14-16 :
sc over sc (36) - [3 rows]
Round 17 :
8 sc, [1 sc and 1 dec] 6x, 10 sc (30)
Round 18-19 :
sc over sc (30) - [2 rows]
Round 20 :
8 sc, [1 dec] 6x, 10 sc (24)
Round 21 :
[1 dec] 2x, 12 sc, [1 dec] 4x (18)
Info :
Put stuffing. But don't put too much padding on the thigh part, this part has to be flatter.
Round 22 :
[1 sc and 1 dec] 6x (12)
Round 23 :
[1 dec] 6x (6). Close the leg with the inverted magic ring. Fasten the legs to the body; before fastening, position the legs in the place you want to fasten, I like to leave them a little further forward, so there is not a very large space between one leg and the other.
— Arms :
Round 1 :
Start with the color line PINKISH (2mm needle). AM of 6 sc (6)
Round 2 :
Inc all around (12)
Round 3 :
[1 dc and 1 inc] 6x (18)
Round 4 :
[2 sc and 1 inc] 6x (24). Change to color QUARRY
Round 5 :
sc over sc in BLO (24)
Round 6-7 :
sc over sc (24) - [2 rows]
Round 8 :
3 sc, [1 dec and 1 sc] 6x, 3 sc (18)
Round 9-18 :
sc over sc (18) - [10 rows]
Info :
Only put padding on the underside of the little arm.
Round 19 :
[4 sc and 1 dec] 3x (15)
Round 20 :
[3 sc and 1 dec] 3x (12)
Round 21 :
Fold the little arm in half and close it with 6 sc (6). Chain 1 and cut a larger thread to sew the arms to the body.
— Embroidery - Claws :
Info :
Use the line in color OFF WHITE and tapestry needle. Embroider the claws of the legs between the rows between rows 4 to 6 of the legs, leave a space of 2 sc between them; make 3 claws on each foot. On the arms make the claws between rows 4 to 6, also leave a space of 2 sc between them, the same amount of claws that you made on the feet also do on the hands.
— Tail :
Round 1 :
Use the line in color QUARRY (2mm needle). AM of 6 sc (6)
Round 2 :
Inc all around (12)
Round 4 :
[1 sc and 1 inc] 6x (18)
Round 6 :
[2 sc and 1 inc] 6x (24)
Round 8 :
[3 sc and 1 inc] 6x (30)
Round 10 :
[4 sc and 1 inc] 6x (36)
Round 11 :
sc over sc all around (36)
Round 12 :
[5 sc and 1 inc] 6x (42)
Round 13 :
sc over sc (42)
Round 14 :
[6 sc and 1 inc] 6x (48)
Round 15 :
sc over sc (48). Close with sl st and cut a larger thread for sewing. Sew the tail to the back of the body between rows 2 to 18. Stuff.
— Bowel - Girl Version :
Round 1 :
Use the line in color SWEETNESS (2.0 mm needle). Make 30 chains, close with sl st in the first chain (it will form a chain ring). Then make 1 sc for each ch (30)
Round 2-6 :
sc over sc (30). Close with sl st and finish the thread. Then double the loop and tie the thread in the color SWEETNESS in the middle of the loop and make about 6 turns, take the line to the back of the loop, tie a couple of knots and then finish the thread.
— Dress - Girl Version :
Round 1 :
Use the line in color SWEETNESS (3mm needle). Make 42 chains, close with sl st in the first chain (it will form a chain ring). Chain 2 up and crochet 1 hdc for each ch (42). Close with sl st in first ch counting from top to bottom.
Round 2 :
Go up ch 2 and do hdc on hdc all around (42). Close with sl st in first ch counting from top to bottom.
Round 3 :
Go up ch 3 and make 1 dc in the same place, make 2 dc for each dc all around (84). Change to color PINKISH, let's do the lace stitch 1 sl st and ch 2 until the end, finish off the thread.
Info :
Now attach the thread to the color SWEETNESS in any spaghetti strap on the first row (be careful that the seam is towards the back of the dress). Make 6 sc, go up 18 ch, skip 6 ch and make 1 sc for each ch, at the base of the skirt make 30 sc, go up 18 ch, skip 6 ch and make 1 sc for each ch, finish with 6 sc, close with sl st and tie off the thread.
Info :
HANDLE BAR: In the first strap we made of the dress, fasten the thread in PINK to the first sc after 6 ch, make the lace stitch: 1 sl st and 2 ch until the last sc on the strap, finish off the thread. Do the same thing in the second loop, but start in the first sc at the bottom of the loop.
Info :
After embroidering the spaghetti straps, place the dress on the hippopotamus, see the best position and distance of the straps. Take off the hippopotamus dress and place the ends of the straps inside the dress, position them and leave a space between one and the other, then with a tapestry needle sew a few stitches taking the strap and the dress (this seam is used to secure the strap and it doesn't leave the place, but if you want, you can add buttons).
This little Triceratops pair brings a touch of handmade charm to any shelf or nursery! 🧶
Follow the full pattern to crochet expressive faces, cute horns and sweet outfits with easy-to-follow rounds. ✨
Enjoy making these cuddly pals for gifts or your own collection — happy stitching! 😊