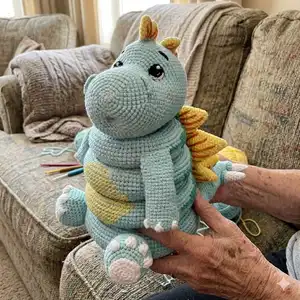
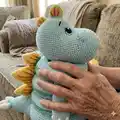
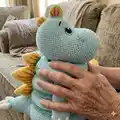
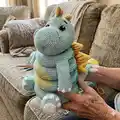
Make a lovable Stegosaurus amigurumi you can cherish or gift. This detailed pattern guides you through every round, color change and assembly step so you can create a sturdy, huggable dinosaur. Perfect for makers who enjoy shaping, decorative plates and small embroidered details. Follow the clear photos and stitch-by-stitch rounds to achieve a professional finish.
Progress Tracker
0% Complete
— Base :
Round 4 :
(1 sc; inc)*6 (18)
Round 7 :
(2 sc; inc)*6 (24)
Round 11 :
(3 sc; inc)*6 (30)
Round 16 :
(4 sc; inc)*6 (36)
Round 22 :
(5 sc; inc)*6 (42)
Round 29 :
(6 sc; inc)*6 (48)
Round 37 :
(7 sc; inc)*6 (54)
Round 46 :
(8 sc; inc)*6 (60)
Round 47 :
FLO (9 sc; inc)*6 (66)
Round 48 :
5 sc; inc; (10 sc; inc)*5; 5 sc (72)
Round 49 :
(11 sc; inc)*6 (78)
Round 50 :
6 sc; inc; (12 sc; inc)*5; 6 sc (84)
Round 51 :
(13 sc; inc)*6 (90)
Round 52 :
7 sc; inc; (14 sc; inc)*5; 7 sc (96)
Round 53 :
(15 sc; inc)*6 (102)
Round 54 :
8 sc; inc; (16 sc; inc)*5; 8 sc (108)
Round 55 :
(17 sc; inc)*6 (114)
Round 56-62 :
114 sc (114)
Round 63 :
(17 sc; dec)*6 (108)
Round 64 :
8 sc; dec; (16 sc; dec)*5; 8 sc (102)
Round 65 :
(15 sc; dec)*6 (96)
Round 66 :
7 sc; dec; (14 sc; dec)*5; 7 sc (90)
Round 67 :
(13 sc; dec)*6 (84)
Round 68 :
6 sc; dec; (12 sc; dec)*5; 6 sc (78)
Round 69 :
(11 sc; dec)*6 (72)
Round 70 :
5 sc; dec; (10 sc; dec)*5; 5 sc (66)
Round 71 :
(9 sc; dec)*6 (60)
Round 72 :
connect round 71 with round 47 (BLO) with 60 sc (60) fill with stuffing as you go, then continue to work in rounds.
Round 73 :
(8 sc; dec)*6 (54)
Round 74 :
(7 sc; dec)*6 (48)
Round 75 :
(6 sc; dec)*6 (42)
Round 76 :
(5 sc; dec)*6 (36)
Round 77 :
(4 sc; dec)*6 (30)
Round 78 :
(3 sc; dec)*6 (24)
Round 79 :
(2 sc; dec)*6 (18)
Round 80 :
(1 sc; dec)*6 (12)
Round 81 :
6 dec (6) cut the yarn, pull off hole, hide a tail.
— Legs :
Round 3 :
(1 sc; inc)*6 (18)
Round 4 :
(2 sc; inc)*6 (24)
Round 5 :
(3 sc; inc)*6 (30)
Round 6 :
(4 sc; inc)*6 (36)
Round 7 :
BLO (2 sc; inc)*4; 24 sc (40)
Round 8 :
(3 sc; inc)*4; 24 sc (44)
Round 9 :
3 sc; dec; (4 sc; inc)*2; 3 sc; dec; 24 sc(44)
Round 10 :
2 sc; dec; (4 sc; dec)*2; 2 sc; dec; 24 sc(40)
Round 11 :
3 sc; (3 sc; dec)*2; 27 sc (38)
Round 12 :
3 sc; (2 sc; dec)*2; 27 sc (36)
Round 14 :
(4 sc; dec)*6 (30)
Round 15 :
(3 sc; dec)*6 (24) fill with stuffing
Round 16 :
BLO (2 sc; dec)*6 (18)
Round 17 :
(1 sc; dec)*6 (12) close the hole, leave a tail for sewing
— NAILS :
NAILS (make 4 on each foot) :
With white yarn in one sc of the foot make (3 ch; 3 tr) and crochet them together, fasten off, cut the yarn, pull it through and tide a knot like in the pictures, then hide sticking yarn.
— Feet :
Info :
Make 2 feet with white yarn.
Round 3 :
(1 sc; inc)*6 (18)
Round 5 :
(2 sc; inc)*6 (24)
Info :
Sew feet to legs and legs to base like in the pictures (pin it before sewing, it really helps:)
— Large Ring :
Round 1 :
60 ch; slst in 1st ch (60)
Round 2 :
(9 sc; inc)*6 (66)
Round 3 :
5 sc; inc; (10 sc; inc)*5; 5 sc (72)
Round 4 :
(11 sc; inc)*6 (78)
Round 5 :
6 sc; inc; (12 sc; inc)*5; 6 sc (84)
Round 6 :
(13 sc; inc)*6 (90)
Round 7 :
7 sc; inc; (14 sc; inc)*5; 7 sc (96)
Round 8 :
(15 sc; inc)*6 (102)
Round 10 :
10 sc; change to green 32 sc; to light green 60 sc(102)
Round 11 :
5 sc; change to green 42 sc; to light green 55 sc(102)
Round 12 :
change to green; 52 sc; to light green 50 sc(102)
Round 13 :
5 sc; change to green 42 sc; to light green 55 sc(102)
Round 14 :
10 sc; change to green 32 sc; to light green 60 sc(102)
Round 16 :
(15 sc; dec)*6 (96)
Round 17 :
7 sc; dec; (14 sc; dec)*5; 7 sc (90)
Round 18 :
(13 sc; dec)*6 (84)
Round 19 :
6 sc; dec; (12 sc; dec)*5; 6 sc (78)
Round 20 :
(11 sc; dec)*6 (72)
Round 21 :
5 sc; dec; (10 sc; dec)*5; 5 sc (66)
Round 22 :
(9 sc; dec)*6 (60)
Info :
Sew round 22 with round 1, fill with stuffing as you go.
— Middle Ring :
Round 1 :
48 ch; slst in 1st ch (48)
Round 2 :
(7 sc; inc)*6 (54)
Round 3 :
4 sc; inc; (8 sc; inc)*5; 4 sc (60)
Round 4 :
(9 sc; inc)*6 (66)
Round 5 :
5 sc; inc; (10 sc; inc)*5; 5 sc (72)
Round 6 :
(11 sc; inc)*6 (78)
Round 7 :
6 sc; inc; (12 sc; inc)*5; 6 sc (84)
Round 8 :
(13 sc; inc)*6 (90)
Round 10 :
10 sc; change to green 26 sc; change to light green 54 sc (90)
Round 11 :
5 sc; change to green 36 sc; change to light green 49 sc (90)
Round 12 :
change to green 46 sc; change to light green 44 sc (90)
Round 13 :
5 sc; change to green 36 sc; change to light green 49 sc (90)
Round 14 :
10 sc; change to green 26 sc; change to light green 54 sc (90)
Round 16 :
(13 sc; dec)*6 (84)
Round 17 :
6 sc; dec; (12 sc; dec)*5; 6 sc (78)
Round 18 :
(11 sc; dec)*6 (72)
Round 19 :
5 sc; dec; (10 sc; dec)*5; 5 sc (66)
Round 20 :
(9 sc; dec)*6 (60)
Round 21 :
4 sc; dec; (8 sc; dec)*5; 4 sc (54)
Round 22 :
(7 sc; dec)*6 (48)
Info :
Sew round 22 with round 1, fill with stuffing as you go.
— Arms :
Info :
Make 2 arms with light green yarn.
Round 3 :
(1 sc; inc)*6 (18)
Round 4 :
(2 sc; inc)*6 (24)
Round 10 :
(10 sc; dec)*2 (22)
Round 16 :
(9 sc; dec)*2 (20)
Round 22 :
(8 sc; dec)*2 (18)
Round 23 :
18 sc (18) fill with a little bit of stuffing
Round 24 :
(7 sc; dec)*2 (16)
Round 25 :
Fold in half and make 8 sc, fasten off, leave long tail for sewing.
— Hand NAILS :
NAILS (make 3 on each hand) :
With white yarn in one sc of the hand make (2 ch; 2 dc) and crochet them together, fasten off, cut the yarn, pull it through and tide a knot the same way as we did with feet, then hide sticking yarn.
— Head :
Info :
With light green yarn. Insert safety eyes or sew crochet eyes 10 sc apart before closing.
Round 3 :
(1 sc; inc)*6 (18)
Round 4 :
(2 sc; inc)*6 (24)
Round 5 :
(3 sc; inc)*6 (30)
Round 6 :
(4 sc; inc)*6 (36)
Round 7 :
(5 sc; inc)*6 (42)
Round 8 :
(6 sc; inc)*6 (48)
Round 9 :
(7 sc; inc)*6 (54)
Round 12 :
2 sc; BLO 5 sc; 13 sc; BLO 5 sc; 29 sc (54)
Round 13 :
(8 sc; inc)*6 (60)
Round 19 :
9 sc; 10 inc; 41 sc (70)
Round 23 :
11 sc; (1 sc; inc)*8; 43 sc (78)
Round 25 :
53 sc; 18 ch (skip 18 sc); 7 sc (78)
Round 34 :
(11 sc; dec)*6 (72)
Round 36 :
(10 sc; dec)*6 (66)
Round 38 :
(9 sc; dec)*6 (60)
Round 39 :
(8 sc; dec)*6 (54)
Round 40 :
(7 sc; dec)*6 (48)
Round 41 :
(6 sc; dec)*6 (42)
Round 42 :
(5 sc; dec)*6 (36)
Round 43 :
(4 sc; dec)*6 (30)
Round 44 :
(3 sc; dec)*6 (24)
Round 45 :
(2 sc; dec)*6 (18)
Round 46 :
(1 sc; dec)*6 (12)
Round 47 :
6 dec (6) fasten off.
Info :
Insert safety eyes or sew crochet eyes 10 sc apart.
Info :
Now return to the hole that we left between rounds 24 and 25, continue to crochet in rounds:
Round 5 :
(4 sc; dec)*6 (30)
Round 8 :
(3 sc; dec)*6 (24)
Round 11 :
(2 sc; dec)*6 (18)
Round 13 :
(1 sc; dec)*6 (12)
Round 14 :
6 dec (6) fasten off, push it inside of the head.
— Nostrils :
Info :
Make 2 nostrils. In round 12 we left front loops, now crochet in these loops with light green yarn.
Row 1 :
1 sc; 3 inc; 1 sc (8) fasten off, weave in tails.
— Eyes :
Info :
Make 2 eyes with black yarn.
Round 2 :
6 inc (12) change to white color
Round 3 :
BLO 4 sl st (4) fasten off.
Info :
You can also add some personality for your Dino with needle sculpting of the face, using tips in the pictures, it's up to you.
— Tail :
Round 4 :
(2 inc; 4 sc)*2 (16)
Round 7 :
1 sc; 2 inc; 6 sc; 2 inc; 5 sc (20)
Round 10 :
2 sc; 2 inc; 8 sc; 2 inc; 6 sc (24)
Round 13 :
3 sc; 2 inc; 10 sc; 2 inc; 7 sc (28)
Round 16 :
4 sc; 2 inc; 12 sc; 2 inc; 8 sc (32)
Round 19 :
5 sc; 2 inc; 14 sc; 2 inc; 9 sc (36)
Round 22 :
6 sc; 2 inc; 16 sc; 2 inc; 10 sc (40)
Round 25 :
7 sc; 2 inc; 18 sc; 2 inc; 11 sc (44)
Round 28 :
8 sc; 2 inc; 20 sc; 2 inc; 12 sc (48)
Round 31 :
9 sc; 2 inc; 22 sc; 2 inc; 13 sc (52)
Round 34 :
10 sc; 2 inc; 24 sc; 2 inc; 14 sc (56)
Round 37 :
11 sc; 2 inc; 26 sc; 2 inc; 15 sc (60)
Round 40 :
12 sc; 2 inc; 28 sc; 2 inc; 16 sc (64) fill with stuffing
Round 41-42 :
64 sc (64) cut the yarn, leave a long tail for sewing
— Plates :
Info :
For the Stegosaurus we will need plates of four different sizes: large, medium, small and extra small. And spikes for the tail big and small. Fill them with only bits of stuffing. Embroider with red yarn stripes on them.
Large Plates (make 2) :
With yellow yarn Round 1. 6 sc in MR (6). Round 2. (inc; 2 sc)*2 (8). Round 3. (inc; 3 sc)*2 (10). Round 4. (inc; 4 sc)*2 (12). Round 5. (inc; 5 sc)*2 (14). Round 6. (inc; 6 sc)*2 (16). Round 7. (inc; 7 sc)*2 (18). Round 8. (inc; 8 sc)*2 (20). Round 9. (inc; 9 sc)*2 (22). Round 10. (inc; 10 sc)*2 (24). Round 11. (inc; 11 sc)*2 (26). Round 12. (inc; 12 sc)*2 (28). Round 13. (inc; 13 sc)*2 (30). Round 14-16. 30 sc (30). Round 17. (3 sc; dec)*6 (24). Round 18. (2 sc; dec)*6 (18). change to green color fold in half, close the hole with 9 sc, fasten off, leave long tail for sewing.
Medium Plates (make 4) :
With yellow yarn Round 1. 6 sc in MR (6). Round 2. (inc; 2 sc)*2 (8). Round 3. (inc; 3 sc)*2 (10). Round 4. (inc; 4 sc)*2 (12). Round 5. (inc; 5 sc)*2 (14). Round 6. (inc; 6 sc)*2 (16). Round 7. (inc; 7 sc)*2 (18). Round 8. (inc; 8 sc)*2 (20). Round 9. (inc; 9 sc)*2 (22). Round 10. (inc; 10 sc)*2 (24). Round 11-13. 24 sc (24). Round 14. (1 sc; dec)*8 (16) change to green color fold in half, close the hole with 8 sc, fasten off, leave long tail for sewing.
Small Plates (make 6) :
With yellow yarn Round 1. 6 sc in MR (6). Round 2. (inc; 2 sc)*2 (8). Round 3. (inc; 3 sc)*2 (10). Round 4. (inc; 4 sc)*2 (12). Round 5. (inc; 5 sc)*2 (14). Round 6. (inc; 6 sc)*2 (16). Round 7. (inc; 7 sc)*2 (18). Round 8-10. 18 sc (18). Round 11. (1 sc; dec)*6 (12) change to light green color fold in half, close the hole with 6 sc, fasten off, leave long tail for sewing.
Extra Small Plates (make 5) :
With yellow yarn Round 1. 6 sc in MR (6). Round 2. (inc; 2 sc)*2 (8). Round 3. (inc; 3 sc)*2 (10). Round 4. (inc; 4 sc)*2 (12). Round 5-6. 12 sc (12). Round 7. 6 dec (6) change to light green color fold in half, close the hole with 3 sc, fasten off, leave long tail for sewing.
— Big Spikes :
Big Spikes (make 2) :
With white yarn Round 1. 6 sc in MR (6). Round 2. 6 sc (6). Round 3. (1 sc; inc)*3 (9). Round 4-5. 9 sc (9). Round 6. (2 sc; inc)*3 (12). Round 7-11. 12 sc (12) change to light green color. Round 12. FLO (1 sc; inc)*6 (18). Round 13. 18 sc (18) fasten off.
— Small Spikes :
Small Spikes (make 2) :
With white yarn Round 1. 6 sc in MR (6). Round 2. 6 sc (6). Round 3. (1 sc; inc)*3 (9). Round 4-5. 9 sc (9). Round 6. (2 sc; inc)*3 (12). Round 7-10. 12 sc (12) change to light green color. Round 11. FLO (1 sc; inc)*6 (18). Round 12. 18 sc (18) fasten off.
This Stegosaurus amigurumi pattern is designed to be fun and rewarding for intermediate crocheters, with lots of sweet details and personalization options. Make a stackable, cuddly dino with decorative plates and embroidered stripes to make it truly yours. Enjoy sewing, sculpting and finishing touches that give this toy its delightful personality. 🧶🦕