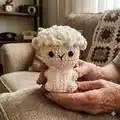
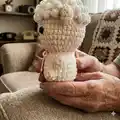
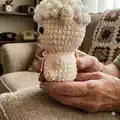
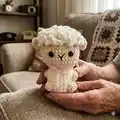
About This Sheep No Sew Amigurumi Pattern
This pattern creates a small, no-sew sheep amigurumi worked from the body up to the head with super bulky yarn. Youll switch colors for the face and add charming wool texture using bobble and loop techniques. The pattern includes clear round-by-round instructions and small accessory pieces like ears and embroidered nose.
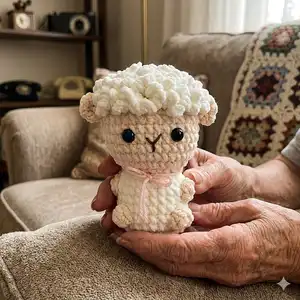
Perfect for beginners who want a quick, satisfying crochet project, the no-sew approach reduces finishing work. The pattern also includes variations used for cow and pig versions, showing flexible color and detail options.
Why You'll Love This Sheep No Sew Amigurumi Pattern
I absolutely love this pattern because it turns a few basic stitches into a delightful, tactile toy that feels cozy and handmade. I enjoy the no-sew construction since it makes finishing so much faster and cleaner. The textured wool detail is playful and forgiving, so even beginners get impressive results. I also love how easy it is to customize colors and facial expressions to make each little animal unique.
Switch Things Up
I love how easy it is to customize these little animals by changing colors and small details to create different personalities.
I often switch the main color to pastels for a softer nursery-friendly toy or to bold colors for playful accents.
If I want a larger or smaller toy, I change the yarn weight and hook size; bulky yarn with a larger hook makes a chunkier friend while thinner yarn creates cute minis.
I sometimes replace safety eyes with embroidered eyes for baby-safe toys or add eyelids and eyelashes for a sleepy look.
I enjoy adding tiny accessories like a crocheted scarf, bow, or a felt heart glued on with hot glue for a personal touch.
I occasionally embroider small freckles or a different mouth shape to change the expression and mood of the amigurumi.
For a textured effect I experiment with more bobble stitches or longer loops for fluffier wool on the sheep.
I like to create a matching set — sheep, cow, and pig — by keeping the same body size and only swapping colors and facial details.
I also try mixing yarn types: combine one fluffy yarn for wool areas and a smoother yarn for the face to create contrast.
Finally, I sometimes add a small bell or button as a collar charm to make the toy extra charming and gift-ready.
Common Mistakes & How to Fix Them
✗ Skipping stitch markers when working continuous rounds can cause you to lose track of the start of the round; place a stitch marker at the first stitch of every round and move it up as you work.
✗ Forgetting to switch yarn color exactly where indicated will misplace facial sections; change colors precisely at the listed row and tuck ends before continuing.
✗ Not stuffing gradually leads to uneven shaping and lumps; stuff little by little and shape as you go to maintain smooth curves.
✗ Working with inconsistent tension causes mismatched sizes across pieces; keep a steady, relaxed tension and check stitch counts regularly.
✗ Placing safety eyes too early or too close to the seam can cause misalignment; attach eyes at the recommended rows and spacing to match the photos.