🧢 Beautiful ✨ Detailed πŸ’ Adorable

Low Sew Spider Amigurumi Pattern

Low Sew Spider Amigurumi Pattern
4.5β˜… Rating
5-7 Hours Time Needed
2.8K Made This
βœ‚οΈ

Intermediate Level

Ideal for those with basic crochet experience, featuring slightly more advanced stitches and techniques to expand your skills.

⏱️

Weekend Treat

Takes 5-7 hours, making it an enjoyable project to finish over a couple of days.

🧸

Cute Companion

An adorable friend to cherish, handcrafted with love to bring comfort and joy for years to come.

About This Low Sew Spider Amigurumi Pattern

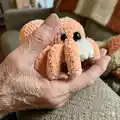
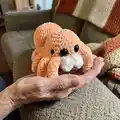
This pattern creates a soft, plush low-sew spider made with chunky plush yarn and fuzzy accent fangs. It uses minimal sewing β€” most parts are crocheted and attached as you work for a quick finish. The finished toy is cuddly, textured, and perfect as a gift or shelf companion.
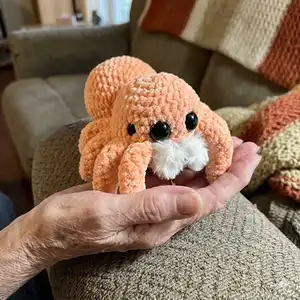
Low Sew Spider Amigurumi Pattern crochet pattern - detailed view of completed project

You will make eight stuffed legs, a rounded head, and a small body, then attach them with simple low-sew techniques. Eyes and fuzzy fangs add personality with a few finishing touches.

Why You'll Love This Low Sew Spider Amigurumi Pattern

I absolutely love this pattern because it transforms simple plush yarn into a charming, tactile creature with very little sewing. I enjoy how quickly the legs work up and how stuffing as you go keeps shaping easy and consistent. The fuzzy yarn fangs add a whimsical texture that makes the face so expressive. I also love that the low-sew attachment method makes assembly straightforward and satisfying.

Low Sew Spider Amigurumi Pattern step 1 - construction progress Low Sew Spider Amigurumi Pattern step 2 - assembly progress Low Sew Spider Amigurumi Pattern step 3 - details and accessories Low Sew Spider Amigurumi Pattern step 4 - final assembly and finishing

Switch Things Up

I love how easy it is to customize this pattern with different yarn colors; try pastels for a sweet look or neon brights for a playful twist.

I often swap the plush yarn for a tighter worsted weight and a smaller hook to create a firmer, smaller collectible version of the spider.

Make floppy, poseable legs by closing the leg ends with 3 sc as noted, or leave them open for stiffer legs that hold shape better.

I sometimes add a tiny wire inside each leg before stuffing to create posable limbs that can be shaped into playful positions.

Try different eye sizes and colors β€” large dark safety eyes give a cute look while smaller or colored eyes add character and whimsy.

For a unique mouth, embroider tiny details or add a small felt tongue instead of the fuzzy fangs for a different personality.

If you want a keychain mini, use thinner yarn and a smaller hook, make a smaller head and legs, and add a keyring loop to the top.

I like to experiment with patterned or variegated yarns for an interesting texture across the body and legs that makes each spider one-of-a-kind.

Consider making a family of spiders in graduated sizes using the same pattern but varying yarn weight and hook sizes to create a matched set.

When gifting, I sometimes add tiny accessories like a crocheted bow, hat, or mini scarf to create a themed spider for holidays or birthdays.

Common Mistakes & How to Fix Them

βœ— Skipping a stitch marker while working continuous rounds can cause lost count and uneven shaping; place a marker at the start of every round and move it each round to stay consistent. βœ— Not stuffing legs as you go results in flat or misshapen limbs; stuff gradually while crocheting the leg rounds so each section keeps its shape. βœ— Using the wrong hook for your chosen plush yarn changes the size and firmness of the toy; match hook size to the yarn recommendation (5 mm for Parfait, 6 mm for Sweet Snuggles Lite) and make a tension swatch if unsure. βœ— Failing to secure and knot leg tails can let legs come loose after assembly; stop and tie off or knot leg tails securely and weave them into the body before finishing. βœ— Placing eyes without checking spacing can make the face look unbalanced; hold the eyes in place and count stitches (place between rows 7-8 with 3 sts between center eyes) before securing.
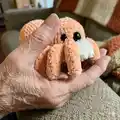
Low Sew Spider Amigurumi Pattern

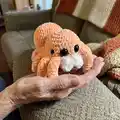
Make a cuddly, low-sew spider amigurumi using plush yarn and minimal sewing. This pattern guides you step-by-step so you can create a plush, poseable spider with fuzzy fangs and big safety eyes. Perfect for makers who love soft textures and a quick, satisfying sew-up. Follow the rounds closely and stuff as you go for best results.

Intermediate 5-7 Hours

Materials Needed for Low Sew Spider Amigurumi Pattern

β€” Main Fabric

  • 01
    Parfait chunky plush yarn - approximately 75 grams (main color)
  • 02
    Sweet Snuggles Lite (alternative plush yarn) - use with 6 mm hook if preferred
  • 03
    Small amount of fuzzy/eyelash yarn or accent yarn for fangs (small quantity)

β€” Tools Required

  • 01
    Crochet hook 5.0 mm (for Parfait chunky)
  • 02
    Crochet hook 6.0 mm (for Sweet Snuggles Lite alternative)
  • 03
    Polyfil stuffing
  • 04
    Darning/yarn needle
  • 05
    Safety eyes 20 mm (2 pieces)
  • 06
    Safety eyes 12 mm (2 pieces) for smaller outer eyes (optional)
  • 07
    Scissors
  • 08
    Stitch marker

Progress Tracker

0% Complete

β€” Supplies :

Infos :

Plush yarn of choice. I recommend parfait chunky or sweet snuggles lite. Small amount of fuzzy yarn or accent yarn for fangs. 5 mm hook for parfait. 6 mm hook for sweet snuggles lite. polyfil. darning needle. safety eyes: 20mm & 12mm. scissors. Yarn Usage: Parfait chunky - 75 grams. Finished size: Approximately 8".

Infos :

Please note this pattern is written in continuous rounds unless otherwise specified. A stitch marker is recommended.

β€” Abbreviations :

Infos :

mc - magic circle - or you can chain 2 and sc into second chain from hook if your yarn does not allow for a mc. sc - single crochet. inc - increase. dec - decrease. sts - stitches. sl st - slip stitch. ( ) - indicates how many stitches per round.

β€” Legs :

Info :

Legs: Make 8. Be sure to stuff the leg as you go.

Round 1 :

4 sc in mc (4)

Round 2 :

sc, (inc x3) (7)

Round 3-7 :

sc around (7)

Info :

Start Stuffing and continue as you go.

Round 8 :

2 sc, inc, 2 sc, dec (7)

Round 9-10 :

repeat round 8 (7)

Round 11 :

sc around (7)

Round 12 :

2 sc. (5 sts left unworked)

Info :

sl st, FO

Info :

*Note: if you would like floppy legs that can be easily posed. You can close the legs with 3 sc. This is an option and will make them move more. I like stiffer legs so I leave mine open.

β€” Fangs :

Info :

Fangs: Make 2 using fuzzy yarn. Leave a yarn tail on both ends because we tie them on later.

Fangs (P1) :

Chain 5, starting in second chain from hook sc 4.

β€” Head :

Info :

Head: we will be working from the top of the head down.

Round 1 :

9 sc in mc (9)

Round 2 :

inc x 9 (18)

Round 3 :

(2 sc, inc) x 6 (24)

Round 4 :

(3 sc, inc) x 6 (30)

Round 5 :

(4 sc, inc) x 6 (36)

Round 6 :

(5 sc, inc) x 6 (42)

Round 7-8 :

sc around (42)

Round 9 :

3 sc with first leg, go through the front and back sts of the leg then through the body as shown (3 sts per leg). Repeat till you have attached 4 legs, 7 sc (this is the front where the eyes will be placed), 3 sc with leg x4, sc 11. (42)

Round 10 :

sc around (42)

Info :

Stop and secure the leg tails with knots.

Info :

Attach eyes between row 7-8 above legs in the 7 st space. 3 sts between the center eyes. Smaller outer eyes are placed 2-3 sts back. Some testers liked to place the smaller eyes between rows 6-7.

Round 11 :

(5 sc, dec) x 6. (36)

Info :

Attach the fangs on row 8 below the eyes, 1-2 sts apart. Note they have a natural curve. Place them so they curve into the head. I just slip my yarn tail through and tie a knot on the inside.

Round 12 :

(4 sc, dec) x 6 (30)

Round 13 :

(3 sc, dec) x 6 (24)

Round 14 :

(2 sc, dec) x 6 (18)

Info :

STUFF

Round 15 :

dec x 9 (9)

Info :

sl st, FO

Info :

close.

β€” Body :

Round 1 :

6 sc in mc (6)

Round 2 :

inc x 6 (12)

Round 3 :

sc around (12)

Round 4 :

(sc, inc) x 6 (18)

Round 5 :

(2 sc, inc) x 6 (24)

Round 6 :

sc around (24)

Round 7 :

(3 sc, inc) x 6 (30)

Round 8 :

(4 sc, inc) x 6 (36)

Round 9 :

(5 sc, inc) x 6 (42)

Round 10-13 :

sc around (42)

Round 14 :

(5 sc, dec) x 6 (36)

Round 15 :

sc around (36)

Round 16 :

(4 sc, dec) x 6 (30)

Round 17 :

sc around (30)

Round 18 :

(3 sc dec) x 6 (24)

Info :

sl st & FO. Leave a long yarn tail for attaching.

Info :

STUFF

Info :

Attach the body 4 rounds from the center of head and 4 rounds from the bottom of the head. I attach my body right up against the legs.

Assembly Instructions

  • Attach legs during head round 9 by crocheting 3 sc through the front and back stitches of each leg and through the head so the legs point down when flipped; repeat until 4 legs are attached on each side (3 sts per leg).
  • Stop and secure the leg tails with knots after attaching all legs to prevent them from coming loose, then weave the tails inside the head/body.
  • Attach the body to the head aligning it 4 rounds from the center of the head and 4 rounds from the bottom of the head; sew the body right up against the legs for a snug fit.
  • Place and secure safety eyes between rows 7-8 above the legs in the 7-stitch space with 3 stitches between the center eyes; smaller outer eyes can be placed 2-3 stitches back or between rows 6-7 as preferred.
  • Attach fuzzy fangs on row 8 below the eyes, spaced 1-2 stitches apart, slipping the yarn tail through to the inside and tying a knot to secure the fangs so they curve naturally into the head.

Important Notes

  • πŸ’‘Use a stitch marker and work in continuous rounds unless otherwise specified to maintain correct stitch counts and shaping.
  • πŸ’‘Stuff parts as you go, especially the legs, to ensure even shaping; start stuffing early and add small amounts as you progress.
  • πŸ’‘Leave a long yarn tail on the body when fastening off to make attaching the body to the head easier and more secure.
  • πŸ’‘Secure and knot all tail ends for legs and fangs before finishing to prevent parts from loosening after play or handling.

You have now completed your Low Sew Spider β€” what a delightful, squishy creature you made! This plush little spider is perfect for gifting or keeping as a cozy companion. Keep experimenting with colors and eye sizes to make each spider unique. πŸ§Άβœ¨πŸ•·οΈ

You ask,

we answer.

FAQs

What size will the finished piece be?

The finished amigurumi measures approximately 8 inches long when using the recommended plush yarn and hook sizes.

Can I use different yarn weights for this pattern?

Yes, you can use different plush yarns, but the finished size and texture will change; use the recommended hook for your chosen yarn (5 mm for Parfait, 6 mm for Sweet Snuggles Lite).

Do I need prior crochet experience for this pattern?

This pattern is rated intermediate because it involves continuous rounds, low-sew leg attachment, and working with plush yarn; basic experience with single crochet, increases, and decreases is recommended.

How long does this project typically take to complete?

Most crocheters complete this project in about 5-7 hours, depending on experience, yarn choice, and how much time you spend on assembly.

How do I attach the fuzzy fangs securely?

Leave long tails on the fuzzy yarn fangs, place them on row 8 below the eyes, slip the tail through to the inside of the head and tie a secure knot before trimming and hiding the tail.