About This Jellyfish Crochet Amigurumi Pattern
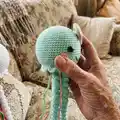
This pattern teaches you how to crochet a sweet jellyfish amigurumi from top of head to bottom of tentacle. It includes full head shaping, a decorative ridge, chain tentacles, curly tentacles, and cheek details. The instructions are written in continuous rounds with tips for assembly and finishing.
You will need worsted weight yarn, a 3.25 mm hook, and 18 mm safety eyes to complete the project. Helpful photos and assembly directions make finishing and positioning easy and clear.
Why You'll Love This Jellyfish Crochet Amigurumi Pattern
I absolutely love this pattern because it turns simple stitches into a cuddly, character-filled jellyfish. I enjoy the combination of round amigurumi shaping with playful curly tentacles that add tons of personality. The pattern lets me experiment with color and texture while staying compact and quick to make. I also love the clear assembly steps — they make finishing easy and satisfying.
Switch Things Up
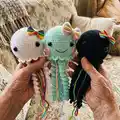
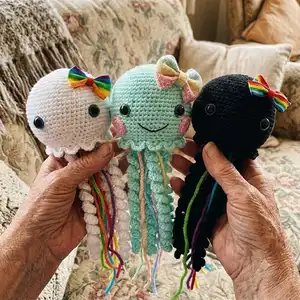
I love customizing the colors of the tentacles to make each jellyfish unique—try ombre shades or a rainbow of pastels for a whimsical look.
Change yarn weight and hook size to alter the finished size; a bulkier yarn gives you a chunky cuddle friend while finer yarn makes a delicate mini version.
I often mix textures by using a fuzzy or boucle yarn for just a few tentacles to add contrast and tactile interest.
Embroider different facial expressions to change personality—move the smile up or down, or make a surprised O for variety.
Use safety eyes for a polished look or embroider eyes for a baby-safe toy that is washable and durable.
Add tiny crocheted accessories like bows, flowers, or a tiny crown to personalize each jellyfish for a gift recipient.
Experiment with metallic or sparkly yarn for the ridge to give the head a subtle shimmer that catches the light.
Turn the chain tentacles into longer streamer-style lengths for a more dramatic mobile or wall hanging version.
I sometimes add a loop at the top to turn the jellyfish into an ornament or nursery mobile—just securely sew a yarn loop into the top of the head.
Try stuffing options: denser stuffing keeps the head firm while softer stuffing gives a squishier feel—adjust to your preference.
Common Mistakes & How to Fix Them
✗ Not placing safety eyes at the correct rounds; measure and mark the eye placement between rounds 17 and 18 leaving 11 stitches between them to ensure symmetry.
✗ Failing to use a stitch marker while working in continuous spirals; place a marker at the first stitch of each round to avoid losing track of round starts.
✗ Over or under stuffing the head which changes the final shape; stuff gradually, check shape often, and stop when the head is firm but flexible.
✗ Skipping BLO instructions for the ridge row which can alter the ridge placement; work the specified BLO (back loops only) round exactly where indicated for correct texture.
✗ Pulling tentacle chains too tight which shortens them; work chain tentacles with relaxed tension and leave a long tail for sewing to maintain length and flexibility.