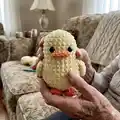
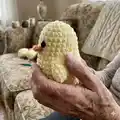
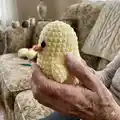
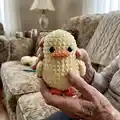
About This Duck No Sew Amigurumi Pattern
This pattern creates small no-sew ducks (yellow chick and mallard versions) and a rooster option using super bulky yarn. You crochet from the body up to the head, adding feet, beak and small details with minimal sewing. The instructions include rounds, legs, wings/comb and placement notes so you can assemble confidently.
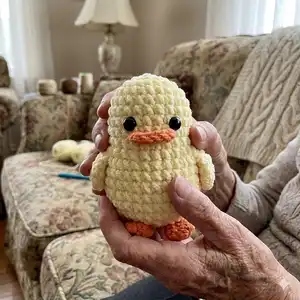
Includes simple shaping, color changes and small accessories for personality and charm. Photo references and clear round-by-round instructions help you follow along easily.
Why You'll Love This Duck No Sew Amigurumi Pattern
I absolutely love this pattern because it delivers a polished, cuddly amigurumi with very little sewing required. I enjoy how fast these take with super bulky yarn—results are instant and satisfying. The design balances simple rounds with little details like the beak and tiny feet that give personality. I also love that you can make multiple color variations (chick, mallard, rooster) from the same basic structure.
Switch Things Up
I love customizing these little birds by changing colors; try pastel shades for a nursery-friendly look or bright shades for playful characters.
You can make them smaller or larger by switching yarn weight and adjusting the hook; using a thinner yarn and smaller hook makes adorable mini versions.
I often embroider small freckles or eyebrows to give each bird a unique expression—experiment with placement before committing.
Swap safety eyes for embroidered eyes if you're making toys for very young children to keep them fully soft and safe.
For a posable version, insert thin wire into the leg pieces before stuffing to pose the feet; cover with stuffing and sew closed carefully.
Add tiny accessories like crocheted scarves, hats or a bow tie for seasonal or themed variations—they make great gifts.
Try textured yarns for a fluffier appearance, or use velvet-style super bulky for a plush, modern look.
I love making sets of three with coordinated colors—mix mallard, chick and rooster for a charming shelf display.
Change the beak shape by lengthening or shortening the speculum rows to tweak the character's smile.
Experiment with eye placement and spacing to create different personalities: closer eyes appear cuter, wider set eyes look more whimsical.
Common Mistakes & How to Fix Them
✗ Skipping stitch markers during increases and decreases can make the shaping go wrong; place a marker at the first stitch of each round to track progress and counts accurately.
✗ Forgetting to stuff at the correct stage causes lumps or a collapsed head; stuff gradually during the designated stuffing rounds and shape with small amounts at a time.
✗ Cutting the leg yarn before attaching can leave short tails; keep the leg yarn tail long and slip stitch into the body as instructed so the leg stays secure.
✗ Misplacing safety eyes will change expression and balance; follow the recommended row placement (eyes between specified rounds and stitches) and pin before securing.
✗ Working with too loose or too tight tension changes size and stitch counts; maintain consistent moderate tension when switching colors and doing surface details to keep stitch counts consistent.