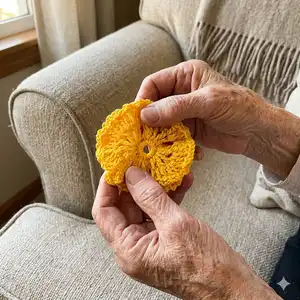
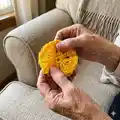
Create a charming bouquet of crocheted daisies and carnations with step-by-step photo guidance and clear stitch instructions. This pattern walks you through the magic ring centers, petal shaping, small button details and simple glue assembly for stems and sepals. You will love how quickly these delicate flowers come together and how beautiful they look arranged into a bouquet.
Progress Tracker
0% Complete
— Legend :
Info :
○ - magic ring. • - slip stitch (st). + - single crochet (sc). o - chain (ch). T - double crochet (dc).
— Daisy :
Round 1 :
CH 1, SC 16 in the magic ring
Info :
tighten the magic ring, ST in the first SC
Round 2 :
CH 3 from the first SC. CH 1. DC 1 in the first SC. CH 1. DC 1 in the second SC. CH 1. DC 1, CH 1, DC 1 in the third SC. repeat around according to photos.
Round 2 Additional :
DC 1 in the second SC. CH 1. DC 1, CH 1, DC 1 in the next chain. CH 1. DC 1 in the same chain. CH 1. DC 1 in the next DC. DC 1, CH 1, DC 1 in the next chain. CH 1. DC 1 in the next DC. repeat.
Round 3 :
ST in the third chain. CH 3 and continue shaping petals as shown in photos and repeat sequence to complete petal round.
— Central part of the daisy (yellow center) :
Round 1 :
CH 1, SC 8 in the magic ring
Info :
tighten the magic ring, ST in the first SC
Round 2 :
CH 1, SC 2 in the first SC (SC 16)
Round 2 Additional :
CH 1, SC 2 in the next SC and repeat around to make SC 16
Round 3 :
Repeat, SC 2 in each SC to form the raised round element (SC 8)
Round 3 Details :
ST in the first SC. CH 1, SC 1 in the first SC. Skip the second SC, SC 1 in the third SC. Skip the fourth SC, SC 1 in the fifth SC, repeat across the round. ST in the first SC.
Item Name (Button) :
get button. fasten and trim the edges of the yarn. apply glue to the back of the button.
— Assembly (daisy center + petals) :
Info :
glue the button in the center of the flower
Info :
all parts + glue, for a daisy, make the sepal the same color as the flower
Info :
apply glue in the hole of the flower
Info :
apply glue to the edge of the stem
Info :
put the stem into the hole and wait for hardening
Info :
put the sepal on the stem, apply glue to the sepal
Info :
and glue to the flower
Info :
for daisy, use a white sepal like the flower itself, because the green sepal can shine through the flower to the outside
Info :
apply glue to the narrower edge of the leaf and glue it to the stem
— The central part of the flower (green small disc) :
Round 1 :
magic ring; CH 1, SC 8 in the magic ring
Info :
tighten the magic ring, ST in the first SC
Round 2 :
CH 1, SC 2 in the first SC (SC 16)
Round 3 :
repeat, SC 2 in each SC (to increase evenly around)
Info :
ST in the first SC; get button; fasten and trim the edges of the yarn; apply glue to the back of the button
— Carnation :
Round 1 :
The carnation is made in the same way as the previous flower - daisy. For daisy, the first row began with CH 16, for carnation make CH 20 in the first row.
Info :
tighten the magic ring, ST in the first SC
Info :
and make the next two rows in the same way as you did the daisy
Item Name (Gathering) :
with the help of a needle and yarn, pull the round element into a bundle (for the instructions I'll use the green color of the yarn in the needle, but actually use the same color as the carnation)
Gathering Technique :
Pass the needle with yarn behind the DC of the second row as follows: pass the needle under the bottom of the first DC, pass the needle above the second DC, pass the needle under the bottom of the next DC, pass the needle above the next DC. In the same way, pass the entire row to the starting point.
Finish :
pull the yarn by two edges and tie a knot, fasten and trim the edges of the yarn
Finish :
open the flower, apply glue inside and close, pressing with your fingers until the glue hardens
— Final assembly and bouquet :
Info :
apply glue in the hole of the flower and on the edge of the stem, insert the stem into the hole and wait for the glue to harden
Info :
put the sepal on the stem, apply glue and glue it to the flower
Info :
apply glue to the narrow edge of the leaf and glue it to the stem
Assembly :
Fold all the flowers included in the bouquet (in my case it is 32 pieces), align the edges of the stems and wind a sufficient amount of yarn on the bundle. Fasten the edges of the yarn with glue.
This cheerful bouquet pattern brings quick-to-make daisies and ruffled carnations to life in delicate cotton thread. Perfect for gifts, home decor, or a thoughtful handmade bouquet to brighten any room. Try different colorways to create springtime arrangements or a colorful everlasting bouquet. 🌼🌿