๐Ÿงถ Beautiful โœจ Detailed ๐Ÿ’ Adorable

Crochet Cactus Pillow Pattern

Crochet Cactus Pillow Pattern
4.3โ˜… Rating
5-7 Hours Time Needed
3.8K Made This
โœ‚๏ธ

Intermediate Level

Ideal for those with basic crochet experience, featuring slightly more advanced stitches and techniques to expand your skills.

โฑ๏ธ

Weekend Treat

Takes 5-7 hours, making it an enjoyable project to finish over a couple of days.

๐Ÿก

Cozy Accent

A warm touch for your space that transforms ordinary corners into inviting nooks filled with handmade charm.

About This Crochet Cactus Pillow Pattern

This pattern creates a stuffed crochet cactus pillow with textured bobble rows and fitted arms for a dimensional look. It is worked flat in rows and seamed together to create a pillow you can stuff and display. The pattern includes a simple rolled flower embellishment for a pretty finishing touch.

Crochet Cactus Pillow Pattern crochet pattern - detailed view of completed project

Written for sport or worsted weight cotton yarn, the instructions are clear and photo-referenced. The finished pillow measures approximately 12 inches tall when using the recommended materials.

Why You'll Love This Crochet Cactus Pillow Pattern

I absolutely love this pattern because it turns simple stitches into charming texture using bobble rows and half double crochet shaping. I enjoy how quickly the pieces grow when worked flat, so you get satisfying progress on each sitting. The finished pillow is both decorative and useful, making it a perfect handmade gift. I also love the rolled flower embellishment โ€” it adds personality with just a few stitches.

Crochet Cactus Pillow Pattern step 1 - construction progress Crochet Cactus Pillow Pattern step 2 - assembly progress Crochet Cactus Pillow Pattern step 3 - details and accessories Crochet Cactus Pillow Pattern step 4 - final assembly and finishing

Switch Things Up

I love changing up the yarn color to create different moods; try a sage green for a neutral look or a bright lime for a playful accent.

You can make a smaller or larger pillow by changing yarn weight and hook size โ€” bulky yarn and a larger hook gives you a chunkier, quicker pillow.

I often add embroidered details or use contrasting yarn to outline the bobble columns for added definition and interest.

Swap the cotton for an acrylic worsted if you want a softer, squishier pillow with less stitch definition.

Try making a matching set in varying sizes to create a cute cactus family for display on a shelf or sofa.

Replace the rolled flower with a felt bloom or a pompom for a different texture and easier attachment options.

Experiment with placement of the arms โ€” higher or lower โ€” to give your cactus different silhouettes and personality.

If you want a weighted base, insert a small zippered pouch with beads inside the stuffing to help the pillow sit upright on a couch.

I also like to stitch a small loop at the top back so the pillow can be hung as a wall accent if desired.

For extra durability, reinforce seams with a mattress stitch after slip stitching to keep the edges tidy and secure during use.

Common Mistakes & How to Fix Them

โœ— Not counting stitches at the end of each row can cause the edges to become uneven; recount at the end of every row especially after increase/decrease sections to maintain correct stitch counts. โœ— Skipping the bobble tension check can create inconsistent bobbles across rows; practice a bobble on a scrap and keep that section a little tighter as suggested to match the pattern. โœ— Failing to mirror the arm pieces will make the arms not line up when sewing; follow the mirror instructions carefully and lay pieces right sides together to check symmetry before stitching. โœ— Forgetting to leave the 3 inch gap when slip stitching the pieces together prevents turning and stuffing; leave the gap and then use it to flip the piece right side out and stuff before final closure.

Crochet Cactus Pillow Pattern

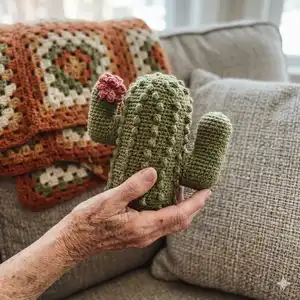
Create a charming crochet cactus pillow that doubles as a cuddly decor piece for your couch or nursery. This pattern uses textured bobble rows and simple shaping to build a plush cactus with arms and a pretty rolled flower. Youll get clear instructions, materials list, and assembly steps so you can finish a sweet pillow in a few sessions.

Intermediate 5-7 Hours

Materials Needed for Crochet Cactus Pillow Pattern

โ€” Main Fabric

  • 01
    2 skeins Sage Green 'I LOVE This Cotton' (cotton yarn) for main cactus body
  • 02
    1 partial skein 'Bruschetta I Love This Yarn' Cotton for the flower
  • 03
    Poly Fil stuffing for pillow filling, enough to stuff a 12 inch tall pillow
  • 04
    Suggested: Worsted or Sport weight yarn (pattern tested with 'I Love This Cotton')

โ€” Tools Required

  • 01
    Crochet hook size F (3.5 mm)
  • 02
    Poly Fil stuffing
  • 03
    Yarn sewing needle
  • 04
    Stitch markers (optional)

Progress Tracker

0% Complete

โ€” Materials :

Info :

Size F (3.5 mm) Crochet hook. Poly Fil stuffing. 2 skeins Sage Green I LOVE This Cotton. 1 partial skein Bruschetta I Love This Yarn Cotton. Yarn sewing needle. Stitch markers (optional).

โ€” Approximate size :

Info :

12 inches tall

โ€” Stitches Used :

Info :

Ch - Chain. Sc - single crochet. Hdc - half double crochet. Hdc2tog - half double crochet 2 together. Bobble stitch: Step 1. *Yarn over, insert hook into stitch and pull up a loop. Yarn over, pull through two loops.* Repeat 3 times total. You should have a total of 4 loops on your hook. Step 2. Yarn over, pull through all 4 loops at once. It helps to keep this part tighter than the rest.

โ€” Pattern Notes :

Info :

This cactus crochets up quickly and easily! It's the perfect on the go project because the whole thing is crochet in one color. The pattern increases are easy to fall into a rhythm with and soon you will be whipping through this project with little reference to the pattern. The bobbles do not happen on increase rows, making it easy to only have to keep track of 1 different stitch on these rows. When you go to crochet the arms of the cactus, make sure that you pay attention to make the front and back mirror images! Otherwise when you go to sew them up the arms will not correspond correctly.

โ€” Main body of the cactus :

Info :

Make 2

Round 1 :

Row 1. Ch 41, hdc in 2nd ch from the hook and in next 38 ch, hdc 6 in the last stitch, moving to work along that back side of the ch, hdc 39. Ch 1, turn.

Round 2 :

Row 2. Hdc 39, 2 hdc in next 6 st, hdc 39. Ch1, turn.

Round 3 :

Row 3. Bobble row: sc 2, bobble [sc 3, bobble] repeat around to last 3 st, sc 3. Ch1, turn.

Round 4 :

Row 4. Hdc 39, [hdc 2 in next st, hdc 1] 6 times, hdc 39. Ch1, turn.

Round 5 :

Row 5. Hdc 39, [hdc 2 in next st, hdc 2] 6 times, hdc 39. Ch1, turn.

Round 6 :

Row 6. Hdc 39 [hdc 2 in next st, hdc 3] 6 times, hdc 39. Ch1, turn.

Round 7 :

Row 7. Bobble row: sc 2, bobble [sc 3, bobble] repeat around to last 5 st, sc 3, bobble, sc 1. Ch1, turn.

Round 8 :

Row 8. Hdc 39 [hdc 2 in next st, hdc 4] 6 times, hdc 39. Ch1, turn.

Round 9 :

Row 9. Hdc 39 [hdc 2 in next st, hdc 5] 6 times, hdc 39. Ch1, turn.

Round 10 :

Row 10. Hdc 39 [hdc 2 in next st, hdc 6] 6 times, hdc 39. Ch1, turn.

Round 11 :

Row 11. Bobble row: sc 2, bobble [sc 3, bobble] repeat around to last 3 st, sc 3. Finish off.

โ€” Front side Lower Arm :

Info :

With the right side facing, on the right side of the cacti, count 15 stitches up from the bottom, join your yarn in the 15th st. See the stitch marker in the picture on the top right.

Round 1 :

Row 1. Hdc 14. Ch1 turn.

Round 2-11 :

Row 2-11. Repeat row 1

Round 12 :

Row 12. Turn the cacti to work along the row ends. Hdc 14 along the raw edge. Ch1, turn.

Round 13-20 :

Row 13-20. Hdc 14. Ch1 turn.

Round 21 :

Row 21. Hdc2tog, hdc 10, hdc2tog. Ch1, turn.

Round 22 :

Row 22. Hdc2tog, hdc 8, hdc2tog. Ch1, turn.

Round 23 :

Row 23. Hdc2tog, hdc 6, hdc2tog. Ch1, turn.

Round 24 :

Finish off.

โ€” Front side Upper Arm :

Info :

With the wrong side facing, on the right side, count 27 st up from the bottom, join your yarn in the 27th st.

Round 1 :

Row 1. Ch1, Hdc 12. Ch1 turn.

Round 2-9 :

Row 2-9. Repeat row 1

Round 10 :

Row 10. Turn the cacti to work along the row ends. Hdc 12 along the raw edge. Ch1, turn.

Round 11-15 :

Row 11-15. Hdc 12. Ch1 turn.

Round 16 :

Row 16. Hdc2tog, hdc 8, hdc2tog. Ch1, turn.

Round 17 :

Row 17. Hdc2tog, hdc6, hdc2tog. Ch1, turn.

Round 18 :

Row 18. Hdc2tog, hdc 4, hdc2tog. Ch1, turn.

Round 19 :

Finish off.

Info :

You will now mirror the arms for the 2nd Cactus side so that when you go to put the right sides together and sew it up, the arms match!

โ€” Back side Lower Arm :

Info :

With the wrong side facing, on the right hand side, count 15 st up from the bottom, join your yarn in the 15th st.

Round 1 :

Row 1. Hdc 14. Ch1 turn.

Round 2-11 :

Row 2-11. Repeat row 1

Round 12 :

Row 12. Turn the cacti to work along the row ends. Hdc 14 along the raw edge. Ch1, turn.

Round 13-20 :

Row 13-20. Hdc 14. Ch1 turn.

Round 21 :

Row 21. Hdc2tog, hdc 10, hdc2tog. Ch1, turn.

Round 22 :

Row 22. Hdc2tog, hdc 8, hdc2tog. Ch1, turn.

Round 23 :

Row 23. Hdc2tog, hdc6, hdc2tog. Ch1, turn.

Round 24 :

Finish off.

โ€” Back side Upper Arm :

Info :

With the right side facing, on the right hand side, count 27 st up from the bottom, join your yarn in the 27th st.

Round 1 :

Row 1. Ch1, Hdc 12. Ch1 turn.

Round 2-9 :

Row 2-9. Repeat row 1

Round 10 :

Row 10. Turn the cacti to work along the row ends. Hdc 12 along the raw edge. Ch1, turn.

Round 11-15 :

Row 11-15. Hdc 12. Ch1 turn.

Round 16 :

Row 16. Hdc2tog, hdc 8, hdc2tog. Ch1, turn.

Round 17 :

Row 17. Hdc2tog, hdc6, hdc2tog. Ch1, turn.

Round 18 :

Row 18. Hdc2tog, hdc 4, hdc2tog. Ch1, turn.

Round 19 :

Finish off.

โ€” Assembly :

Info :

Place right sides together and slp stitch through both layers all the way around, starting on the bottom. Be sure to leave about a 3 inch gap while slp stitching the pieces together so that you can flip it right side out again and then stuff it.

Info :

Stuff the cactus and sew up the hole on the bottom.

โ€” Flower :

Round 1 :

Ch 50, sc in 2nd ch from the hook, 3 dc in the next ch, [sc, 3 dc in the next ch] to the end. Your flower will begin to twist on its own. Cut your yarn leaving a long tail to sew the flower together and attach it to the cactus.

Round 2 :

Next you're going to roll your flower by gently wrapping the petals around each other starting at the center. Sew securely together by going through all the rows on the back a couple times.

Info :

Sew the flower securely onto the top cactus arm. Weave in your ends!

Assembly Instructions

  • Place right sides together and slip stitch through both layers all the way around, starting on the bottom, leaving about a 3 inch gap for turning and stuffing.
  • After turning the piece right side out through the gap, stuff the cactus firmly but not overly tight to keep the shape, distributing stuffing evenly.
  • Sew up the remaining opening on the bottom with a yarn needle and mattress or whipstitch for a neat finish.
  • Roll the flower strip into a rose shape, sew through the rows on the back a couple times to secure, then sew the flower onto the top cactus arm and weave in ends.

Important Notes

  • ๐Ÿ’กUse stitch markers or a visual marker to help locate join points for the arms and row counts during construction.
  • ๐Ÿ’กStuff the pillow evenly and moderately; overstuffing will distort the shape while understuffing will not give enough structure.
  • ๐Ÿ’กMirror the arm pieces for the second cactus side so the arms align correctly when the right sides are joined and sewn.

This crochet cactus pillow is a cozy, textured accent that adds handmade charm to any room. It uses bobble stitch rows and simple shaping to create delightful texture and dimension. Make one for your couch, a gift, or as a whimsical decorative pillow for a nursery. ๐ŸŒต๐Ÿงถ

You ask,

we answer.

FAQs

What size will the finished piece be?

The finished pillow measures approximately 12 inches tall when using the recommended yarn and hook size.

Can I use different yarn weights for this pattern?

Yes, you can use different yarn weights, but this will affect the final size. If you choose a heavier yarn, use a larger hook and expect a larger pillow; adjust stuffing accordingly.

Do I need prior crochet experience for this pattern?

This pattern is rated intermediate due to bobble stitches and shaping; basic knowledge of hdc, decreases, and working in rows is recommended.

How long does this project typically take to complete?

Most crocheters complete this project in 5-7 hours, though time may vary based on experience level and working pace.

How do I attach the rolled flower securely?

After cutting a long tail, roll the crocheted strip into a flower and stitch through the back rows a few times to secure, then sew the flower onto the top arm and weave in the ends.