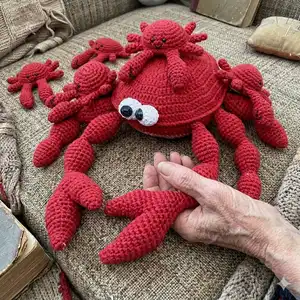
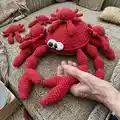
🧢 Beautiful ✨ Detailed πŸ’ Adorable

Crab Memory Game Amigurumi Pattern

Crab Memory Game Amigurumi Pattern
4.9β˜… Rating
12-15 Hours Time Needed
2.3K Made This
βœ‚οΈ

Beginner Friendly Level

Perfect for those just starting their crochet journey, with clear instructions and simple techniques

⏱️

Multi-Day Project

A rewarding 12+ hour journeyβ€”perfect for dedicated crafters who love detailed work.

🧸

Cute Companion

An adorable friend to cherish, handcrafted with love to bring comfort and joy for years to come.

About This Crab Memory Game Amigurumi Pattern

This pattern teaches you how to crochet a large mother crab and ten baby crabs using amigurumi techniques. It includes step-by-step rounds for each component, photos, and crochet charts to guide you. The designs are simple, repeatable and designed with beginners in mind.

Crab Memory Game Amigurumi Pattern crochet pattern - detailed view of completed project

You will work with basic crochet stitches, magic rings, and simple assembly to complete charming, tactile crab toys. The finished set makes a lovely memory game or decorative family of crabs.

Why You'll Love This Crab Memory Game Amigurumi Pattern

I absolutely love this pattern because it turns simple stitches into a delightful family of crabs that kids and adults both enjoy. I enjoy how quickly the baby crabs come togetherβ€”each one feels like a tiny victory. The mother crab is wonderfully sculptural and rewarding to assemble, giving a great sense of completion. I also love that the pattern is beginner-friendly yet produces professional-looking results that make perfect gifts.

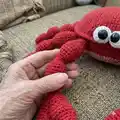
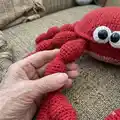
Crab Memory Game Amigurumi Pattern step 1 - construction progress Crab Memory Game Amigurumi Pattern step 2 - assembly progress Crab Memory Game Amigurumi Pattern step 3 - details and accessories Crab Memory Game Amigurumi Pattern step 4 - final assembly and finishing

Switch Things Up

I love experimenting with color combinations for the baby crabs; try using different bright colors for the inner oval to make each pair unique.

If you want a chunkier mum crab use a bulkier yarn and a larger hook β€” this will create a plush, oversized version ideal for cuddling.

To make keychains from the baby crabs, work with thinner yarn and a smaller hook and add a keyring to the assembly tail before closing.

I sometimes embroider extra facial expressions using different mouth shapes to give each crab a personality; try a smile, a surprised O, or a wavy grin.

For a more durable toy for young children, embroider the eyes instead of adding safety eyes or use sew-on buttons placed securely with backing.

I like adding a tiny felt accessory like a bow or a hat to a few babies to create special pieces that stand out during the memory game.

If you prefer less stuffing, reduce the amount of filling for flatter legs and a more floppy look, which can be fun for stacking and play.

To create a beach-themed set, use tan or sand-coloured yarn for the base mat and scatter the crabs on top for display or play.

Want to speed up production? Make multiple baby crab parts in assembly-line mode: crochet all bottoms, then all tops, then all legs, then join β€” it saves a lot of time.

I enjoy customizing sizes by changing hook and yarn: thinner yarn and smaller hook for miniature sets, and thicker yarn and larger hook for a statement mum crab.

Common Mistakes & How to Fix Them

βœ— Skipping stitch markers during rounds can make it hard to find the start of a round; place a marker at the first stitch of each round to keep your count accurate. βœ— Forgetting that beginning chains do not count as a stitch can change your stitch totals; always follow the pattern notes and count actual stitches at the end of each round. βœ— Stuffing unevenly will cause lumps or flat spots in legs or body; stuff a little at a time and shape as you go for a smooth finish. βœ— Attaching eyes too early or in the wrong round will misplace facial placement; follow the guidance for which rounds to place safety eyes and check spacing before securing.

Crab Memory Game Amigurumi Pattern

Make a charming mother crab and ten baby crabs with this beginner-friendly crochet pattern. You will enjoy simple, repeatable rounds and clear assembly steps to create an engaging memory game set. The pattern uses standard US crochet terms and includes full instructions for bodies, legs, eyes and finishing. Perfect for gifting, playtime, or a colorful handmade project you can complete over several sessions.

Beginner Friendly 12-15 Hours

Materials Needed for Crab Memory Game Amigurumi Pattern

β€” Main Fabric

  • 01
    5 ply, 100% cotton - approx 10g for pink color (used for mum bottom center)
  • 02
    4 ply, 100% cotton - approx 250g Dark Red or Maroon for main crab color
  • 03
    Small amounts (2 yards from 5 different colors) - assorted for baby crab centers
  • 04
    Approx 5 g black yarn for embroidered mouth and details
  • 05
    Approx 5 g white yarn for eyes (4 ply white yarn) and small details

β€” Tools Required

  • 01
    Crochet hook size 3.00 mm
  • 02
    Crochet hook size 3.5 mm
  • 03
    Safety eyes 15 mm (1 pair) for mum
  • 04
    Safety eyes 4 mm (10 pairs) for baby crabs
  • 05
    Scissors
  • 06
    Tapestry needle for sewing
  • 07
    Stitch marker
  • 08
    Polyester fiber filling
  • 09
    1 cm button (for mum bottom)
  • 10
    Pins for assembly (optional)

Progress Tracker

0% Complete

β€” Instructions for baby crabs :

Bottom part of the body :

Bottom part of the body - Make 10 in 5 different colors. (2 crabs from each color) β€’ Starting with any random color β€’ Make 6 foundation chs β€’ Work from the 2nd ch β€’ 3.5 mm hook

Rnd 1 :

1 sc inc. 3 sc.1 sc inc. Now work into the other side of the chs. 1 sc inc. 3 sc. 1 sc inc (14)

Rnd 2 :

2 sc inc. 3 sc. 4 sc inc. 3 sc. 2 sc inc (22)

Infos :

Change the color into Dark Red

Rnd 3 :

22 sc (22)

Rnd 4 :

(1 sc, 1 sc inc)x11 (33)

Rnd 5 :

33 sc (33)

Info :

Fasten off.

β€” Top part of the body :

Top part of the body - Make 10 Dark red β€’ Make 6 foundation chs β€’ Work from the 2nd ch β€’ 3.5 mm hook

Rnd 1 :

1 sc inc. 3 sc.1 sc inc. Now work into the other side of the chs. 1 sc inc. 3 sc. 1 sc inc (14)

Rnd 2 :

2 sc inc. 3 sc. 4 sc inc. 3 sc. 2 sc inc (22)

Rnd 3 :

22 sc (22)

Rnd 4 :

(1 sc, 1 sc inc)x11 (33)

Rnd 5 to 7 :

33 sc (33)

Info :

Fasten off.

Info :

Attach safety eyes (4mm) between rnd 4 and 5. 3 sts in between.

Info :

Embroider the mouth with black color on rnd 6.

β€” Let's join top and bottom parts together :

Insert the hook into the st in the last rnd (from top part to bottom part) and attach the dark red yarn with a sl st. Work into both parts together. 1 sl st to every st. Before you complete the round fill inside.

β€” Small legs :

Small legs - Make 60 in Dark red β€’ Work into a magic ring β€’ 3.5 mm hook

Rnd 1 :

5 sc into the magic ring (05)

Rnd 2 to 5 :

5 sc (05)

Info :

Fasten off. Leave the tail.

β€” Large front legs :

Large front legs - Make 20 in Dark red β€’ Work into a magic ring β€’ 3.5 mm hook

Rnd 1 :

6 sc into the magic ring (06)

Rnd 2 :

2 sc inc. 4 sc (08)

Rnd 3 :

8 sc (08)

Rnd 4 :

4 sc inc. 4 sc (12)

Rnd 5 to 7 :

12 sc (12)

Rnd 8 :

2 sc. 2 inv sc dec. 6 sc. (10)

Rnd 9 :

2 sc. 1 inv sc dec. 6 sc (09)

Rnd 10 :

1 inv sc dec. 1 sc. 1 inv sc dec. 4 sc (07)

Rnd 11 to 14 :

7 sc (07)

Info :

Fasten off. Leave the tail.

Info :

Embroider V shape in the inner side of the leg.

β€” Let's join legs :

Join all legs into the bottom part of the body.

β€” Eyes :

Eyes - Make 2 in 4 ply White yarn β€’ Work into a magic ring β€’ 3.5 mm hook

Rnd 1 :

6 sc into the magic ring (06)

Rnd 2 :

6 sc inc (12)

Rnd 3 to 5 :

12 sc (12)

Info :

Attach safety eyes (15mm) between rnd 3 and 4.

Rnd 6 :

6 inv sc dec (06)

Info :

Fasten off. Close the open. Attach on the top part

β€” Instructions for mum crabs :

β€” Bottom :

β€’ Starting with 5 ply pink color yarn β€’ Make a magic ring. ch 3. β€’ 3 mm hook

Rnd 1 :

12 dc into the magic ring (Total 12 sts)

Info :

Close the magic ring. Sl st to the top of the 1st dc.

Rnd 2 :

ch 3. 1 dc inc to every st. Sl st to the top of the 1st dc. (Total 24 sts)

Rnd 3 :

ch 3. *1 dc, 1 dc inc**. Rep from * to ** for another 11 times. Sl st to the top of the 1st dc. (Total 36 sts)

Rnd 4 :

ch 3. *2 dc, 1 dc inc**. Rep from * to ** for another 11 times. Sl st to the top of the 1st dc. (Total 48 sts)

Rnd 5 :

ch 3. *3 dc, 1 dc inc**. Rep from * to ** for another 11 times. Sl st to the top of the 1st dc. (Total 60 sts)

Rnd 6 :

ch 3. *4 dc, 1 dc inc**. Rep from * to ** for another 11 times. Sl st to the top of the 1st dc. (Total 72 sts)

Rnd 7 :

ch 3. *5 dc, 1 dc inc**. Rep from * to ** for another 11 times. Sl st to the top of the 1st dc. (Total 84 sts)

Info :

Change the yarn into 4 ply Dark red

Rnd 8 :

ch 3. *6 dc, 1 dc inc**. Rep from * to ** for another 11 times. Sl st to the top of the 1st dc. (Total 96 sts)

Rnd 9 :

ch 3. *7 dc, 1 dc inc**. Rep from * to ** for another 11 times. Sl st to the top of the 1st dc. (Total 108 sts)

Info :

Fasten off.

β€” Top :

β€’ Starting with 4 ply Dark Red color yarn β€’ Make a magic ring. ch 3. β€’ 3 mm hook

Rnd 1 :

12 dc into the magic ring (Total 12 sts)

Info :

Close the magic ring. Sl st to the top of the 1st dc.

Rnd 2 :

ch 3. 1 dc inc to every st. Sl st to the top of the 1st dc. (Total 24 sts)

Rnd 3 :

ch 3. *1 dc, 1 dc inc**. Rep from * to ** for another 11 times. Sl st to the top of the 1st dc. (Total 36 sts)

Rnd 4 :

ch 3. *2 dc, 1 dc inc**. Rep from * to ** for another 11 times. Sl st to the top of the 1st dc. (Total 48 sts)

Rnd 5 :

ch 3. *3 dc, 1 dc inc**. Rep from * to ** for another 11 times. Sl st to the top of the 1st dc. (Total 60 sts)

Rnd 6 :

ch 3. *4 dc, 1 dc inc**. Rep from * to ** for another 11 times. Sl st to the top of the 1st dc. (Total 72 sts)

Rnd 7 :

ch 3. *5 dc, 1 dc inc**. Rep from * to ** for another 11 times. Sl st to the top of the 1st dc. (Total 84 sts)

Rnd 8 :

ch 3. *6 dc, 1 dc inc**. Rep from * to ** for another 11 times. Sl st to the top of the 1st dc. (Total 96 sts)

Rnd 9 :

ch 3. *7 dc, 1 dc inc**. Rep from * to ** for another 11 times. Sl st to the top of the 1st dc. (Total 108 sts)

Info :

Fasten off.

β€” LetΒ΄s join top and bottom parts together :

Insert the hook into the st in the last rnd (from top part to bottom part) and attach the dark red yarn with a sl st. ch 1. Work into both parts together. 1 sc to every st for next 81 st. Now work into the top part only. 13 sl st. ch 8. 14 sl st. Fasten off.

β€” Small legs :

Small legs - Make 6 in Dark red β€’ Work into a magic ring β€’ 3.5 mm hook

Rnd 1 :

6 sc into the magic ring (06)

Rnd 2 :

6 sc (06)

Rnd 3 :

(1 sc , 1 sc inc)x3 (09)

Rnd 4 :

9 sc (09)

Rnd 5 :

(2 sc , 1 sc inc)x3 (12)

Rnd 6 and 7 :

12 sc (12)

Rnd 8 :

(2 sc , 1 inv sc dec)x3 (09)

Rnd 9 and 10 :

9 sc (09)

Rnd 11 :

(2 sc , 1 sc inc)x3 (12)

Rnd 12 :

(3 sc , 1 sc inc)x3 (15)

Rnd 13 :

(4 sc , 1 sc inc)x3 (18)

Rnd 14 to 16 :

18 sc (18)

Rnd 17 :

(4 sc , 1 inv sc dec)x3 (15)

Rnd 18 :

(3 sc , 1 inv sc dec)x3 (12)

Rnd 19 :

(2 sc , 1 inv sc dec)x3 (09)

Rnd 20 and 21 :

09 sc (09)

Info :

Rep again from rnd 11 to 21. Fasten off. Leave the tail.

β€” Large front legs :

Large front legs - Make 2 in Dark red β€’ Work into a magic ring β€’ 3.5 mm hook

Part A - Rnd 1 :

6 sc into the magic ring (06)

Part A - Rnd 2 :

6 sc (06)

Part A - Rnd 3 :

3 sc inc. 3 sc (09)

Part A - Rnd 4 :

9 sc (09)

Part A - Rnd 5 :

3 sc. 3 sc inc. 3 sc (12)

Part A - Rnd 6 :

12 sc (12)

Part A - Rnd 7 :

4 sc. 4 sc inc. 4 sc (16)

Part A - Rnd 8 :

16 sc (16)

Info :

Fasten off.

Part B - Rnd 1 :

6 sc into the magic ring (06)

Part B - Rnd 2 :

6 sc (06)

Part B - Rnd 3 :

3 sc inc. 3 sc (09)

Part B - Rnd 4 :

9 sc (09)

Part B - Rnd 5 :

3 sc. 3 sc inc. 3 sc (12)

Part B - Rnd 6 :

12 sc (12)

Part B - Rnd 7 :

4 sc. 4 sc inc. 4 sc (16)

Part B - Rnd 8 and 9 :

16 sc (16)

Part B - Rnd 10 :

6 sc. 4 sc inc. 6 sc. (20)

Part B - Rnd 11 :

20 sc (20)

Part B - Rnd 12 :

11 sc. Insert the hook into the part A. Make 16 sc around part A. Again Make 9 sc tp the part B. (36)

Info :

Fasten off.

Rnd 13 :

(4 sc , 1 inv sc dec)x6 (30)

Rnd 14 :

(3 sc , 1 inv sc dec)x6 (24)

Rnd 15 :

2 inv sc dec. 16 sc. 2 inv sc dec (20)

Rnd 16 and 17 :

20 sc (20)

Rnd 18 :

2 inv sc dec. 12 sc. 2 inv sc dec (16)

Rnd 19 :

(2 sc , 1 inv sc dec)x4 (12)

Rnd 20 :

(2 sc , 1 inv sc dec)x3 (09)

Rnd 21 and 22 :

9 sc (09)

Rnd 23 :

(2 sc , 1 sc inc)x3 (12)

Rnd 24 :

(3 sc , 1 sc inc)x3 (15)

Rnd 25 :

(4 sc , 1 sc inc)x3 (18)

Rnd 26 to 28 :

18 sc (18)

Rnd 29 :

(4 sc , 1 inv sc dec)x3 (15)

Rnd 30 :

(3 sc , 1 inv sc dec)x3 (12)

Rnd 31 :

(2 sc , 1 inv sc dec)x3 (09)

Rnd 32 and 33 :

09 sc (09)

Info :

Rep rnd 23 to 33 one more time.

β€” Let's join legs :

Join all legs into the bottom part of the body.

β€” Eyes (mum) :

Make 2 in 4 ply White yarn β€’ Work into a magic ring β€’ 3.5 mm hook

Rnd 1 :

6 sc into the magic ring (06)

Rnd 2 :

6 sc inc (12)

Rnd 3 to 5 :

12 sc (12)

Info :

Attach safety eyes (15mm) between rnd 3 and 4.

Rnd 6 :

6 inv sc dec (06)

Info :

Fasten off. Close the open. Attach on the top part

β€” Final assembly :

Attach the button into the bottom part as shown in photos. Sew eyes and position legs evenly around the body. Embroider mouth details with black yarn on specified rounds. Weave in all ends and secure joints.

Assembly Instructions

  • Join mum top and bottom: Insert hook into the stitch in the last rnd from top to bottom; attach dark red yarn with a sl st, ch 1 and work both parts together, 1 sc to every stitch for next 81 sts; then work top part only as directed and fasten off; attach button to bottom.
  • Attach baby top and bottom: Insert the hook into the stitch in the last rnd (top to bottom) and attach dark red yarn with a sl st; work both parts together with 1 sl st to every stitch; stuff before closing.
  • Position and sew legs: Join all small and large legs into the bottom part of each crab, spacing evenly; use tails to sew firmly and stuff leg bases slightly before final stitching.
  • Attach eyes and face: For babies attach 4mm safety eyes between rnd 4 and 5 (3 sts between). For mum attach 15mm eyes between rnd 3 and 4 of the eye piece and sew to top part; embroider mouth on specified rnds.
  • Embroider details: Use black yarn to embroider mouth and V-shaped markings on the inner side of the larger legs as indicated in pattern instructions.
  • Weave in ends and secure: After assembly weave in all loose ends and secure knots so parts remain durable during play.

Important Notes

  • πŸ’‘Follow the steps given under the instructions to complete the project and keep consistent stitch counts.
  • πŸ’‘When working in rounds, beginning chains do not count as a stitch unless specified, so always follow the pattern's counting notes.
  • πŸ’‘Keep tension normal and avoid working too loosely; exact gauge is not critical but loose tension will distort shaping.
  • πŸ’‘Stuff legs and body gradually to avoid lumps and to maintain smooth shaping during assembly.

This crab memory game set brings handmade charm and tactile fun to playtime β€” a joyful family of amigurumi crabs to love and display. Create a keepsake collection for kids or a playful decorative piece for your home. Each baby crab is small, quick to make, and perfect for gifting or classroom activities. πŸ§ΆπŸ¦€

You ask,

we answer.

FAQs

What size will the finished piece be?

The finished mother crab measures approximately 8.5 inches in diameter for the body; baby crabs measure about 3 inches for the body as noted in the pattern.

Can I use different yarn weights for this pattern?

Yes, you can use different yarn weights but the finished size will change. Use appropriate hook sizes for your yarn to maintain fabric density and shape.

Do I need prior crochet experience for this pattern?

This pattern is rated beginner friendly, so basic knowledge of single crochet, increases and decreases, magic ring, and joining is recommended for best results.

How long does this project typically take to complete?

Most crafters finish the full mother and ten baby crabs in about 12-15 hours total, depending on experience and assembly speed.

Where should I place the safety eyes?

Attach baby crab 4mm safety eyes between rnd 4 and 5 with three stitches between; attach mum's 15mm eyes between rnd 3 and 4 of the eye piece as shown.