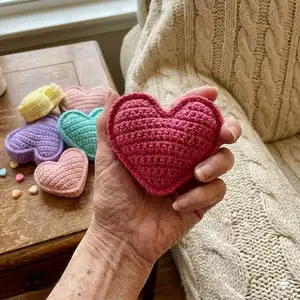
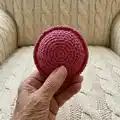
Make sweet, pocket-sized conversation candy hearts with this friendly crochet pattern. You will create soft, stuffed hearts perfect for gifts, decorations, or little keepsakes using basic stitches and simple assembly. The pattern is written step-by-step with photos and diagrams so you can follow along easily. Enjoy customizing colors and messages to make each heart unique.
Progress Tracker
0% Complete
— Materials :
Info :
Yarn: Big Twist Value, Worsted Weight Yarn (#4 weight) used roughly 1/4 skein: 2oz (100 yds). Any color, pastel is recommended to look like the conversation heart candies. Red color for writing a custom message. Hook 4.00 mm. Needle for sewing. Stitch marker. Scissors. Polyester stuffing.
— Notes :
Infos :
Following each round, the numbers in parentheses are the stitch count of that row. Stitches used in this pattern are listed below, this pattern is for everyone of all skill levels and takes roughly 60-90 minutes to complete. After the yarn is cut and tied off, I do not weave in the ends, I just tuck them into the middle of the heart during assembly, this leaves only 1 end to weave in, at the end of the project. This project can be made with #3 weight yarn and a 2.75mm hook for a smaller size.
— Abbreviations :
Infos :
Sc: Single crochet. Ch: Chain. Sc dec (sc2tog): decrease stitch, insert hook into stitch yarn over and pull up a loop, there will be 2 loops on the hook, insert hook into next stitch yarn over and pull up a loop, there will be 3 loops on the hook, yarn over and pull through all 3 loops. Sc inc: Two single crochet in the same stitch (increase). Magic Circle: A self-closing loop to start a row in the round.
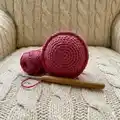
— Heart Panel (make 2) :
Row 1 :
Start with a magic circle, 2 sc in magic circle, ch 1 & turn (2)
Row 2 :
2 sc in next 2 stitches, ch 1 & turn (4)
Row 3 :
2 sc in first stitch, 2 sc, 2 sc in the last stitch, ch 1 & turn (6)
Row 4 :
2 sc in first stitch, 4 sc, 2 sc in the last stitch, ch 1 & turn (8)
Row 5 :
2 sc in first stitch, 6 sc, 2 sc in the last stitch, ch 1 & turn (10)
Row 6 :
2 sc in first stitch, 8 sc, 2 sc in the last stitch, ch 1 & turn (12)
Row 7 :
2 sc in first stitch, 10 sc, 2 sc in the last stitch, ch 1 & turn (14)
Row 8 :
2 sc in first stitch, 12 sc, 2 sc in the last stitch, ch 1 & turn (16)
Row 9 :
2 sc in first stitch, 14 sc, 2 sc in the last stitch, ch 1 & turn (18)
Row 10 :
18 sc, ch 1 & turn (18)
Row 11 :
2 sc in first stitch, 16 sc, 2 sc in the last stitch, ch 1 & turn (20)
Row 12 :
20 sc, ch 1 & turn (20)
Row 13 :
20 sc, ch 1 & turn (20)
Row 14 :
Sc dec, 18 sc, sc dec, ch 1 & turn (18) *The rounded tops of the heart are completed one side at a time, you will come back to this row to do the other half.
Row 15 :
Sc dec, 5 sc, sc dec, ch 1 & turn (7)
Row 16 :
7 sc, ch 1 & turn (7)
Row 17 :
Sc dec, 3 sc, sc dec, ch 1 & turn (5)
Row 18 :
5 sc, cut yarn and tie off & turn (5)
Row 19 :
Make a slip knot on the hook and sc dec in first 2 stitches in Row 14, 5 sc, sc dec, ch 1 & turn (7)
Row 20 :
7 sc, ch 1 & turn (7)
Row 21 :
Sc dec, 3 sc, sc dec, ch 1 & turn (5)
Row 22 :
5 sc, cut yarn and tie off (5)
— Edging :
Row 2 :
Sc in 2nd chain from hook, 60 sc, ch 1 & turn (61)
Row 3 :
61 sc, ch 1 & turn (61)
Row 4 :
61 sc, ch 1 & turn (61) *do not cut the yarn, the assembly will be done using sc in the next row
— Assembly :
Info :
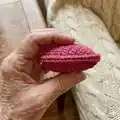
This is assembled right sides out, the project will not be turned inside out to stuff so the seams will be seen on the finished piece. Remember to tuck the loose ends into the project as you close it, so you don’t have to weave them in. There is a total of 60 sc on each side of the edging attached to each heart panel.
Step 1 :
Starting at the 'V' of the heart between the two rounded top edges, hold the edging behind the heart and enter the hook through the stitch in the heart and the first sc from the edging to pull up a loop, yarn over and pull through both loops on the hook to complete the sc through both layers. Working up the heart, sc through the heart and edging 5 times to reach the top row of the heart. (Total of 6 sc completed at the end of this step.)
Step 2 :
Sc 5 through the heart and edging, on the edging count 19 stitches and place a stitch marker through the stitch in the edging and the tip of the heart. This will hold it together and help with spacing when stitching along the side.
Step 3 :
Evenly space the next 18 sc between both layers along the edge of the heart down toward the tip, sc through the marked stitch and tip of the heart. In the same stitch, sc 2 more times for a total of 3 stitches of the edging attached through one stitch in the tip of the heart. (Total of 31 stitches completed so far in assembly.)
Step 4 :
Continue 18 sc up the other side of the of the heart until you reach the top row of the heart. (Total of 49 stitches completed so far in assembly.)
Step 5 :
Sc 5 across the top of the heart and the edging, then 6 sc evenly spaced to reach the middle, with the final stitch landing next to the first of this round in the 'V'. (Total of 60 stitches completed in assembly, 1 stitch remains on edging.) Slip stitch to first stitch in the round, ch 1.
Step 6 :
Flip the project over so you are on the 'inside' of the heart. Going through the last stitch in the edging and the first stitch completed in the edging, slip stitch the 2 short ends together using 4 slip stitches. This will create a heart with a fully connected rim, similar to a tiny box.
Step 7 :
Position the other heart panel over the project, repeat the same process as the first side (use diagram as visual aid for stitch placement); join through the front of the heart panel to the edging and sc the two pieces together, space 5 sc evenly until the top of the heart row is reached. (6 sc so far this side of assembly)
Step 8 :
5 sc in the top row of the heart, use a stitch marker to connect the point of the heart to the edging, evenly space 18 sc to the point, in the point sc 3, 18 sc evenly spaced to the top row of the heart, 5 sc. (55 sc so far this side of assembly)
Step 9 :
Stuff the heart with poly-fil or other stuffing, 6 sc evenly spaced to close, slip stitch to first stitch in the edging, cut yarn and tie off. Weave in the end to finish.
Info :
Optional: Using red yarn, sew a message to one side of the heart. You could also use felt and attach it with fabric adhesive or a felting needle.
This adorable conversation candy heart pattern makes quick, colorful, and customizable gifts that are perfect for holidays, parties, or little thoughtful surprises. Each heart is soft, stuffed, and ready for a tiny embroidered message or felt decoration to make it truly unique. Enjoy making a stack of these charming hearts to share or display — they’re fast, fun, and full of handmade joy! 🧶💛