🧢 Beautiful ✨ Detailed πŸ’ Adorable

Chunky Chain Pattern

Chunky Chain Pattern
4.3β˜… Rating
2-3 Hours Time Needed
2.2K Made This
βœ‚οΈ

Beginner Friendly Level

Perfect for those just starting their crochet journey, with clear instructions and simple techniques

⏱️

Bite-Sized Project

Finishes in 2-4 hoursβ€”perfect for an afternoon of creative relaxation.

✨

Stylish Touch

An elegant detail to elevate any look, combining traditional techniques with contemporary design sensibilities.

About This Chunky Chain Pattern

This pattern teaches you how to crochet sturdy oval chain links using 2 mm cord and a 3 mm hook to make a chunky chain for bags or necklaces. It focuses on working single crochet rounds around a cord, joining rows, hiding ends and assembling links. The result is a modern, textured chain that can be used as a handle or jewelry piece.
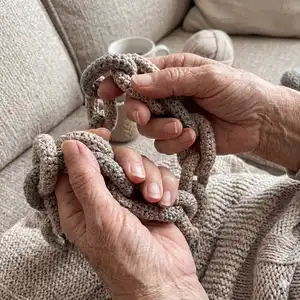
Chunky Chain Pattern crochet pattern - detailed view of completed project

Clear step-by-step instructions and photos guide you through creating each link and connecting them together. Suitable for beginners who want a quick, satisfying accessory project.

Why You'll Love This Chunky Chain Pattern

I absolutely love this pattern because it turns simple materials into a chic, functional accessory. I enjoy how quickly a single link takes shape and how satisfying it is to connect them into a wearable chain. The technique is straightforward, but the finished look feels designer-made and modern. I also love that you can customize length, color, and cord type to match any bag or outfit.

Chunky Chain Pattern step 1 - construction progress Chunky Chain Pattern step 2 - assembly progress Chunky Chain Pattern step 3 - details and accessories Chunky Chain Pattern step 4 - final assembly and finishing

Switch Things Up

I love experimenting with different cord colors to make a multicolor chain β€” try alternating two or three shades for a striped look.

If you want a chunkier result, I switch to a thicker cord and a larger hook, which makes oversized, statement links.

To create a delicate necklace version, I use thinner cord or embroidery floss with a very small hook for daintier links.

I sometimes add beads between links or thread small charms onto individual links for a personalized touch.

Try doubling the cord (use two strands held together) for extra strength and a denser texture β€” perfect for bag handles.

For a glam finish, crochet a metallic or shiny cord and pair the chain with gold or silver snap hooks to match hardware.

I like to experiment with link sizes within one chain β€” make alternating big and small links for a playful, graphic look.

To make the chain removable, attach lobster clasps to the ends of the chain so you can swap it between bags.

For a soft, wearable necklace, add a few rows of filler (tiny tassels or fringe) inside links or at the ends for emphasis.

I also try combining crochet links with metal chain segments β€” crochet a few links and join them to a short length of metal chain for mixed-material style.

Common Mistakes & How to Fix Them

βœ— Not securing the starting slip stitch tightly can make the first stitch gap visible; tuck and secure the starting tail and use a marker to keep your first stitch aligned. βœ— Forgetting to place or move the stitch marker each round causes miscounts and crooked rows; move the marker to the first stitch of every row to maintain stitch count and alignment. βœ— Pulling the cord end through too few loops before trimming can cause the end to slip out later; pull the tail through several loops of the first row and melt or seal the end securely. βœ— Using a too-large or too-small hook will change link size and density; stick to the recommended 3 mm hook with 2 mm cord or swatch to match the gauge before starting.
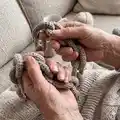
Chunky Chain Pattern

Make a stylish chunky crochet chain that works as a bag handle or a statement necklace. This beginner-friendly pattern uses simple single crochet rounds worked around a 2 mm cord to create sturdy oval links. Follow clear step-by-step photos and tips to join links and finish ends securely. Perfect for adding a handmade, contemporary touch to bags or wearable accessories.

Beginner Friendly 2-3 Hours

Materials Needed for Chunky Chain Pattern

β€” Main Fabric

  • 01
    Any cord, 2 mm, approximately 60 yards (50 m) (enough for multiple links)
  • 02
    Example used: polyester cord Shikimiki PP Macrame Mini, latte color (approx. 50 m)
  • 03
    Prepare additional small lengths of cord for joining and hiding ends

β€” Tools Required

  • 01
    Crochet hook size 3 mm
  • 02
    Marker (stitch marker)
  • 03
    Lighter (to melt and secure cord ends)
  • 04
    Scissors
  • 05
    Tapestry/yarn needle (optional for tucking ends)

Progress Tracker

0% Complete

β€” Materials :

Info :

Any cord, 2 mm, 60 yards (50 m). In my example, I used polyester cord Shikimiki PP Macrame Mini, latte color; 3 mm hook; Marker; Lighter; Scissors.

Info :

Finished chain from the specified materials: length of the chain - 22 inches (55 cm), 10 chain link; length of the chain link - 3 inches (8 cm), width of the chain link - 2 inches (5 cm).

Info :

Gauge: 16 stitches and 16 row = 4*4 inches (10*10cm).

β€” Abbreviations :

Infos :

CH - chain stitch. SlSt - slip stitch. SC - single crochet.

β€” Crochet the chain :

Info :

Crochet chain with 25 CH. Connect in a circle.

Info :

SlSt in the 1st loop of the chain, CH.

Round 1 :

1 row. 25 SC. Place the marker in the 1st SC of this row, last SC make in the SlSt and the 1st loop of the chain.

Info :

SlSt, CH.

Round 2 :

2 row. 25 SC, SlSt, CH, rearrange the marker in the 1st loop of this and the each subsequent row.

Info :

Pull out the end through the 1st loop of the chain.

Info :

Then pull the end through a few loops of the 1st row. Cut, process with fire.

Info :

Crochet the row.

Round 3-4 :

3-4 rows. 25 SC, SlSt, CH.

Round 5 :

5 row. 25 SC, SlSt.

Info :

Fold the work in half lengthwise, right side inward.

Info :

Pull the working loop through the loop of the chain.

β€” Base trim :

Info :

Base trim. Crochet 25 SlSt. Insert the hook on the back loop only of the last row and the loop of the chain.

Info :

Cut the thread, pull out the end. Insert the hook under the 1st SlSt. Pull the end.

Info :

Pull back the end in the last SlSt. Strengthen and hide the end. Process with fire.

Info :

Crochet the next chain link through hole of the 1st link.

Info :

Crochet the required number of the links. For example, 9-10 links for a handle.

β€” Assembly :

Info :

Put the crochet chain to the snap hook rings.

Info :

The chain can be used as a necklace.

Assembly Instructions

  • Crochet the required number of links, joining each new link by working the rounds through the hole of the previous link so links interlock securely.
  • For a bag handle, make 9-10 links for a comfortable length; adjust number of links to reach desired handle length.
  • After finishing each link, pull the tail through a few loops of the first row, cut and carefully melt the end with a lighter to secure and hide it.
  • Attach the finished chain to snap hook rings or bag hardware by threading the final link onto the ring and closing the hardware securely.
  • You can also use the finished chain as a necklaceβ€”simply finish the desired number of links and tuck or melt ends as instructed for a clean finish.

Important Notes

  • πŸ’‘Place and move a stitch marker to the first single crochet of every row to keep track of rounds and maintain even stitch counts.
  • πŸ’‘When hiding cord ends, pull the tail through multiple loops of the first row before trimming and use a lighter carefully to melt and secure synthetic cords.
  • πŸ’‘Fold the work right side inward when pulling the working loop through the chain loop to create a neat, even oval link.
  • πŸ’‘Work with consistent tension around the cord to produce uniform links that sit flat and join together smoothly.

Thank you for trying this Chunky Chain pattern β€” I hope it sparks your creativity and adds a handcrafted touch to your accessories. Make handles, necklaces, or custom hardware that reflect your style and love for handmade items. Share your finished projects and tag me β€” I love seeing your makes! 🧢✨

You ask,

we answer.

FAQs

What size will the finished piece be?

The finished chain from the specified materials measures about 22 inches (55 cm) long with approximately 10 links; each link is about 3 inches (8 cm) long and 2 inches (5 cm) wide.

Can I use different cord thicknesses or yarn?

Yes, you can use different cord thicknesses or yarn, but this will change the size and look of the links; swatch first and adjust hook size to maintain a sturdy shape.

Do I need prior crochet experience for this pattern?

This pattern is beginner friendly and requires basic skills like chain, single crochet and slip stitch, so new crocheters with basic knowledge can follow along.

How long does this project typically take to complete?

Most crafters finish a single chain in about 2-3 hours depending on the number of links and finishing techniques; time varies with experience and customization.