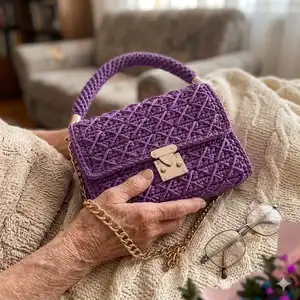
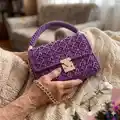
🧢 Beautiful ✨ Detailed πŸ’ Adorable

Canvas Handbag Pattern

Canvas Handbag Pattern
4.5β˜… Rating
12-15 Hours Time Needed
3.9K Made This
βœ‚οΈ

Intermediate Level

Ideal for those with basic crochet experience, featuring slightly more advanced stitches and techniques to expand your skills.

⏱️

Multi-Day Project

A rewarding 12+ hour journeyβ€”perfect for dedicated crafters who love detailed work.

✨

Stylish Touch

An elegant detail to elevate any look, combining traditional techniques with contemporary design sensibilities.

About This Canvas Handbag Pattern

This pattern creates a structured canvas handbag featuring a textured single crochet canvas with embroidered diamond details. Youll crochet the main canvas, add a neat base trim, embroider a lattice pattern and sew on side panels for a clean finished bag. The pattern includes hardware suggestions and step-by-step assembly to help you finish a professional-looking handbag.

Canvas Handbag Pattern crochet pattern - detailed view of completed project

Designed for intermediate crocheters, it uses simple stitches worked in turning rows and finishing techniques to create a polished accessory. Photos and clear notes guide you through blocking, embroidery and sewing for a polished result.

Why You'll Love This Canvas Handbag Pattern

I absolutely love this pattern because it transforms simple stitches into a beautifully textured handbag that feels and looks high-end. I enjoy the satisfying rhythm of the turning rows as the canvas grows, and the embroidery brings a handmade, bespoke touch. The pattern is practical β€” it includes hardware recommendations and assembly tips so the finished piece is both sturdy and stylish. I find finishing and ironing the pieces especially rewarding because it makes the texture pop and gives the bag its final professional look.

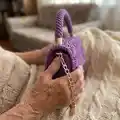
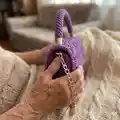
Canvas Handbag Pattern step 1 - construction progress Canvas Handbag Pattern step 2 - assembly progress Canvas Handbag Pattern step 3 - details and accessories Canvas Handbag Pattern step 4 - final assembly and finishing

Switch Things Up

I love changing the color palette to update the look β€” try a neutral cream with contrasting embroidery for an elegant everyday bag.

To make a smaller clutch version, use thinner cord and a smaller hook; to make a larger tote, choose thicker cord and increase chains and rows proportionally.

I sometimes add a fabric pocket to the lining for organization β€” simply sew a small rectangle of cotton to the lining before inserting it into the bag.

Try metallic cord for a special occasion clutch, or ombre cord to give a gradient effect through the canvas for a unique visual texture.

Swap the embroidered diamond motif for another design by changing spacing β€” e.g., wider diamonds or diagonal lines for a more modern look.

For a more durable strap, use leather handles or add an inner nylon strap reinforcement before sewing the side panels down.

I often add magnetic snaps or a more decorative clasp β€” using the same placement instructions for the lock keeps the proportions right.

Consider making matching accessories like a coin purse or key fob using leftover cord and the same stitch language for a coordinated set.

If you want a softer structure, add thin foam or interfacing to the lining before sewing it in for a padded, luxurious feel.

I frequently experiment with final finishes β€” try steam-blocking more or less for different texture depths and to control how pronounced the embroidery appears.

Common Mistakes & How to Fix Them

βœ— Skipping the back-loop-only instruction on the foundation chain causes an uneven edge; always work the first row from the 2nd loop on the back loop to create a neat base edge. βœ— Not pulling the working loop up to the hook level (17-18 mm) when single crocheting can leave holes in the canvas; pull the loop to the indicated height and then tighten back on the hook. βœ— Forgetting to count stitches during the base trim increases can distort the corners; count the 65 SC and placement of 3 SC in one stitch carefully and mark corner points. βœ— Tightening seams too much when sewing side parts creates puckering; sew with a relaxed tension, pin parts in place, and make securing stitches rather than pulling tight. βœ— Not hiding and securing ends properly makes them visible after steam-blocking; weave ends through a few loops, then process the ends with a lighter and steam through a damp cloth to finish discreetly.

Canvas Handbag Pattern

Make a chic, textured canvas handbag using macrame-style polyester cord and simple single crochet stitches. This pattern guides you step-by-step through crocheting the canvas, adding a base trim, embroidered diamond detail, side parts and assembly. Youll get clear photos and practical tips for finishing, blocking and attaching hardware so your bag looks polished and professional.

Intermediate 12-15 Hours

Materials Needed for Canvas Handbag Pattern

β€” Main Fabric

  • 01
    Polyester cord 3 mm, approximately 220 yards (200 m) β€” main color (example used: purple)
  • 02
    Soft flat cord 4 mm (optional alternative if a slightly thicker texture is desired)
  • 03
    Fabric for the lining (cotton or linen), about 12x20 inches (30x50 cm)

β€” Tools Required

  • 01
    Crochet hook size 4.0 mm
  • 02
    Plastic needle with large eyelet (for sewing and embroidery)
  • 03
    Sewing thread and needle
  • 04
    Any lock 2x2 inches (5x5 cm)
  • 05
    2 snap hook O-rings, 30-40 mm or 2 D-rings
  • 06
    2 holders for handle, diameter 14-16 mm
  • 07
    Chain 39-48 inches (1-1.2 m) with 2 snap hooks (for shoulder/crossbody option)
  • 08
    8 stitch markers
  • 09
    Scissors
  • 10
    Lighter (to seal cord ends)
  • 11
    Small Phillips screwdriver (for hardware)
  • 12
    Yarn needle for weaving ends

Progress Tracker

0% Complete

β€” Canvas :

Info :

Crochet 26 CH.

Round 1 :

1 row. 25 SC from the 2nd loop from the hook on the back loop of the chain only, CH.

Info :

When crochet SC, pull the working loop to the level of the hook (17-18 mm). Then the canvas will be without holes.

Info :

Then tighten the loop on the hook back.

Info :

Insert the hook trough the last SC. Over hook the end of the thread and pull out.

Info :

Crochet in the end of the thread in the next row.

Info :

Next crochet with the turning rows.

Round 2 :

2 row. 25 SC, CH.

Round 3 :

3 row. 25 SC, CH. Cut the end of the beginning of the crocheting, process with fire.

Info :

From the 3rd row crochet the 1st SC on the legs of the last SC and skip the 1st loop of the row.

Round 4 :

4 row. 25 SC, CH.

Round 5 :

5 row. 25 SC, CH.

Round 6-66 :

6-66 rows. 25 SC, CH.

Round 67 :

67 row. 25 SC. Don’t cut the thread.

β€” Base trim :

Info :

Crochet 2 SC in the last SC of the 67th row.

Round A :

Next crochet 65 SC in the each row.

Round B :

Then 3 SC in 1.

Round C :

Next 23 SC.

Round D :

Then 3 SC in 1.

Round E :

Next 65 SC in the each row.

Round F :

Then 1 SC in the 1st SC of the 67th row. Cut the thread, insert the hook under 1st SC of the row, pull the thread. Tighten back in the last loop.

Info :

Tighten the end through few loops, process with fire.

Round G :

Insert the hook in the any SC of the base trim. Pull the loop, insert the hook in the next SC, crochet SlSt.

Round H :

Next crochet SlSt in the each SC of the base trim.

Info :

Cut the thread and pull out the end. Close the row: insert the hook under 1st SlSt of the row, pull the thread. Tighten back in the last loop. Tighten the ends through few loops, process with fire.

Info :

Now, after the base trim, the canvas consists of 68 rows.

β€” Embroidery :

Info :

Start embroidery from the top left corner.

Info :

The top is the future valve, where the crocheting of the fabric is finished (67th row).

Info :

Cut the thread about 4.4 yards (4 m) long, so there are fewer knots.

Info :

Insert the needle under the base trim. Count 4 rows and 4 SC and insert the needle between the 4th and 5th SC.

Info :

Next embroider from left to right, down and right to left.

Info :

Repeat rapport until the end of the canvas.

Info :

Don’t tighten the seams, but should not hang out.

Info :

Tie the knot when the thread runs out. Then join the threads with the lighter.

Info :

Hide the ends. Steam with the iron through a damp cloth.

Info :

Embroidery looks like squares on the wrong side.

β€” Side part(*2) :

Info :

Crochet 7 CH.

Round 1 :

1 row. 6 SC from the 2nd loop from the hook on the back loop of the chain only, CH.

Round 2 :

2 row. 6 SC, CH.

Round 3 :

3 row. 6 SC, CH. From the 3rd row crochet the 1st SC on the legs of the last SC and skip the 1st loop of the row.

Round 4-18 :

4-18 row. 6 SC, CH.

Round 19 :

19 row. 6 SC, don’t cut the thread.

Info :

Pull out the loop to the front side. Crochet 5 SlSt in the last row.

Info :

Leave the end about 60 inches (1.5 m) long for sewing. Cut the thread, pull out the end. Pull out the end to the wrong side again.

Info :

Similarly crochet the 2nd side part. Crochet the base trim with 5 SlSt in the other way. That’s, the ends of the side parts will be on opposite sides.

β€” Assembly :

Info :

Steam the side parts with an iron through a damp cloth.

Info :

Turn the side of the canvas to himself, where the additional row of the base trim.

Info :

Count 10 rows (or 5 squares). Place the marker between the rows in the loop of the base trim.

Info :

Then count 4 rows (or 2 squares) and place the markers between the rows. There should be 7 loops between the 1st and the 2nd markers.

Info :

Count 10 rows (or 5 squares) again. Place the markers. It should be in the 19th loops from the 2nd markers. Also, count 19 loops from the 1st markers. Place the markers in the 19th loops on the rounding.

Info :

Take the right side part. The side with the chain of the base trim with SlSt - front. The end of the thread on the left.

Info :

Put on the corners of the side part to the canvas. Take the plastic needle.

Info :

Make the securing stitches at the beginning. Next sew the side part with the canvas in each loop of the canvas and each row of the side part.

Info :

Sew to the marker, remove, make the stitch in the corner.

Info :

At down, sew 6 loops in the chain of the side part, make the 7th stitch in the knot.

Info :

Remove the marker, make the stitch in the corner. Then sew to the next marker.

Info :

Make securing stitches at the finish. Strengthen and hide the end, process with fire.

Assembly Instructions

  • Place the side parts on the canvas corners and secure with a few securing stitches, then sew the side part to the canvas through each loop of the canvas and each row of the side part.
  • Count and mark placement: count 10 rows (5 squares) down from the top for marker placement, then count 4 rows (2 squares) and place the side markers; there should be 7 loops between the 1st and 2nd markers.
  • When sewing the bottom chain of the side part, sew 6 loops then make the seventh stitch through the knot to secure the corner.
  • After sewing each side part, remove the marker and make a corner stitch, continue to the next marker and finish with securing stitches; hide and seal ends with a lighter then steam through a damp cloth.

Important Notes

  • πŸ’‘Work the first row into the back loop of the foundation chain only to create a smooth base edge and prevent holes.
  • πŸ’‘Use stitch markers to mark the side placement points; accurate counting (10 rows / 5 squares and 4 rows / 2 squares) is essential for symmetric assembly.
  • πŸ’‘Steam and press pieces through a damp cloth after embroidery and assembly to set the texture and hide minor irregularities.
  • πŸ’‘Leave long sewing tails for side parts (about 60 inches / 1.5 m) so you can sew neatly and tuck ends back into the work before finishing.

This Canvas Handbag Pattern offers a modern textured finish and embroidered detail for a truly special accessory. Whether you make it for yourself or as a thoughtful gift, the finished bag combines structure with soft handmade charm. Follow the step-by-step photos and notes for a professional, polished result. 🧢✨

You ask,

we answer.

FAQs

What size will the finished piece be?

The finished bag measures approximately 8 5/8 inches (22 cm) length, 7 1/2 inches (19 cm) height and 2 5/8 inches (6.5 cm) width when using the specified materials.

Can I use different cord thicknesses for this pattern?

Yes, you can use a different cord thickness but it will affect the final size and texture; adjust the hook size accordingly and expect changes in stitch counts or row numbers for perfect fit.

Do I need prior crochet experience for this pattern?

This pattern is rated intermediate, so basic crochet skills such as single crochet, working in back loops only, working turning rows and simple slip-stitch finishing are recommended for best results.

How long does this project typically take to complete?

This is a multi-day project β€” most makers finish in about 12-15 hours total depending on experience, embroidery detail and assembly time.