🧢 Beautiful ✨ Detailed πŸ’ Adorable

Bunny Stacking Toy Amigurumi Pattern

Bunny Stacking Toy Amigurumi Pattern
4.1β˜… Rating
8-10 Hours Time Needed
4.2K Made This
βœ‚οΈ

Intermediate Level

Ideal for those with basic crochet experience, featuring slightly more advanced stitches and techniques to expand your skills.

⏱️

All-Day Adventure

Requires 8-10 hours, ideal for a full day of immersive crocheting.

🧸

Cute Companion

An adorable friend to cherish, handcrafted with love to bring comfort and joy for years to come.

About This Bunny Stacking Toy Amigurumi Pattern

This pattern makes a stacking bunny toy composed of three rings, a head, legs, arms, ears and a pompom tail. You will work mostly in continuous rounds with simple increases and decreases to shape each piece. Color changes and small sewn details give the bunny its sweet personality and stacked play function. Clear photos in the original guide show assembly and finishing touches.

Bunny Stacking Toy Amigurumi Pattern crochet pattern - detailed view of completed project

Designed for crocheters who enjoy shaping and finishing techniques, the pattern uses Alize Cotton Gold yarn in four colors. The set becomes a tactile toy ideal for baby-safe play when finished with securely attached eyes and tightly sewn parts.

Why You'll Love This Bunny Stacking Toy Amigurumi Pattern

I absolutely love this pattern because it combines classic amigurumi shaping with a playful stacking toy concept that both kids and adults adore. I enjoy how the rings stack neatly to create a stable base while the soft bunny pieces remain cuddly and gentle. The face shaping and needle sculpting let me add tons of personality with just a few stitches, which is very satisfying. I also appreciate the color-change rows β€” they make it easy to personalize the set and practice neat color joins.

Bunny Stacking Toy Amigurumi Pattern step 1 - construction progress Bunny Stacking Toy Amigurumi Pattern step 2 - assembly progress Bunny Stacking Toy Amigurumi Pattern step 3 - details and accessories Bunny Stacking Toy Amigurumi Pattern step 4 - final assembly and finishing

Switch Things Up

I love changing colors to make each ring and accessory match different nursery themes, so try pastel tones for a softer look or bold colors for a toy that stands out.

I often adjust the size by using a thicker yarn and larger hook to make a chunky version, or a thinner yarn and smaller hook for a tiny keychain-style toy.

I recommend experimenting with embroidered facial expressions β€” moving the eyes or altering the needle-sculpted lines changes the bunny's personality instantly.

You can replace safety eyes with embroidered eyes for a fully baby-safe toy, especially if making this for very young children.

I sometimes add a removable felt accessory like a tiny scarf or bow that fastens with a small snap to give the toy extra charm and customization options.

If you want posable arms, consider inserting thin wire armature before stuffing, but be sure to wrap and secure the wire well for safety.

For a different texture, try using a boucle or cotton-blend yarn for the rings while keeping the body in smooth cotton for contrast.

I enjoy adding small appliques or crocheted motifs to the rings to personalize for birthdays, baby names, or holidays.

To make assembly easier, I always pin pieces in place first, take a photo, then sew β€” this helps me remember orientation and keep symmetry.

Finally, you can combine color sequences from the pattern in a different order or repeat stripes to make extra rings and build a larger stacking set.

Common Mistakes & How to Fix Them

βœ— Skipping stitch markers during long rounds leads to losing the start of rounds; place and move a stitch marker at the beginning of every round to avoid confusion. βœ— Not stuffing as you go causes lumps or difficulty closing openings later; stuff gradually and evenly while maintaining the intended shape for each section. βœ— Cutting yarn tails too short prevents secure sewing of parts; always leave long tails for sewing and finishing to anchor pieces firmly. βœ— Forgetting to insert safety eyes before closing the head will make placement difficult; insert safety eyes between rounds 19 and 20, 12 sc apart, then continue stuffing and shaping. βœ— Changing colors without securing ends can result in loose or visible tails; weave in or carry yarn neatly at color changes and secure ends when possible.

Bunny Stacking Toy Amigurumi Pattern

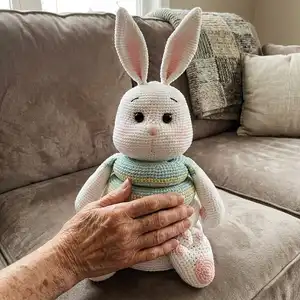
Make a charming stacking bunny toy that doubles as a playful learning stacker and a cuddly amigurumi companion. This pattern guides you through crocheting rings, body parts, and adorable facial details with clear step-by-step rounds. You will enjoy shaping the face, assembling rings and sewing toes and ears for a finished handmade keepsake. Perfect as a gift or nursery toy.

Intermediate 8-10 Hours

Materials Needed for Bunny Stacking Toy Amigurumi Pattern

β€” Main Fabric

  • 01
    White - Alize Cotton Gold (color 55) for body, rings and main parts
  • 02
    Pink - Alize Cotton Gold (color 149) for nose, paws and feet details
  • 03
    Turquoise - Alize Cotton Gold (color 514) for rings and accents
  • 04
    Yellow - Alize Cotton Gold (color 187) for ring stripes and accents
  • 05
    Fiberfill (polyester stuffing) for filling all parts

β€” Tools Required

  • 01
    Crochet hook 3 mm (or in accordance with the yarn you use)
  • 02
    Fiberfill for stuffing
  • 03
    Scissors
  • 04
    Safety eyes (recommended size used in model)
  • 05
    Tapestry needle for sewing pieces and weaving ends
  • 06
    Stitch markers
  • 07
    Pins for assembly (optional)

Progress Tracker

0% Complete

β€” Base :

Info :

With white yarn

Round 1 :

6 sc in MR (6)

Round 2 :

6 inc (12)

Round 3 :

12 sc (12)

Round 4 :

(1 sc; inc)*6 (18)

Round 5-6 :

18 sc (18)

Round 7 :

(2 sc; inc)*6 (24)

Round 8-10 :

24 sc (24)

Round 11 :

(3 sc; inc)*6 (30)

Round 12-15 :

30 sc (30)

Round 16 :

(4 sc; inc)*6 (36)

Round 17-21 :

36 sc (36)

Round 22 :

(5 sc; inc)*6 (42)

Round 23-28 :

42 sc (42)

Round 29 :

(6 sc; inc)*6 (48)

Round 30-36 :

48 sc (48)

Round 37 :

(7 sc; inc)*6 (54)

Round 38-45 :

54 sc (54)

Round 46 :

(8 sc; inc)*6 (60)

Round 47 :

FLO (9 sc; inc)*6 (66)

Round 48 :

5 sc; inc; (10 sc; inc)*5; 5 sc (72)

Round 49 :

(11 sc; inc)*6 (78)

Round 50 :

6 sc; inc; (12 sc; inc)*5; 6 sc (84)

Round 51 :

(13 sc; inc)*6 (90)

Round 52 :

7 sc; inc; (14 sc; inc)*5; 7 sc (96)

Round 53 :

(15 sc; inc)*6 (102)

Round 54 :

8 sc; inc; (16 sc; inc)*5; 8 sc (108)

Round 55 :

(17 sc; inc)*6 (114)

Round 56-62 :

114 sc (114)

Round 63 :

(17 sc; dec)*6 (108)

Round 64 :

8 sc; dec; (16 sc; dec)*5; 8 sc (102)

Round 65 :

(15 sc; dec)*6 (96)

Round 66 :

7 sc; dec; (14 sc; dec)*5; 7 sc (90)

Round 67 :

(13 sc; dec)*6 (84)

Round 68 :

6 sc; dec; (12 sc; dec)*5; 6 sc (78)

Round 69 :

(11 sc; dec)*6 (72)

Round 70 :

5 sc; dec; (10 sc; dec)*5; 5 sc (66)

Round 71 :

(9 sc; dec)*6 (60)

Round 72 :

connect round 71 with round 47 (BLO) with 60 sc (60) fill with stuffing as you go, then continue to work in rounds.

Round 73 :

(8 sc; dec)*6 (54)

Round 74 :

(7 sc; dec)*6 (48)

Round 75 :

(6 sc; dec)*6 (42)

Round 76 :

(5 sc; dec)*6 (36)

Round 77 :

(4 sc; dec)*6 (30)

Round 78 :

(3 sc; dec)*6 (24)

Round 79 :

(2 sc; dec)*6 (18)

Round 80 :

(1 sc; dec)*6 (12)

Round 81 :

6 dec (6) cut the yarn, pull off hole, hide a tail.

β€” Legs :

Info :

make 2. With white yarn. Row 1. 11 ch (11) continue to work in rounds

Round 2 :

9 sc; 4 sc in one sc; 9 sc (22)

Round 3 :

inc; 8 sc; 4 inc; 8 sc; inc (28)

Round 4 :

inc; 9 sc; 8 inc; 9 sc; inc (38)

Round 5 :

1 sc; inc; 13 sc; 8 inc; 15 sc (47)

Round 6-11 :

47 sc (47)

Round 12 :

16 sc; 8 dec; 15 sc (39)

Round 13 :

12 sc; 8 dec; 7 sc; 2 dec (29)

Round 14 :

2 dec; 8 sc; 4 dec; 7 sc; dec (22) fill with stuffing

Round 15 :

dec; 8 sc; 2 dec; 7 sc; dec (18)

Round 16 :

18 sc (18) cut the yarn, leave a tail for sewing.

β€” Toes :

Info :

make 6 - 3 on each foot

Round 1 :

6 sc in MR (6) fasten off.

β€” Feet :

Info :

make 2 with pink yarn

Round 1 :

6 sc in MR (6)

Round 2 :

6 inc (12)

Round 3 :

(1 sc; inc)*6 (18)

Round 4 :

(2 sc; inc)*6 (24) fasten off.

Info :

Leave tails, when you cut the yarn and use them to sew feet and toes to the legs as you can see in the pictures.

β€” Large Ring :

Info :

With white yarn

Round 1 :

60 ch; slst in 1st ch (60)

Round 2 :

(9 sc; inc)*6 (66)

Round 3 :

5 sc; inc; (10 sc; inc)*5; 5 sc (72)

Round 4 :

(11 sc; inc)*6 (78)

Round 5 :

6 sc; inc; (12 sc; inc)*5; 6 sc (84)

Round 6 :

(13 sc; inc)*6 (90)

Round 7 :

7 sc; inc; (14 sc; inc)*5; 7 sc (96)

Round 8 :

(15 sc; inc)*6 (102)

Round 9-15 :

102 sc (102)

Round 16 :

(15 sc; dec)*6 (96)

Round 17 :

7 sc; dec; (14 sc; dec)*5; 7 sc (90)

Round 18 :

(13 sc; dec)*6 (84)

Round 19 :

6 sc; dec; (12 sc; dec)*5; 6 sc (78)

Round 20 :

(11 sc; dec)*6 (72)

Round 21 :

5 sc; dec; (10 sc; dec)*5; 5 sc (66)

Round 22 :

(9 sc; dec)*6 (60)

Info :

Sew round 22 with round 1, fill with stuffing as you go.

β€” Middle Ring :

Info :

Start with turquoise yarn

Round 1 :

48 ch; slst in 1st ch (48)

Round 2 :

(7 sc; inc)*6 (54)

Round 3 :

4 sc; inc; (8 sc; inc)*5; 4 sc (60)

Round 4 :

(9 sc; inc)*6 (66)

Round 5 :

5 sc; inc; (10 sc; inc)*5; 5 sc (72)

Round 6 :

(11 sc; inc)*6 (78)

Round 7 :

6 sc; inc; (12 sc; inc)*5; 6 sc (84) change to yellow

Round 8 :

(13 sc; inc)*6 (90) change to turquoise

Round 9 :

90 sc (90) change to yellow

Round 10 :

90 sc (90) change to turquoise

Round 11 :

90 sc (90) change to yellow

Round 12 :

90 sc (90) change to turquoise

Round 13 :

90 sc (90) change to yellow

Round 14 :

90 sc (90) change to turquoise

Round 15 :

90 sc (90)

Round 16 :

(13 sc; dec)*6 (84)

Round 17 :

6 sc; dec; (12 sc; dec)*5; 6 sc (78)

Round 18 :

(11 sc; dec)*6 (72)

Round 19 :

5 sc; dec; (10 sc; dec)*5; 5 sc (66)

Round 20 :

(9 sc; dec)*6 (60)

Round 21 :

4 sc; dec; (8 sc; dec)*5; 4 sc (54)

Round 22 :

(7 sc; dec)*6 (48)

Info :

Sew round 22 with round 1, fill with stuffing as you go.

β€” Arms :

Info :

make 2. Start with white yarn

Round 1 :

6 sc in MR (6)

Round 2 :

6 inc (12)

Round 3 :

(1 sc; inc)*6 (18)

Round 4 :

(2 sc; inc)*6 (24)

Round 5 :

24 sc (24)

Round 6 :

(3 sc; inc)*6 (30)

Round 7 :

30 sc (30)

Round 8 :

3 dec; 24 sc (27)

Round 9 :

27 sc (27)

Round 10 :

3 dec; 21 sc (24)

Round 11 :

24 sc (24)

Round 12 :

3 dec; 19 sc (21)

Round 13-20 :

21 sc (21)

Round 21 :

dec; 19 sc (20)

Round 22-24 :

20 sc (20)

Round 25 :

4 sc; dec; 8 sc; dec; 4 sc (18)

Round 26 :

5 sc; change to turquoise; 13 sc (18)

Round 27 :

5 sc; change to yellow; 13 sc (18)

Round 28 :

5 sc; change to turquoise; 13 sc (18)

Round 29 :

3 sc; dec; 7 sc; dec; 4 sc (16)

Info :

Fold in half and make 8 sc, fasten off.

β€” Palms :

Info :

make 2 with pink yarn

Round 1 :

6 sc in MR (6)

Round 2 :

6 inc (12) fasten off.

Info :

Leave tails, when you cut the yarn and use them to sew palms to the arms as you can see in the pictures.

β€” Small Ring :

Info :

Start with turquoise yarn

Round 1 :

36 ch; slst in 1st ch (36)

Round 2 :

(5 sc; inc)*6 (42)

Round 3 :

3 sc; inc; (6 sc; inc)*5; 3 sc (48)

Round 4 :

(7 sc; inc)*6 (54)

Round 5 :

4 sc; inc; (8 sc; inc)*5; 4 sc (60)

Round 6 :

(9 sc; inc)*6 (66)

Round 7 :

5 sc; inc; (10 sc; inc)*5; 5 sc (72)

Round 8 :

Connect first arm with 8 sc; 3 sc; inc; (11 sc; inc)*2; connect second arm with 8 sc; 3 sc; inc; (11 sc; inc)*2 (78)

Round 9 :

78 sc (78) change to yellow

Round 10 :

78 sc (78) change to turquoise

Round 11 :

78 sc (78) change to yellow

Round 12 :

78 sc (78) change to turquoise

Round 13 :

78 sc (78) change to yellow

Round 14 :

78 sc (78) change to turquoise

Round 15 :

78 sc (78)

Round 16 :

(11 sc; dec)*6 (72)

Round 17 :

5 sc; dec; (10 sc; dec)*5; 5 sc (66)

Round 18 :

(9 sc; dec)*6 (60)

Round 19 :

5 sc; dec; (10 sc; dec)*5; 5 sc (54)

Round 20 :

(7 sc; dec)*6 (48)

Round 21 :

3 sc; dec; (6 sc; dec)*5; 3 sc (42)

Round 22 :

(5 sc; dec)*6 (36)

Info :

Sew round 22 with round 1, fill with stuffing as you go.

β€” Head :

Info :

With white yarn

Round 1 :

6 sc in MR (6)

Round 2 :

6 inc (12)

Round 3 :

(1 sc; inc)*6 (18)

Round 4 :

(2 sc; inc)*6 (24)

Round 5 :

(3 sc; inc)*6 (30)

Round 6 :

(4 sc; inc)*6 (36)

Round 7 :

(5 sc; inc)*6 (42)

Round 8 :

(6 sc; inc)*6 (48)

Round 9 :

(7 sc; inc)*6 (54)

Round 10 :

4 sc; inc (8 sc; inc)*5; 4 sc (60)

Round 11 :

(9 sc; inc)*6 (66)

Round 12 :

5 sc; inc (10 sc; inc)*5; 5 sc (72)

Round 13 :

(11 sc; inc)*6 (78)

Round 14-21 :

78 sc (78)

Info :

Insert safety eyes between rounds 19 and 20, 12 sc apart

Round 22 :

57 sc; 3 inc; 18 sc (81)

Round 23-25 :

81 sc (81)

Round 26 :

39 sc; (6 sc; inc)*6 (87)

Round 27-33 :

87 sc (87)

Round 34 :

39 sc; (6 sc; dec)*6 (81)

Round 35 :

39 sc; (12 sc; dec)*3 (78)

Round 36 :

78 sc (78)

Round 37 :

(11 sc; dec)*6 (72)

Round 38 :

5 sc; dec; (10 sc; dec)*5; 5 sc (66)

Round 39 :

(9 sc; dec)*6 (60)

Round 40 :

4 sc; dec; (8 sc; dec)*5; 4 sc (54)

Round 41 :

(7 sc; dec)*6 (48)

Round 42 :

(6 sc; dec)*6 (42)

Round 43 :

(5 sc; dec)*6 (36)

Round 44 :

36 sc (36)

Round 45 :

BLO 36 sc (36)

Round 46-48 :

36 sc (36)

Round 49 :

(4 sc; dec)*6 (30)

Round 50-51 :

30 sc (30)

Round 52 :

(3 sc; dec)*6 (24)

Round 53-54 :

24 sc (24)

Round 55 :

(2 sc; dec)*6 (18)

Round 56 :

18 sc (18)

Round 57 :

(1 sc; dec)*6 (12)

Round 58 :

6 dec (6) cut the yarn, leave a long tail for needle sculpting of bunny's face.

β€” Ears :

Info :

make 2. With white yarn

Round 1 :

6 sc in MR (6)

Round 2 :

(1 sc; inc)*3 (9)

Round 3 :

9 sc (9)

Round 4 :

(2 sc; inc)*3 (12)

Round 5 :

12 sc (12)

Round 6 :

(3 sc; inc)*3 (15)

Round 7 :

15 sc (15)

Round 8 :

(4 sc; inc)*3 (18)

Round 9 :

18 sc (18)

Round 10 :

(5 sc; inc)*3 (21)

Round 11 :

21 sc (21)

Round 12 :

(6 sc; inc)*3 (24)

Round 13 :

24 sc (24)

Round 14 :

(7 sc; inc)*3 (27)

Round 15 :

27 sc (27)

Round 16 :

(8 sc; inc)*3 (30)

Round 17-25 :

30 sc (30)

Round 26 :

(8 sc; dec)*3 (27)

Round 27-29 :

27 sc (27)

Round 30 :

(7 sc; dec)*3 (24)

Round 31-33 :

24 sc (24) cut the yarn, leave a long tail for sewing.

Info :

Sew the ears, nose and eyebrows as in the pictures below. You can also add some personality for your bunny with needle sculpting of bunny's face, using tips in the pictures, it's up to you.

β€” Tail :

Info :

With white yarn make a pom pom diameter 6 cm.

Info :

Sew to the bottom of the body.

Assembly Instructions

  • Insert safety eyes between rounds 19 and 20 of the head, spacing them 12 single crochets apart before continuing to stuff and close the head.
  • Sew the ears to the top of the head using the long tails left from ear rounds, pinning them in place and securing with whipstitch for even placement.
  • Attach the arms to the middle ring by sewing securely through the ring stitches where the arms were connected in Round 8 of the Small Ring, matching photos for orientation.
  • Sew toes to each foot using the tails left on toes; place three toes on each foot and sew the feet to the bottom of the legs, pinning before sewing for correct placement.
  • Assemble rings by sewing round joins: sew round 22 of each ring to round 1 as instructed, filling with stuffing as you go to maintain shape and stackability.
  • Attach the finished head to the top of the middle ring or stack assembly as shown in the pictures, sewing through the neck area and reinforcing with multiple passes for secure attachment.

Important Notes

  • πŸ’‘Use stitch markers to mark the first stitch of each round so you always know where the round starts and ends.
  • πŸ’‘Stuff parts gradually and evenly while working, especially when sewing rings together, to avoid lumps and to keep the shape smooth.
  • πŸ’‘Leave long yarn tails when fastening off so you can sew parts securely; short tails may make finishing difficult.
  • πŸ’‘Pin parts in position before sewing to ensure correct alignment and symmetry, particularly ears, arms and legs.
  • πŸ’‘When changing colors, carry or weave in yarn ends neatly to prevent loose threads and to keep the inside of rings tidy.

This lovely stacking bunny makes a sweet handmade gift or a charming nursery toy that doubles as a skill-building stacker. The pattern combines shaping, color-change stripes, and simple assembly for a rewarding crochet project you will treasure. Finish with a fluffy pom pom tail and playful facial details for a bunny full of personality. πŸ§ΆπŸ‡βœ¨

You ask,

we answer.

FAQs

What size will the finished piece be?

The finished stacking bunny measures approximately as shown in the photos when using Alize Cotton Gold and a 3 mm hook; size may vary with different yarn or hook choices.

Can I use different yarn weights for this pattern?

Yes, you can use different yarn weights, but this will change the final size and stitch counts per round; adjust your hook size accordingly and be mindful of safety eye size for the new scale.

Do I need prior crochet experience for this pattern?

This pattern is rated intermediate and assumes familiarity with amigurumi techniques like magic ring, continuous rounds, increases and decreases, and basic sewing of parts.

How long does this project typically take to complete?

Most crafters will complete the bunny in about 8-10 hours total, depending on experience, finishing details, and assembly time.