About This Bulbasaur Amigurumi Pattern
This pattern creates a small, palm-sized Bulbasaur amigurumi using worsted weight yarn and a 3.5mm hook. It includes step-by-step instructions for the head, body, ears, pod, legs and simple felt markings. The project is designed to be quick, stash-busting, and friendly for new crocheters wanting a charming finished toy.

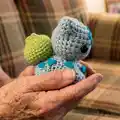
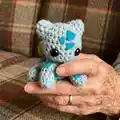
Photographs show placement and finished pieces to help with assembly and finishing. Felt shapes are glued on for easy, customizable markings and a cute final look.
Why You'll Love This Bulbasaur Amigurumi Pattern
I absolutely love this pattern because it turns simple stitches into an instantly recognizable, delightful little character. I enjoyed designing it to be both compact and full of personality, using felt details to give Bulbasaur charm without complicated embroidery. I love that it is a quick project, perfect for using leftover yarn and making fast gifts for friends. I also enjoy how the separate pieces sew together easily, so you get neat, consistent results every time.
Switch Things Up
I love how easy this pattern is to customize so I often switch yarn colors to create different characters or unique Bulbasaur variations.
I sometimes use pastel shades for a softer look, or bright contrasting felt pieces for a bolder, playful design.
If I want a larger version I switch to a bulkier yarn and a larger hook; the shapes stay the same but the toy becomes chunkier and cuddlier.
To make a tiny keychain version I choose finer yarn and a smaller hook, then reduce stuffing and use a keychain ring attached to the pod.
I also like to embroider eyes or use smaller safety eyes for different expressions when making toys for very young children.
Adding wire to the legs or connecting the limbs with a small button joint gives posability if I want a poseable figure.
For seasonal variations I change felt colors and markings to match holidays — orange and black for Halloween or red and green accents for festive versions.
I often glue on little fabric flowers or tiny accessories to personalize gifts and make each Bulbasaur feel special.
Try combining yarn textures, like a slightly fuzzy yarn for the pod and smooth yarn for the body, to create tactile contrast and interest.
When I want a sturdier toy I use tighter tension and more dense stuffing, and for plush, snuggly versions I keep tension relaxed and add extra polyfill for softness.
Common Mistakes & How to Fix Them
✗ Placing safety eyes too close together makes the face look misproportioned; place the eyes 5 stitches apart as instructed between the increases to get the intended expression.
✗ Forgetting to stuff as you go results in lumps or misshapen parts; stuff the head and body gradually, adding small amounts of polyfill while shaping for a smooth finish.
✗ Skipping stitch counts during increases and decreases causes uneven shaping and incorrect stitch totals; count after each round and follow the exact increase/decrease pattern to maintain the correct shape.
✗ Pulling stitches too tight on small rounds makes assembly difficult and parts stiff; maintain even, moderate tension for a soft, malleable amigurumi that is easier to sew together.
✗ Leaving very short tails when fastening off can make sewing pieces together awkward; leave a long tail when finishing pieces so you can seam them securely without re-threading the needle.