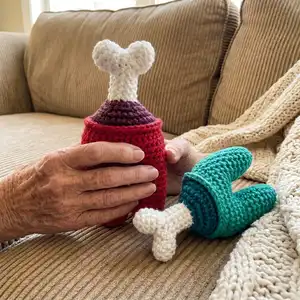
About This Among Us Crewmate Amigurumi Pattern
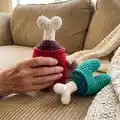
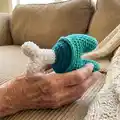
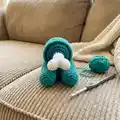
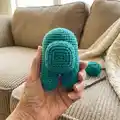
This pattern creates a small Among Us crewmate amigurumi with a removable bone top and split legs. It uses worsted weight yarn and simple amigurumi shaping for an expressive, squishy result. The instructions include body, bone top, and clear assembly photos to guide you through sewing and stuffing.
You will work in the round with basic increases and decreases to shape the legs and bone. The pattern is intermediate level, so some experience with amigurumi and sewing pieces together is helpful.
Why You'll Love This Among Us Crewmate Amigurumi Pattern
I absolutely love this pattern because it combines a playful design with simple shaping that yields a surprisingly expressive toy. I enjoy how the split-leg body and removable bone top create a fun silhouette that is instantly recognizable. I love that the pattern uses basic stitches so you can focus on shaping and finishing details. I also enjoy how customizable the piece is — different colors instantly change the personality. Finally, the included assembly photos make sewing everything together approachable and satisfying.
Switch Things Up
I love experimenting with color choices to give each crewmate a unique personality — try pastel shades for a soft look or neon tones for playful impact.
I often change the yarn weight and hook size to create different sizes: bulky yarn makes a chunky plush, while fingering weight yarn creates a tiny keychain version.
I sometimes embroider facial details or add tiny felt accessories like a visor or hat to personalize the character for gifts.
If I want posability, I add a short wire inside the legs before stuffing so the crewmate can stand or lean slightly.
I also like to make matching sets with different colored crews and a coordinating base or stand for display.
To create a more realistic bone, I use light gray yarn for shading or embroider tiny seam lines for texture.
When I want a washable toy, I substitute cotton yarn and secure knots more carefully before tucking ends inside the stuffing.
I sometimes add a loop at the top and a keyring for a portable keychain version — great for gift tags or bag charms.
For a themed set, I mix and match secondary colors for trims and visors, then photograph them together for a cohesive collection.
I recommend testing different stuffing amounts to achieve the exact firmness you prefer; a little makes it squishy, a lot makes it firm and stable.
Common Mistakes & How to Fix Them
✗ Skipping stitch counts when making the leg circles leads to mismatched leg sizes; count your stitches after each round to ensure both legs match exactly.
✗ Leaving large gaps between stitches exposes stuffing and weakens structure; use a slightly smaller hook or tighten tension so stuffing does not show through.
✗ Forgetting to attach the second leg without fasten off will break the construction instructions; when instructed, create the first leg, slip stitch off, then create the second leg and do not slip stitch off before joining.
✗ Not stuffing gradually can make shaping difficult and lumpy; stuff a bit at a time, adjusting as you go, to keep the silhouette smooth and even.
✗ Ignoring the instruction to sew the bone top through row 14 of the body can cause misalignment; follow the exact row placement when sewing to ensure the bone sits centered and secure.