About This Bobble Clutch Crochet Pattern
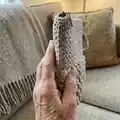
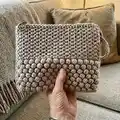
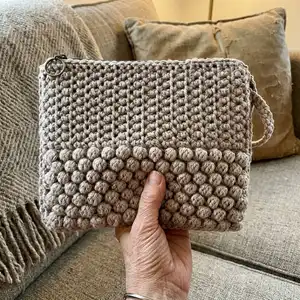
This pattern creates a textured bobble-stitch clutch worked as two identical bag faces then joined together. The design uses chunky yarn and a 6mm hook for a sturdy, tactile finish. Techniques include the bobble (MB) and crochet moss stitch for contrasting texture. Clear finishing instructions show how to add a zipper and a simple handle.
You will make two bag faces, join them with dc, and attach an open-ended zipper. The pattern is perfect for making a small statement accessory or a thoughtful handmade gift.
Why You'll Love This Bobble Clutch Crochet Pattern
I absolutely love this pattern because the bobble texture is so satisfying to make and looks striking on a simple clutch. I enjoy how the chunky yarn creates instant structure and a luxurious feel with very little fuss. The combination of bobble stitch and crochet moss stitch gives a beautiful contrast that feels handmade and modern. I also love that the finishing is straightforward—adding a zipper and a simple handle transforms the pieces into a functional accessory.
Switch Things Up
I often change yarn colors to make a two-tone bobble clutch, using a contrasting color for the bobble section to make it pop.
I like to switch yarn weight and hook size to create mini or oversized versions; a bulkier yarn gives a chunky, statement piece while a lighter yarn makes a delicate clutch.
I sometimes add a fabric lining with a small interior pocket to make the clutch more durable and to protect small items from snagging on the bobbles.
I like to replace the open-ended zipper with a magnetic snap or button flap for a different closure style and cleaner exterior look.
I sometimes lengthen the handle to make this into a wristlet or shorten it and add a detachable strap for crossbody wear using small lobster clasps.
I recommend trying different finishing edges — a neat slip stitch border or a round of sc can change the overall look and make joining easier.
I enjoy embellishing the surface with simple embroidery or sewn-on charms to personalize the clutch for gifting or seasonal themes.
I sometimes make a matching set by using the same yarn to crochet a small coin pouch or key fob with a single bobble row to match the clutch design.
For a more structured bag, I insert a thin piece of interfacing inside the lining before hand-sewing it in place to preserve the shape over time.
I advise testing the MB bobble on a small swatch first to perfect the tension and appearance before committing to the full clutch, as it really affects the final look.
Common Mistakes & How to Fix Them
✗ Skipping the foundation chain count will make the bag too narrow or wide; count your starting chain and ensure you have 30 chains before beginning.
✗ Not securing the bobble stitches properly leads to loose, floppy bobbles; follow the MB instructions exactly and ch 1 to secure each bobble.
✗ Working with inconsistent tension will distort the texture and final dimensions; maintain even tension throughout and check your gauge frequently.
✗ Forgetting to align bag faces before joining can misplace the zipper; pin or baste both faces together before joining and attach the zipper securely.
✗ Cutting the zipper without measuring first can leave it too short for the opening; measure against the finished edges then cut and tack it in place before sewing.