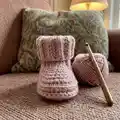
About This Baby's Booties Crochet Pattern
This pattern creates a pair of classic baby booties with a folded rib cuff and a shaped sole for a comfortable fit. Written for the smallest size with clear parenthetical adjustments for larger sizes. Techniques include working in back loops for the cuff, hdc rounds for the sole, and decreases to shape the toe. Ideal for using cotton or satin yarn for a soft, durable finish.
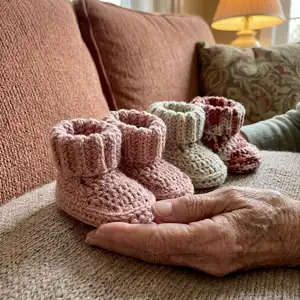
Includes detailed row and round-by-round instructions, plus simple sewing/assembly directions. Finished sizes fit infants 3, 6 and 12 months depending on size selected and yarn choice.
Why You'll Love This Baby's Booties Crochet Pattern
I absolutely love this pattern because it combines a classic silhouette with simple shaping that yields a polished, wearable baby bootie. I find the ribbed cuff especially charming and practical for keeping the bootie snug on tiny feet. The pattern is versatile—I enjoy using different yarn textures to change the look while keeping the same great fit. It is written clearly for the smallest size with parenthetical numbers for larger sizes, which makes it easy for me to scale up without reworking the whole design. Every finished pair always feels like a thoughtful handmade gift.
Switch Things Up
I love customizing these booties by changing yarn colors and textures to create different looks for every season.
I often make the cuff in a contrasting color to add a pop of interest that highlights the ribbing detail.
To make a larger or smaller pair I change the yarn weight and hook size; thicker yarn with a larger hook makes chunky booties while thinner yarn and a smaller hook make mini versions.
I sometimes add a small embroidered heart or a crocheted flower to the toe for an extra special touch.
Try using a cotton yarn for warm-weather booties and a soft acrylic or wool blend for cozy winter versions.
I recommend testing placement of any embellishment before sewing it on permanently so you can adjust symmetry and balance.
If you want non-slip soles, I add small dots of fabric glue mixed with yarn scraps on the sole for better traction.
For a gift-ready finish, I fold the cuff down and attach a tiny ribbon or button at the side for decoration.
I sometimes convert these into keychain or ornament size by using fingering-weight yarn and a much smaller hook for miniature keepsakes.
Remember to always swatch and adjust hook size to keep proportions when making any size or style changes.
Common Mistakes & How to Fix Them
✗ Skipping the back loop only instruction for the cuff causes the ribbing to disappear; work the cuff rows in the back loops only as directed to create the ribbed effect.
✗ Not ending with a right side row before measuring length can give an incorrect cuff measurement; measure after a RS row as stated so the cuff reaches the correct length.
✗ Failing to leave the remaining stitches unworked when making the instep will distort the foot shaping; follow the instruction to leave rem sts unworked so the sole rounds form correctly.
✗ Joining rounds incorrectly (wrong stitch for sl st join) causes lumpy joins and uneven shaping; always join with a slip stitch to the top of the chain or first stitch as specified to keep edges smooth.