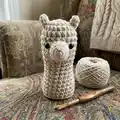
About This The Bowling Llama Amigurumi Pattern
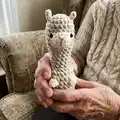
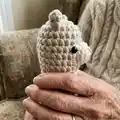
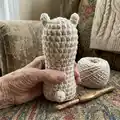
This pattern creates a sweet, no-sew amigurumi llama with an accompanying bowling ball for an adorable playset. The design integrates ears, snout and legs directly into the rounds so no separate sewing of parts is required. Youll use chunky velvet-style yarn and bobble stitch details to get the plush, textured look. Helpful photos and video links guide you through tricky steps like color changes and finishing.
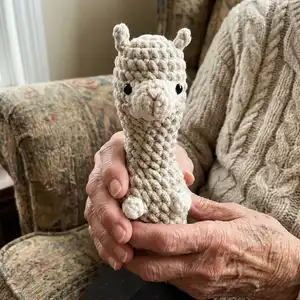
Perfect as a nursery toy or a small gift, this llama stands about 15cm tall when made with the recommended materials. The pattern includes explicit round-by-round instructions and tips for stuffing, eye placement, and finishing touches.
Why You'll Love This The Bowling Llama Amigurumi Pattern
I absolutely love this pattern because it turns simple, chunky yarn into a delightfully textured little character that feels as good as it looks. I enjoy the no-sew construction — integrating the ears, snout and legs into the rounds saves time and makes assembly easy and tidy. The bobble stitch details add so much personality and make each llama unique. I also love that the pattern includes video links and clear notes, so I can follow along even when trying a new technique.
Switch Things Up
I love experimenting with colors, so I often swap the cream body for soft pastels or a bold single color to create a personality-packed flock.
I sometimes use a bulkier chenille yarn and a larger hook to make a chunky, cuddly version that is perfect for little hands.
For a mini keychain version, I use thinner yarn and a smaller hook and reduce stuffing for a compact, portable pal.
I also like to change the bobble stitch color to create polka-dot spots — pick a contrasting color and work the bo4 in that color only for fun accents.
If you want a poseable toy, try inserting thin wire into the neck area or light armature in the base for subtle shaping and stability.
I often embroider different facial expressions by moving the nose and eye placement slightly to change the llama's mood and character.
Try adding tiny accessories—crocheted scarves, hats, or a small saddlebag—to personalize each llama for gifting.
For the bowling ball, experiment with stripe patterns or three-tone spirals by changing colors every few rounds for a retro look.
I recommend testing color placement on a small swatch first so you know exactly where stripes or spots will fall on the finished toy.
Finally, I always secure safety eyes with hot glue inside for extra durability if the toy will be used by young children, and I finish seams with invisible decreases for a professional look.
Common Mistakes & How to Fix Them
✗ Skipping stitch markers during rounds with increases and decreases leads to losing the beginning of round; place a marker at the start of every round and move it up as you go.
✗ Overstuffing early distorts shaping and makes it hard to close openings; stuff gradually, shaping as you add small amounts of fiberfill.
✗ Leaving large gaps between stitches allows stuffing to peek through; use slightly tighter tension and ensure stitches sit close together when working with chunky yarn.
✗ Forgetting to insert safety eyes before closing the head results in difficult placement; position and secure safety eyes between the specified rounds before stuffing too firmly.
✗ Rushing bobble stitch sections causes uneven bobbles and inconsistent texture; practice the bo4 technique on a swatch to keep bobbles uniform and consistent.
✗ Not weaving the tail through the front loops for closure can leave a visible hole; follow the tail-weaving instruction and pull tight through the front loop of each remaining stitch to close neatly.