🧢 Beautiful ✨ Detailed πŸ’ Adorable

Plush Booties with Pompoms Pattern

Plush Booties with Pompoms Pattern
4.4β˜… Rating
2-4 Hours Time Needed
4.1K Made This
βœ‚οΈ

Intermediate Level

Ideal for those with basic crochet experience, featuring slightly more advanced stitches and techniques to expand your skills.

⏱️

Bite-Sized Project

Finishes in 2-4 hoursβ€”perfect for an afternoon of creative relaxation.

🧢

Effortless Style

Simple lines for everyday wear, focusing on quality stitchwork and timeless appeal that never goes out of fashion.

About This Plush Booties with Pompoms Pattern

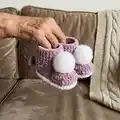
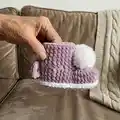
This pattern creates a pair of plush baby booties worked from the sole up using super-bulky velvet yarn for a soft, squishy texture. The design includes a color-change cuff, a shaped front (muzzle) and fluffy pompoms for a sweet finishing touch. You will follow step-by-step rounds with photos to guide shaping and assembly for a polished result.
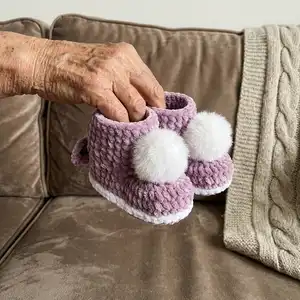
Plush Booties with Pompoms Pattern crochet pattern - detailed view of completed project

Sizes vary by hook and tension β€” the pattern is adjustable and quick to make. Ideal as a thoughtful handmade gift or cozy accessory for newborn photography.

Why You'll Love This Plush Booties with Pompoms Pattern

I absolutely love this pattern because it transforms thick velvet yarn into the coziest little booties that babies adore. I enjoy the simple sole-to-top construction that still provides charming shaping and personality with minimal finishing. The pompom detail elevates the design and makes each pair feel like a special gift. I also love that the pattern is adaptable β€” you can change yarn or hook size to achieve different finished sizes and textures.

Plush Booties with Pompoms Pattern step 1 - construction progress Plush Booties with Pompoms Pattern step 2 - assembly progress Plush Booties with Pompoms Pattern step 3 - details and accessories Plush Booties with Pompoms Pattern step 4 - final assembly and finishing

Switch Things Up

I love to experiment with color placement β€” try reversing the colors so the sole and cuff swap shades for a bold contrast.

You can make the booties larger by switching to a thicker hook or adding 2-4 chains to the foundation and adjusting increases proportionally.

I often replace the faux pompoms with crocheted flowers or bows for a softer, baby-friendly embellishment.

If you want a non-slip sole, consider sewing a thin layer of faux suede or adding fabric glue dots to the bottom.

I sometimes make the ties shorter and use a button closure on the heel for a tidier look on newborns.

For a miniature keychain or decorative version, use thinner yarn and a smaller hook to scale down the pattern.

I like to embroider initials or a small motif on the heel before finishing to personalize each pair as a gift.

To make ankle-high booties, continue working rounds 10-16 for extra height or add more sc rounds until you reach the desired cuff height.

If you prefer no seams, try joining rounds with invisible joins and slip stitching into front loops to create a cleaner edge.

I recommend testing one sole first and adjusting your chain length if you want a narrower or wider fit; small changes make a big difference.

Don't be afraid to mix textures β€” pair the velvet with a cotton contrast cuff for durability where little feet rub most.

Common Mistakes & How to Fix Them

βœ— Skipping the recommended chain length for the sole can make the bootie too small or too large; follow the ch14 baseline and adjust only after checking your gauge. βœ— Not weaving in the starting tail into the foundation row can cause gaps along the sole; weave the yarn tail into the stitches as you work round 1 for a seamless edge. βœ— Changing tension between the sole and the cuff creates uneven edges and shapes; keep consistent tension and try a practice sole first to match the pattern counts. βœ— Forgetting to use stitch markers when marking the muzzle middle can lead to asymmetrical shaping; fold and mark the middle points before crocheting the front part to ensure balance.

Plush Booties with Pompoms Pattern

Make these irresistibly soft plush baby booties with fluffy pompoms using super-bulky velvet yarn. You will love how quickly the sole-to-top construction comes together and how cozy the finished booties feel. The pattern includes clear step-by-step instructions, photos, and simple finishing tips so you can sew on pompoms and ties with confidence. Perfect for handmade gifts and newborn photo props.

Intermediate 2-4 Hours

Materials Needed for Plush Booties with Pompoms Pattern

β€” Main Fabric

  • 01
    Super Bulky / Super Chunky / 14-ply velvet yarn (Himalaya Dolphin Baby) 100g/120m β€” main color approx 50-100g
  • 02
    Yarn Art Dolce 100g/120m as an alternate velvet yarn (use two colors if desired) approx 50-100g
  • 03
    Pompoms size 3.5-5 cm β€” 2 pieces (one for each bootie)

β€” Tools Required

  • 01
    Crochet hook size 3.5 mm (recommended) or 4 mm (optional)
  • 02
    Pompons size 3.5-5 cm (2 pcs.)
  • 03
    Needle and strong sewing thread for sewing pompoms
  • 04
    Scissors
  • 05
    Lighter (for singeing tie ends)
  • 06
    Stitch markers
  • 07
    Yarn/tapestry needle for weaving in ends
  • 08
    Pins for assembly (optional)

Progress Tracker

0% Complete

β€” Materials :

Infos :

Super Bulky/Super Chunky/14ply velvet yarn Himalaya dolphin baby (100g/120m) or Yarn Art Dolce (100g/120m) of 2 colors. Crochet hook (I used 3.5 mm or 4 mm). Pompoms size 3.5-5 cm (2 pcs.). Needle, scissors, strong sewing thread for sewing pompoms. Lighter, stitch markers.

β€” Abbreviations :

Infos :

MR - magic ring. ch - chain. sc - single crochet. sl st - slip stitch. inc - increase (2 sc in one stitch). dec - decrease (2 sc together). sc8tog - crochet 8 sc together.

β€” Sole :

Round 1 :

ch14. Starting on the second chain from the hook: 12 sc; 4 sc in the last chain; on the other side of the chain: 11 sc (weave in the yarn tail into the stitches); inc in the first chain (29)

Round 2 :

12 sc, 4 inc, 11 sc, 2 inc (35)

Round 3 :

Sc, inc, 9 sc, (sc, inc)*4, 12 sc, inc , 2 sc, inc, sl st (42)

Info :

Cut the yarn. The sole is ready.

β€” Change color and work in back loops :

Round 4 :

attach the yarn to the heel and crochet around with sc in back loops (42 sc)

Round 5-6 :

42 sc (42)

β€” Crochet the front part of the bootie (muzzle) :

Info :

Fold the bootie in half. Then in half again. With a hook find the middle and mark it with stitch markers on both sides. And crochet this part from marker to marker. IMPORTANT: you may get a different number of stitches, I have 22sc. Just crochet this part alternating sc and dec.

Round 7 :

I have: (sc, dec)*7, sc (15)

Round 8 :

ch1, crochet decreases along the inner side to the end of row (7 dec and 1sc) - you can have another number of decreases. (8)

Round 9 :

ch1, sc8tog.

β€” Go to the top of the bootie :

Round 10-16 :

sc around (7 rounds) (25)

Info :

Crochet the sole around with sl st in front loops.

β€” Now sew on pompoms :

Info :

Sew the pompoms to the front of each bootie as shown in the photo, fastening securely with strong thread and hiding knots inside the pompom.

β€” Ties (P1) :

Ties (P1) :

Ch65. Singe the ends with a lighter and attach it to the booties as shown in the photo, using a hook, threading through 1 stitch and tying it on a bow on the heel.

Assembly Instructions

  • Sew each pompom to the front of the bootie using strong sewing thread; knot securely and hide the thread ends inside the pompom.
  • Attach the ties by threading the Ch65 cord through one stitch at the heel using a hook and tie into a bow, singe the ends with a lighter to prevent fraying.
  • Weave in all loose ends along the sole and cuff with a yarn needle, trimming any excess yarn to keep seams tidy.
  • Pin parts and check symmetry before final sewing to ensure pompoms and bows are evenly placed on both booties.
  • If using two colors, ensure the color change is worked in back loops as instructed so the inner sole remains the original color while the cuff is the second color.

Important Notes

  • πŸ’‘According to this pattern, booties will measure approximately 8 to 13 cm depending on crochet density and hook size; gauge affects final size.
  • πŸ’‘Do not make the foundation chain less than 10 or more than 18 chains for this design; ch14 is the pattern baseline.
  • πŸ’‘My booties are worked for a leg up to 10 cm when using a 3.5 mm hook and ch14; for larger sizes use a different pattern or larger hook and yarn.
  • πŸ’‘Use stitch markers to find and mark the muzzle middle before crocheting the front part to maintain symmetry.

These plush booties are a cozy, quick-to-make gift that adds a handmade touch to any newborn outfit. 🧢 The velvet yarn gives a luxurious, soft finish and the fluffy pompoms bring playful charm. πŸŽ€ Make a pair in your favorite colors and share the love β€” handmade gifts are treasured for years. 🍼

You ask,

we answer.

FAQs

What size will the finished piece be?

The finished booties measure approximately 8 to 13 cm depending on your crochet tension and hook size; using 3.5 mm hook with ch14 makes a bootie for a leg up to 10 cm.

Can I use different yarn weights for this pattern?

Yes, you can use different yarn weights, but this will change the final size; choose an appropriate hook for your yarn and adjust the foundation chain if necessary.

Do I need prior crochet experience for this pattern?

This pattern is rated intermediate because it involves shaping, decreases, and color changes worked in back loops; basic crochet skills are recommended.

How long does this project typically take to complete?

Most crocheters complete one pair of booties in about 2-4 hours depending on experience and whether you make ties and sew on pompoms by hand.