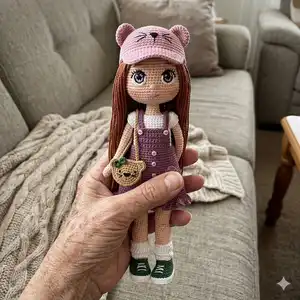
Create a charming Mimosa Baby amigurumi with step-by-step instructions and detailed assembly notes. This pattern guides you through head shaping, embroidered eyes, facial features, arms, feet and legs to craft a fully finished 35cm doll. You'll find materials, abbreviations and helpful tips to make the process smooth and enjoyable. Perfect for crafters who love detailed, photo-assisted projects.
Progress Tracker
0% Complete
— Head :
Row 1 :
6x into the magic ring
Info :
Go to eye processing. After the eye embroidery is finished, the head will continue to be knitted.
— Eye Processing :
Step 1 :
Identifying eye locations: Align with the third increment loop of the head in the 12th row and place a marker between the 21st and 22nd rows with a pin. This is the midpoint between the two eyes. Make a mark with a pin by counting 6 sc to the right of the pin and 5 to the left of the pin. Remove the pins by placing dots in the designated places with the flying pen. Pupils will be embroidered on the marked places.
Step 2 :
There are 11 sc between the points we marked to process the pupils. Eye distance can be zoomed in and out optionally.
Step 3 :
The concept of tour will be used when processing the eye. The tour consists of two stages. In the first stage, basting is done by sinking into the folds of the frequent needles. In the second stage, the round is completed by going through all the basting stitches.
Step 4 :
one- Draw a circle with a flying pencil so that the diameter of the pupils corresponds to two single needles. Attach a single layer of black domino thread to the needle. Complete the first step by basting the circumference of the circle from the multiples of the frequent needles. In the second stage, complete the tour as in the image by passing from the outside to the inside under each of the stitches you have worked on.
Step 5 :
Remove the needle from the upper part of the eye and pass under the opposite stitches to fill the pupil. Process horizontally all the way down, taking care not to overlap the threads while embroidering.
Step 6 :
If you could not provide an oval image to the pupil as in the image, try to get the correct shape by sinking around it a few times. Process the other pupil in the same way.
Step 7 :
Draw the iris of the eye in a circle, leaving a single needle around the pupil. Starting from the upper part of the eye with dark blue thread, embroider around the iris by basting from the fold of the loops. Complete the round as in the image by passing under each of the stitches you have embroidered from the outside to the inside.
Step 8 :
Process one more round into the iris.
Step 9 :
Embroider the upper half of the iris with another round of dark blue thread. The remaining half will be embroidered with light blue thread.
Step 10 :
With a double layer of light blue thread, embroider the half part under the pupil. The width and length of the iris is 4 sc. Process the other iris in the same way. If there are gaps in the processed areas, retouch the gaps by sinking into the head.
Step 11 :
To embroider the white part of the eye, draw a circle starting from the bottom row of the inner part of the eye and ending at the highest point of the outer part of the eye, as in the image. The part of the circle on the nose side of the eye should be the width of a single needle, expand a little more towards the outer part, and taper a little more towards the top.
Step 12 :
Complete the first step by basting around the circle you have drawn, starting from the top. At the end of the first stage, remove the needle from the starting point and complete the tour by doing the second stage.
Step 13 :
Do one more round in the same way.
Step 14 :
Since the upper white part of the eye is full, start the new round from the untreated area and process one more round. If there are 3 rounds of processing on the white part, but there are still empty spaces, one more round can be made or the empty spaces can be retouched.
Step 15 :
A round will be made with the same technique between the blue and white part of the eye with the black rope. Process the other eye in the same way.
Step 16 :
Lash bottom line: one- Sink into the second row from the bottom of the outer part of the eye. Baste up to the corner of the eye. Complete the tour by sinking in from the eye spring and leaving the starting point and embroidering over the basting stitches. Do one more round, starting from the top row of the lower lash line and up to the corner of the eye.
Step 17 :
Eyelash: one- Come out from the upper row of the lower line of the eyelash as in the image and sink into the root of the eyelash. Repeat the same action on the same eyelash. Determine the places of the other eyelashes as in the image. The technique of processing eyelashes is as follows. First, a small eyelash will be processed by sinking further than the point you have determined. Then, insert the needle under the small eyelash and exit from the point you have determined and sink into the root of the eyelash. Complete the other eyelashes with this technique.
Step 18 :
Eye shimmer: Attach two layers of white thread to the quilt needle. Process both eyes in the same way as in the pictures. Eye processing is finished. The head will continue to be knitted.
Row 31 :
2x, a, (10x, a)*5, 8x (66)
Row 32 :
5x, a, (9x, a)*5, 4x (60)
Row 34 :
2x, a, (7x, a)*5, 5x (48)
Row 35 :
5x, a, (6x, a)*5, x (42)
Info :
You fill the head. Fill the head while keeping it round and homogeneous in stuffing; fill to the sides after filling so the head becomes more rounded.
Row 38 :
2x, a, (5x, a)*5, 3x (36)
Row 41 :
(x, a)*8, sl st (16)
Info :
Head done, cut the rope. Fasten off leaving a tail for sewing.
— Nose :
Info :
It will be embroidered by leaving two single needles spaced, two rows below the eye, coinciding with the middle level of the two eyes. Separate the yarn into layers. Process the nose by sinking in and out 4-5 times as in the image.
— Eyebrow :
Info :
Embroider the eyebrows one row above the lashes, leaving 9 single needles with a width of 5 sc between the two eyebrows. Follow the images.
— Lips :
Info :
Determine the place of the lip with pins, leaving 3 single needles down the nose, and 3 frequent needles. Attach the thread to the needle in two layers. To embroider the lip, the triangle shape will be created. Enter through the neck space and exit from the designated point on the left. Dive into the middle of the lip in the upper row and exit from the determined point on the right. To form the other side of the triangle, sink to the upper point and exit the neck space. Enter from the left of the lip and enter from the right and exit the neck cavity. Lip processing Youtube link provided in original PDF.
1st round :
Lip shaping will be created by wrapping the triangle. Insert the needle under the thread and exit from the top to embroider. Starting from the top left edge, loop the rope 5 times. Take care not to overlap the yarn and to keep it regularly side by side. Do the same to the right side of the upper lip. Complete the round by wrapping the bottom edge 6-7 times.
2nd round :
In the second round, if you make 3-4 loops on the outer lips and the loops on the lips towards the middle part, it will stop. Intensity of 4 to the lower lip, middle of the lower lip. Lip fullness can be increased upon request.
— Arm :
Start :
Start with skin color.
Row 1 :
6x into the magic ring
Row 3 :
2x, v, 4x, v, 2x (12)
Row 4 :
3x, v, 5x, v, 2x (14)
Row 9 :
4x, a, 6x, a, x (13)
Rows 11-36 :
26 rows: 12x, sl st, done break the thread.
Info :
The arms will not be filled with fibers. Knit the other arm in the same way.
— Foot Recipe :
Row 1 :
9ch check. Starting from 2ch, into the first loop 2x, 6x, into the same loop 3x, 7x (18)
Row 11 :
3x, 7ch and skip 9x, 8x
Row 12 :
3x, 7x on 7 chain, 8x (18)
Row 13 :
(x, a)*6 (12) - continue with the heel part
Row 14 :
6a, the heel is over, leave a long rope to collect the heel and break the rope.
Info :
Gather the needle and 6 sc needles from the flo loops, tighten them well, knot the thread inside the foot and hide it. The foot is over, the leg will be passed. Knit the other foot in the same way.
— Left Leg Recipe :
Info :
While filling, the left foot and leg should always be filled to the left of the leg, creating a protruding image on the calf and carefully filling. If the filling in the feet and legs is not done carefully and regularly, the distorted and protruding appearance of the heels, calves and knees may not be available.
Row 1 :
We turn the back of the foot and pull the 7th loop, attach the thread to the 4th loop, 4x on the chain, one sc in the gap between the front part and the sole, 9x in the front, one sc in the gap between the front part and the sole, 3x on the chain (18)
Row 2 :
4x, a, float 7x, a, 3x (16)
Row 24 :
5x, a, x, a, 13x (21)
Row 26 :
4x, a, x, a, 12x (19)
Row 27 :
5x, a, 7x, 4v, 3x (22)
Row 30 :
4x, v, x, v, 11x (20)
Row 34 :
7x, v, x, v, 11x (23)
Row 45 :
4x with tan, 24x with white thread (28)
Row 47 :
4x, sl st, finish, break the thread. Left leg done.
— Right Leg Recipe :
Info :
When filling, the right foot and leg should always be filled to the right of the leg to create a protruding image on the calf. The right leg is knitted with the same recipe as the left leg until the 26th row. The difference in appearance in the two lower legs is all about filling. Keep the leg away and check the image frequently.
Row 1 :
We turn the back of the foot and pull the 7th loop, attach the thread to the 4th loop, 4x on the chain, one sc in the gap between the front part and the sole, 9x in the front, one sc in the gap between the front part and the sole, 3x on the chain (18)
Row 2 :
4x, a, float 7x, a, 3x (16)
Row 24 :
5x, a, x, a, 13x (21)
Row 26 :
4x, a, x, a, 12x (19)
Row 27 :
5x, a, 7x, 4v, x (22)
Row 30 :
4x, v, x, v, 11x (20)
Row 34 :
7x, v, x, v, 11x (23)
This Mimosa Baby amigurumi pattern helps you craft a sweet, poseable doll full of personality and hand-embroidered details. Follow the head and eye embroidery steps to bring expression to the face and use the leg filling tips for balanced shaping. Make one for a special gift or to add a handmade friend to your collection. 🧶✨😊