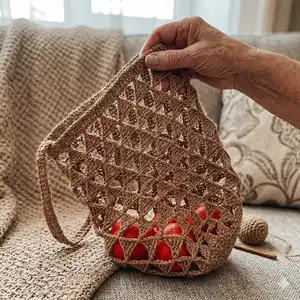
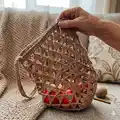
🧢 Beautiful ✨ Detailed πŸ’ Adorable

Mash Bag Triangles Pattern

Mash Bag Triangles Pattern
4.5β˜… Rating
5-7 Hours Time Needed
3.6K Made This
βœ‚οΈ

Beginner Friendly Level

Perfect for those just starting their crochet journey, with clear instructions and simple techniques

⏱️

Weekend Treat

Takes 5-7 hours, making it an enjoyable project to finish over a couple of days.

✨

Stylish Touch

An elegant detail to elevate any look, combining traditional techniques with contemporary design sensibilities.

About This Mash Bag Triangles Pattern

This pattern creates a lightweight, triangular-motif mash bag crocheted from twisted raffia yarn. The design uses a circular base worked into a repeating triangle mesh that forms the bag body. It includes instructions for shaping and steaming the triangles, crocheting the base trim and creating sturdy double handles. The finished bag is practical, breathable, and perfect for market trips or beach days.

Mash Bag Triangles Pattern crochet pattern - detailed view of completed project

Step-by-step instructions are provided with rounds clearly numbered for easy following. Photos and a chart are included to help you visualize the motif and finishing steps.

Why You'll Love This Mash Bag Triangles Pattern

I absolutely love this pattern because it turns simple stitches into a beautiful, airy mesh that looks designer-made. I enjoy working with raffia for its natural texture and the satisfying way the triangles take shape after steaming. The pattern is beginner friendly but yields a professional-looking finished bag, which always feels rewarding. I also love that the bag is practical and eco-friendly β€” perfect for everyday use or as a thoughtful handmade gift.

Mash Bag Triangles Pattern step 1 - construction progress Mash Bag Triangles Pattern step 2 - assembly progress Mash Bag Triangles Pattern step 3 - details and accessories Mash Bag Triangles Pattern step 4 - final assembly and finishing

Switch Things Up

I love how easy it is to customize this pattern with color and size β€” you can swap the raffia for cotton cord for a softer, washable bag.

I sometimes change the triangle sizes by adding or removing DC clusters to create bigger or smaller openings in the mesh.

I often make the bag larger by adding more base repeats before working the vertical triangle rows to create a wider bag.

If you want a firmer base, add an internal round of tight single crochets or use a slip-in flat circular base before attaching the mesh sides.

I like to braid two thinner cords to make decorative stronger handles instead of crocheting DC handles for a different look and extra strength.

You can add a small lining or inner pouch by sewing in a fabric piece to protect delicate items and prevent small things from slipping through triangles.

Try decorative trims or tassels at the bottom points for a boho twist β€” they’re easy to attach and add personality.

If you prefer a longer strap, simply chain more for the handles and adjust DC count when finishing to keep proportions balanced.

I also recommend experimenting with metallic or colorful raffia strands twisted with natural raffia for a subtle glint in the mesh when gifting the bag.

Finally, don’t be afraid to mix stitches for the base trim (for example alternating SC and HDC) to create a contrasting edge that frames the triangle motif nicely.

Common Mistakes & How to Fix Them

βœ— Skipping the initial chain & join step will give you a twisted or uneven center; make sure to join the 4 CH into a circle with a slip stitch before continuing. βœ— Not pulling up long loops for the false DC makes the triangle points too short; pull the loop approximately 20 mm as instructed for consistent triangle height. βœ— Forgetting to steam and shape the triangles after crocheting makes them look floppy; steam the triangles and shape them by hand for crisp points and a uniform finish. βœ— Not counting repeats when creating rows with ( … )*15 can create misaligned triangles; place stitch markers and count repeats as you work each round to stay accurate.

Mash Bag Triangles Pattern

Make a stylish, reusable mash bag using twisted raffia yarn and a simple triangle motif. This pattern walks you through creating the shaped triangular mesh, steaming and shaping the triangles, adding a sturdy base and handles for a finished bag. You will enjoy the tactile process of shaping raffia and watching the bag transform into a roomy, eco-friendly carryall. Perfect for makers who like a quick, satisfying accessory project.

Beginner Friendly 5-7 Hours

Materials Needed for Mash Bag Triangles Pattern

β€” Main Fabric

  • 01
    Paper twisted raffia yarn, 100 gr / 220 yards (200 m) - main material (one or more balls as needed depending on bag size)

β€” Tools Required

  • 01
    Crochet hook size 3.0 mm
  • 02
    Scissors
  • 03
    Stitch markers
  • 04
    Tape measure or ruler
  • 05
    Yarn needle for hiding ends
  • 06
    Iron for steaming and shaping
  • 07
    Glue (for joining raffia ends if necessary)
  • 08
    Rubber bands (to secure wound raffia balls)

Progress Tracker

0% Complete

β€” Materials and Tools :

Info :

Paper twisted raffia yarn, 100 gr/ 220 yards (200 m);

Info :

3 mm hook;

Info :

Scissors.

Info :

Gauge: 16 stitches and 4-5 row = 4*4 inches (10*10cm).

Info :

Finished mash bag from the specified materials: width - 12 inches (30 cm), height - 14 inches (36 cm), length of the handles - 22 inches (55 cm).

β€” Abbreviations :

Infos :

CH - chain stitch; SlSt - slip stitch; HDC - half double crochet; SC - single crochet; DC - double crochet; TC - treble crochet; DTC - double treble crochet; DDTC - double double treble crochet; Inc - increase (2 DC in 1).

Info :

Link to the video of the process (57 min.): https://youtu.be/cTZriybh4FM

β€” Recommendations for working with twisted raffia :

Info :

1. Before starting work, the raffia needs to be unwound into balls. Twisted raffia is usually sold in strands. Place a strand over the legs of a chair and carefully unwind it while simultaneously winding it into a ball. Secure the balls with a rubber band.

Info :

2. When the thread runs out, you need to take a new ball. Separate the fibers. Straighten the ends of the ribbon. Cut the ends diagonally. Overlap them with a 5 mm gap. Glue them together. Wait for a bit to dry, then twist the ribbons. Twist the fibers back.

β€” Crochet the Bottom :

Info :

Crochet 4 CH.

Info :

Join to the circle with SlSt.

Round 1 :

Pull up the loop 20 mm long. Twist the hook clockwise to create a loop. Pull up another loop. Crochet the two loops on the hook together, then another two. This is a false DC, which is also the first DC of the row. 14 DC in the hole, SlSt (=15).

Info :

Crochet the end in this row, cut off the excess.

Round 2 :

Pull up the loop 20 mm long. Make the false DC, DC in the same loop, 14 Inc, SlSt (=30).

Round 3 :

Pull up the loop 20 mm long. Make the false DC, Inc, (DC, Inc)*14, SlSt (=45).

Round 4 :

(4 CH, SC from the 2nd loop from the hook, 2 DC, skip 2 loops, SlSt)*15, 4 SlSt on the back loop only of the 1st triangle.

Info :

Shape each triangle with your hands before steaming.

Round 5 :

(5 CH, SC from the 2nd loop from the hook, 2 DC, TC, SlSt)*15, 5 SlSt on the back loop only of the 1st triangle.

Round 6 :

(6 CH, SC from the 2nd loop from the hook, 2 DC, TC, DTC, SlSt)*15, 6 SlSt on the back loop only of the 1st triangle.

Round 7 :

(6 CH, HDC from the 2nd loop from the hook, DC, TC, DTC, DDTC, SlSt)*15, 6 SlSt on the back loop only of the 1st triangle.

Info :

Steam with an iron on the front and wrong sides. Shape the triangles with your hands.

β€” Crochet the Base :

Info :

The diameter of the circle after steaming is about 10 7/8 inches (27-28 cm).

Round 8 :

(6 CH, HDC from the 2nd loop from the hook, DC, TC, DTC, DDTC, SlSt)*15, 6 SlSt on the back loop only of the 1st triangle.

Round 9-14 :

(6 CH, HDC from the 2nd loop from the hook, DC, TC, DTC, DDTC, SlSt)*15, 6 SlSt on the back loop only of the 1st triangle.

Info :

Steam with an iron 8-14 rows on the front side. Shape the triangles with your hands.

Round 15 :

(6 CH, SlSt)*15 (=105).

Round 16 :

Pull up the loop 20 mm long. Make the false DC, 104 DC, SlSt.

Info :

Measure the end of the thread 3.5 yards (3 m) long for the base trim, cut off.

β€” Crochet the Handle (*2) :

Info :

Crochet 82 CH.

Info :

Crochet 80 DC from the 3rd loop from the hook.

Info :

Cut the thread, pull out the end. Tie the knot. Hide the ends on the wrong side.

Info :

Similarly crochet the 2nd handle.

β€” Base Trim :

Info :

Count 15 and 38 loops from the beginning of the row, place the markers.

Info :

Crochet 13 SlSt along the edge to the marker. Crochet 3 SlSt on the 3rd post of the handle.

Info :

Crochet 18 SlSt, stop 2 loops before the next marker. Crochet 3 SlSt on the 3rd post of the other end of the handle.

Info :

Then 29 SlSt to the 3rd marker. Crochet 3 SlSt on the 3rd post of the 2nd handle.

Info :

Crochet 18 SlSt, stop 2 loops before the next marker. Crochet 3 SlSt on the 3rd post of the other end of the 2nd handle.

Info :

Crochet 14 SlSt to the end of the row. Cut the thread, pull out the end. Close the row with the end. Strengthen and hide the ends on wrong side.

Info :

Steam with an iron the last row of the bag and handles.

β€” Finishing and Notes :

Info :

Congratulations! Your trendy mash bag is ready πŸ‘

Info :

I hope you enjoy this pattern, and if you have questions about it, please convo me. I am always glad to help!!!

Info :

Follow the designer on social media: YouTube and Instagram links provided in the pattern.

Assembly Instructions

  • Steam and shape each triangle after the triangle rounds (rows 4-7) to give crisp, uniform points before continuing with the base.
  • After completing rows 8-14 for the base, steam the front side of rows 8-14 and shape the triangles with your hands to maintain the mesh structure.
  • Measure and attach handles evenly: count 15 and 38 loops from the beginning of the row and place markers before crocheting the base trim to align handles accurately.
  • Sew and hide all ends on the wrong side after cutting threads for the handles and the base trim to secure and neaten the finish.

Important Notes

  • πŸ’‘Work with consistent tension when pulling up 20 mm loops for the false DC; inconsistent loop height will make triangle points uneven.
  • πŸ’‘Steam triangles gently on both front and wrong sides and shape with your hands for best, durable shape β€” avoid pressing flat with the iron.
  • πŸ’‘Place stitch markers when repeating groups (for example *15 repeats) to ensure symmetry and to track the beginning and end of motif repeats.

This mash bag pattern creates a beautiful, breathable, and eco-friendly market bag that showcases sculpted raffia triangles. It is lightweight yet sturdy, making it perfect for shopping, beach trips, or everyday carry. Enjoy making one for yourself or as a handmade gift that stands out with natural texture and thoughtful finishing. 🧢✨

You ask,

we answer.

FAQs

What size will the finished piece be?

The finished mash bag measures approximately 12 inches wide by 14 inches high with handles approximately 22 inches long using the recommended raffia and hook size.

Can I use a different yarn instead of raffia?

Yes, you can substitute other cord or bulky yarns, but the texture and final drape will change; adjust hook size and expect a different finished size and look.

Do I need to steam the triangles?

Yes, steaming and shaping the triangles is important to obtain crisp points and consistent mesh structure; steam on front and wrong sides as instructed.

How long does this project typically take to complete?

Most crocheters complete this project in 5-7 hours, though time may vary based on experience and how carefully you steam and shape the triangles.