🧢 Beautiful ✨ Detailed πŸ’ Adorable

Llama No Sew Amigurumi Pattern

Llama No Sew Amigurumi Pattern
4.7β˜… Rating
2-3 Hours Time Needed
2.8K Made This
βœ‚οΈ

Intermediate Level

Ideal for those with basic crochet experience, featuring slightly more advanced stitches and techniques to expand your skills.

⏱️

Bite-Sized Project

Finishes in 2-4 hoursβ€”perfect for an afternoon of creative relaxation.

🧸

Cute Companion

An adorable friend to cherish, handcrafted with love to bring comfort and joy for years to come.

About This Llama No Sew Amigurumi Pattern

This pattern guides you through crocheting a no-sew llama amigurumi, worked from the head down into the body in one piece. It uses super bulky yarn and a 3.5mm (E) hook to create a soft, plush texture with easy shaping. Colorful saddle details are worked separately and glued on for a quick decorative finish. Photographs and clear rounds help you follow each shaping step.
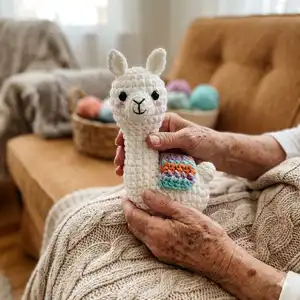
Llama No Sew Amigurumi Pattern crochet pattern - detailed view of completed project

The pattern includes step-by-step rounds for the head/body, nose, ears, and saddle plus finishing notes. No sewing is required to join the major piecesβ€”perfect for quick assembly and neat results.

Why You'll Love This Llama No Sew Amigurumi Pattern

I absolutely love this pattern because it transforms simple stitches into a sweet, personality-filled llama in just a few hours. I designed the no-sew construction so you can focus on crocheting rather than complicated finishing, which saves time and gives a tidy result. The colorful saddle and small facial details allow you to be creative with yarn choices and tiny embellishments. Making one always brightens my day and makes a delightful handmade gift for friends and family.

Llama No Sew Amigurumi Pattern step 1 - construction progress Llama No Sew Amigurumi Pattern step 2 - assembly progress Llama No Sew Amigurumi Pattern step 3 - details and accessories Llama No Sew Amigurumi Pattern step 4 - final assembly and finishing

Switch Things Up

I love customizing this llama by changing yarn colors β€” try soft pastels for a baby-friendly version or jewel tones for a bold look.

I often make a mini version by using lighter weight yarn and a smaller hook, which creates adorable keychain-sized llamas.

Try swapping the saddle colors or adding tiny pom-poms or tassels for a festive style that suits holidays or themed gifts.

I sometimes embroider different expressions: moving the mouth stitch slightly changes the whole personality of the llama.

For added durability on a toy for children, consider sewing the saddle on rather than using glue and using safety eyes with washers for extra security.

I like to add a small loop of yarn at the top to turn the llama into an ornament or bag charm β€” perfect for gifts and craft markets.

To make a weighted base, insert a small bag of poly pellets before final stuffing to help the llama stand more firmly.

I enjoy mixing textures by using boucle or chenille yarn for the saddle while keeping the body in super bulky plush yarn for contrast.

If you want a posable neck, you can thread a thin florist wire through the neck before stuffing and bend gently for poseable display (use caution for child-safe toys).

Experiment with different facial details like stitched eyelashes, felt blush circles, or tiny crocheted flowers to make each llama unique.

Common Mistakes & How to Fix Them

βœ— Skipping stitch markers when working in continuous rounds can make rounds hard to track; use a marker at the start of each round and move it as you go. βœ— Forgetting to stuff as you go causes poor shaping and lumps; stuff gradually at the indicated *Stuffing* points and add small amounts until the shape is firm and even. βœ— Not counting stitches after increases and decreases leads to shape errors; count stitches at the end of each round, especially after increase/decrease rounds. βœ— Pulling stitches too tightly when switching colors or making bobbles makes edges stiff; maintain relaxed, consistent tension and gently shape bobbles with your fingers. βœ— Attaching safety eyes too late or without checking placement can look off; place and check eye spacing before securing or gluing, then attach firmly or use adhesive as recommended.
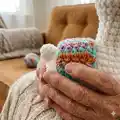
Llama No Sew Amigurumi Pattern

Make a charming no-sew llama amigurumi with this friendly crochet pattern. You will crochet the head and body in one piece, add a sweet nose and ears, and finish with a colorful saddle. Clear step-by-step rounds and photo guidance help you create a cuddly handmade gift or decor piece. Perfect for crafters who enjoy quick, satisfying projects that look professionally finished.

Intermediate 2-3 Hours

Materials Needed for Llama No Sew Amigurumi Pattern

β€” Main Fabric

  • 01
    Super Bulky yarn / Category 6 - White (main color for Llama)
  • 02
    Accent colors for Llama saddle: Blue, Purple, Orange - small amounts for saddle strips
  • 03
    Worsted/Bulky options for Owl and Horse patterns shown in the PDF: Brown, White, Yellow, Beige, Light brown, Skin color - small amounts each
  • 04
    Plastic safety eyes: 8mm (for Llama and Owl variations)
  • 05
    Plastic safety eyes: 10mm (used on Horse sample)
  • 06
    Fiberfill (Polyester stuffing) - small amount to fill head/body

β€” Tools Required

  • 01
    Crochet hook size 3.5mm (E)
  • 02
    Stitch markers
  • 03
    Sewing needle / yarn needle for weaving ends
  • 04
    Scissors
  • 05
    Plastic safety eyes 8mm (2 pieces)
  • 06
    Plastic safety eyes 10mm (2 pieces - used in horse pattern)
  • 07
    Hot glue or adhesive glue for attaching saddle and small parts
  • 08
    Polyester stuffing (fiberfill)
  • 09
    Pins for positioning pieces (optional)

Progress Tracker

0% Complete

β€” Head & Body (crochet from the head up to the body, no sew) :

Begin :

Begin with White yarn

Row 1 :

6SC in an MR (6)

Row 2 :

6INC (12)

Row 3 :

(SC, INC) 6 times (18)

Row 4 :

(2SC, INC) 6 times (24)

Row 5-8 :

24SC (24)

Row 9 :

(SC, DEC) 8 times (16)

Row 10 :

(6SC, DEC) 2 times (14)

Info :

*Stuffing*

Row 11-14 :

14SC (14)

Row 15 :

5SC, (SC, INC) 2 times, 5SC (16)

Row 16 :

make 8CH, crochet with the second chain from the hook: INC, 6 SC(of the chains), 16SC(of the body), 6SC, (SC, BO in one st) (of the chains)(32)

Row 17 :

2INC, 28SC, INC, INC into the stitch's BO (36)

Row 18-21 :

36SC (36)

Row 22 :

SC, DEC, 9SC, (SC, DEC) 3 times, 9SC, (SC, DEC) 2 times (30)

Row 23 :

DEC, SC, BO, 6SC, BO, SC, 4DEC, BO, 6SC, BO, DEC (24)

Info :

*Stuffing*

Row 24 :

12 DEC (12)

Row 25 :

6DEC (6)

Row 26 :

Cut the yarn.

β€” Nose :

Begin :

Begin with White yarn

Row 1 :

Crochet 10SLst from rows 5-7 in a circular shape as photo

Row 2 :

Crochet 10 single crochets (SC) into the 10 slip stitches of row 1.

Row 3 :

5DEC

Info :

*Stuffing* Cut the yarn.

Info :

Embroider the mouth, attach the eyes, and embroider the pink cheeks.

β€” Ears :

Begin :

Begin with White yarn

Ear pick-up :

Pick up the yarn from row 2: 2CH, DC-picot, 2CH, Slst in one stitch.

β€” Llama Saddle :

Info :

Change colors sequentially in the following order: blue, purple, orange, until you complete row 10.

Begin :

Begin with Blue yarn

Row 1 :

5Ch, turn: 4SC, turn (4)

Row 2-10 :

Ch, 4SC, turn (4)

Finish :

Cut the yarn

Info :

Secure the saddle on the back with adhesive glue.

Assembly Instructions

  • Embroider the mouth on the nose piece, attach the plastic safety eyes to the head, then embroider small pink cheeks for a finished face.
  • Secure the small crocheted nose to the head where indicated (rows 13-16 on the head) and tack it in place before final glue or sew for stability.
  • Attach the ears by picking up the yarn at the indicated stitches and slip stitching them into position on top of the head; shape and secure.
  • Position the saddle centered on the back and secure with adhesive glue; press firmly and allow glue to set before handling.
  • Weave in yarn ends and cut excess yarn; hide ends inside the body or nose where possible for a neat finish.

Important Notes

  • πŸ’‘Use a stitch marker to mark the beginning of each round to keep track of continuous rounds and increases/decreases.
  • πŸ’‘Stuff gradually at every indicated *Stuffing* point; under- or over-stuffing will change the final shape dramatically.
  • πŸ’‘Switch yarn colors exactly when indicated for the saddle and any bold/underlined instructions to match the pictured design.
  • πŸ’‘Secure plastic safety eyes and adhesive-attached pieces firmly; use hot glue for saddle attachment as recommended for stability.

This adorable no-sew Llama amigurumi is perfect for gifting or decorating any cozy corner. Give it a bright saddle and a shy embroidered smile to make it uniquely yours. Keep one for yourself and make another as a handmade giftβ€”these little llamas always bring joy! 🧢🧡

You ask,

we answer.

FAQs

What size will the finished piece be?

The finished llama measures approximately 10-15 cm tall when made with super bulky Category 6 yarn and the recommended 3.5mm (E) hook; size will vary with yarn and tension.

Can I use different yarn weights for this pattern?

Yes, you can substitute yarn weights but that will change the final size significantly; if you choose a different yarn, adjust your hook accordingly and make a gauge test.

Do I need to sew parts together for this pattern?

No, the llama head and body are crocheted in one piece (no sew), but small pieces like the saddle are glued and the nose/ears are attached by slip stitch or embroidery as directed.

How long does this project typically take to complete?

Most crocheters complete this small amigurumi in about 2-3 hours depending on experience and whether you make color changes and add detailed embroidery.