🧶 Beautiful ✨ Detailed 💝 Adorable

Gatitos Amigurumi Pattern

Gatitos Amigurumi Pattern
4.8★ Rating
2-3 Hours Time Needed
3.6K Made This
✂️

Beginner Friendly Level

Perfect for those just starting their crochet journey, with clear instructions and simple techniques

⏱️

Bite-Sized Project

Finishes in 2-4 hours—perfect for an afternoon of creative relaxation.

🧸

Cute Companion

An adorable friend to cherish, handcrafted with love to bring comfort and joy for years to come.

About This Gatitos Amigurumi Pattern

This pattern teaches you how to crochet a tiny cat amigurumi with a round head, a compact body, small ears, and four legs. You will work in continuous rounds using single crochet, increases and decreases, then add embroidered details for a charming face. The finished piece is small and sweet—perfect for gifts or to start a mini collection.
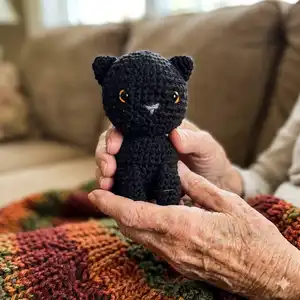
Gatitos Amigurumi Pattern crochet pattern - detailed view of completed project

Clear round-by-round instructions make the project easy to follow, even if you are new to amigurumi. The pattern includes embroidery steps to give each cat a unique, expressive face.

Why You'll Love This Gatitos Amigurumi Pattern

I absolutely love this pattern because it turns simple stitches into a tiny companion full of personality. I enjoy how quickly it comes together, making it satisfying to finish in one sitting. The embroidery steps let me add little touches that make each cat unique and expressive. Creating a set in different colors is one of my favorite ways to personalize gifts for friends and family.

Gatitos Amigurumi Pattern step 1 - construction progress Gatitos Amigurumi Pattern step 2 - assembly progress Gatitos Amigurumi Pattern step 3 - details and accessories Gatitos Amigurumi Pattern step 4 - final assembly and finishing

Switch Things Up

I love how easy it is to customize this pattern by changing yarn colors and eye sizes to create different personalities.

You can make pastel versions for a nursery set or bright colors for playful gifts; swapping colors is my go-to trick.

If you want a larger cat, use a bulkier yarn and a larger hook—this makes an irresistibly cuddly version.

For a smaller keychain, use thinner cotton thread and a smaller hook; add a keyring before closing the head.

I sometimes embroider different mouth shapes or add whiskers with thin embroidery thread to shift the expression.

Try safety eyes with different colors or use embroidered eyes for a softer, child-safe toy.

Add tiny accessories like a crocheted bow, scarf, or collar to personalize each cat for gifting.

Experiment with textured stitches for the body—surface crochet or a slip-stitch panel can add fur-like detail.

Combine body and head colors for calico or tuxedo styles; small color blocks are very effective on such a tiny scale.

I also enjoy making little seasonal versions (Halloween, Christmas) by selecting themed yarns and tiny embellishments to match.

Common Mistakes & How to Fix Them

✗ Skipping the magic ring tightening step can leave a hole at the start; pull the ring tight and close the center before proceeding. ✗ Forgetting to place safety eyes before closing the head will make them hard to position; insert eyes between the recommended rounds and check spacing before stuffing. ✗ Overstuffing the head or body causes distortion of the shape; stuff gradually and evenly, adding small amounts until you reach a firm but soft shape. ✗ Not leaving a long enough tail for sewing will make assembly difficult; follow the instructions and cut the yarn with sufficient length for sewing parts together.
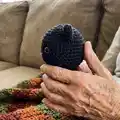
Gatitos Amigurumi Pattern

Make a tiny, adorable crocheted cat with this clear step-by-step pattern. You will create a compact amigurumi using basic stitches and simple assembly so you can finish a cute gift quickly. The design focuses on sweet facial embroidery and compact proportions for a polished, professional look. Perfect for gifting, keychains, or a tiny collection on your shelf.

Beginner Friendly 2-3 Hours

Materials Needed for Gatitos Amigurumi Pattern

— Main Fabric

  • 01
    80g fine cotton yarn or 3-ply cotton (main color) - approximately 80 grams
  • 02
    Additional colors as desired for eyes and nose embroidery - small amounts of each
  • 03
    Safety eyes size No.6 (6 mm) - 2 pieces for each cat

— Tools Required

  • 01
    Aguja lanera (yarn needle)
  • 02
    Safety eyes No.6 (6 mm)
  • 03
    Aguja de coser (sewing needle) for closing and assembly
  • 04
    Crochet hook (use size appropriate for your chosen fine cotton yarn)

Progress Tracker

0% Complete

— Cabeza :

Round 1 :

V 1. 6 pb en Anillo Mágico (6pb)

Round 2 :

V 2. 6 aum seguidos *6 veces (12pb)

Round 3 :

V 3. (1 pb, aum) (18pb)

Round 4 :

V 4. (2 pb, aum) (24pb)

Round 5 :

V 5. (3 pb, aum) (30pb)

Round 6 :

V 6. (4 pb, aum) (36pb)

Round 7 :

V 7. (5 pb, aum) (42pb)

Round 8-14 :

V 8 - 14 (solo pb) (42pb)

Round 15 :

V 15. (5pb, dism) (36pb)

Round 16 :

V 16. (4pb, dism) (30pb)

Info :

*Colocar ojos, bordar detalles y rellenar*

Round 17 :

V 17. (3pb, dism) (24pb)

Round 18 :

V 18. (2pb, dism) (18pb)

Round 19 :

V 19. (1pb, dism) (12pb)

Round 20 :

V 20. (6 dism seguidas) (6pb)

Info :

Terminar con punto deslizado y cortar el hilo con suficiente longitud para pasar con una aguja de coser por los 6pb. Tirar del hilo. Hacer un nudo

— Orejas :

Round 1 :

V 1. 6 pb en Anillo Mágico (6pb)

Round 2 :

V 2 (solo pb) (6pb)

Round 3 :

V 2. 6 aum seguidos *6 veces (12pb)

Round 4 :

V 3. (solo pb) (12pb)

Info :

Terminar con punto deslizado y cortar el hilo con suficiente longitud para usar este mismo hilo para coser la oreja a la cabeza

— Cuerpo :

Round 1 :

V 1. 6 pb en Anillo Mágico (6pb)

Round 2 :

V 2. 6 aum seguidos *6 veces (12pb)

Round 3 :

V 3. (1 pb, aum) (18pb)

Round 4 :

V 4. (2 pb, aum) (24pb)

Round 5 :

V 5. (3 pb, aum) (30pb)

Round 6 :

V 6. (4 pb, aum) (36pb)

Round 7-12 :

V 7 - 12 (solo pb) (36pb)

Round 13 :

V 13. (4pb, dism) (30pb)

Round 14 :

V 14. (3pb, dism) (24pb)

Info :

*Colocar ojos, bordar detalles y rellenar*

Info :

Terminar con punto deslizado y cortar el hilo con suficiente longitud para coser el cuerpo a la cabeza

— Bordado en la cara :

Paso 1 :

1 calculamos el lugar donde va a ir nuestra nariz

Paso 2 :

2 metemos la aguja en un punto un poco alejado de donde va a ir nuestra nariz

Paso 3 :

3 sacamos la aguja en uno de los puntos marcados

Paso 4 :

4 metemos la aguja en nuestro segundo punto y sacamos la aguja en el primer punto

Paso 5 :

5 comenzamos a envolver este hilo hacemos tantas vueltas como nos parezca

Paso 6 :

6 pasamos la aguja al centro de la nariz y bordamos una linea vertical, luego pasamos la aguja hacia donde metimos la aguja la primera vez Hacemos un nudo con ambos hilos y los escondemos dentro del tejido

Info :

Bordamos desde uno de los extremos de arriba (rojo) o abajo (rojo) hacia el medio (azul) y luego desde el medio (azul) hacia el extremo de abajo (rojo) o arriba (rojo)

— Patas de adelante :

Round 1 :

V 1. 5 pb en Anillo Mágico (5pb)

Round 2 :

V 2. 5 aum seguidos *5 veces (10pb)

Round 3-8 :

V 3 - 8 (solo pb) (10pb)

Info :

Terminar con punto deslizado y cortar el hilo con suficiente longitud para usar este mismo hilo para coser las patas al cuerpo

— Patas de atrás :

Round 1 :

V 1. 5 pb en Anillo Mágico (5pb)

Round 2 :

V 2. 5 aum seguidos *5 veces (10pb)

Round 3-4 :

V 3 - 4 (solo pb) (10pb)

Info :

Terminar con punto deslizado y cortar el hilo con suficiente longitud para usar este mismo hilo para coser las patas al cuerpo

— Cola :

Item :

Hacemos 12 cadenas salteamos la ultima y la anteúltima cadena que realizamos y pasamos a hacer pm desde la cadena que sigue, en la cual vamos a hacer 3pm, pasamos a la cadena siguiente y hacemos 3pm después hacemos 6pm seguidos (uno en cada cadena) para que nos queden libres las ultimas 2cds donde vamos a hacer en cada una nuevamente 3pm

Info :

Terminamos con pd, y cortamos el hilo Con ese mismo hilo cosemos la cola al cuerpo.

Assembly Instructions

  • After finishing the head (end of Round 20), thread a sewing needle through the 6 final stitches, pull the yarn to close, knot and weave the tail to secure the top of the head.
  • Place and secure the safety eyes between Rounds 8-9 of the head before stuffing, then embroider the nose and eye details as described, and stuff the head firmly.
  • Sew the body to the head using the long tail left when finishing the body; align the opening and use a mattress or whip stitch to attach securely.
  • Position ears on top of the head and sew them in place using the tail left from finishing each ear, adjusting spacing for symmetry before securing.
  • Use the same long tails left on legs to sew front and back legs to the underside of the body, spacing them evenly so the amigurumi can sit upright.
  • Sew the tail to the back lower section of the body using the tail left when finishing the tail; hide knots and weave ends into the fabric.

Important Notes

  • 💡Insert safety eyes before closing the head and before heavy stuffing to ensure correct placement and secure attachment.
  • 💡Leave long yarn tails when finishing parts to make sewing easier; these threads will be used to attach parts together without rethreading.
  • 💡Embroider the nose and eye details before fully closing the head so you can reach the work comfortably and hide ends inside.

This tiny cat amigurumi is designed to bring a little handmade joy to your day, whether you're gifting it or collecting a few color variations. Make a set in different shades for an instant charming display on your shelf or desk. Happy crocheting and enjoy every stitch! 🧶🐱

You ask,

we answer.

FAQs

What size will the finished piece be?

The finished amigurumi measures approximately small palm-sized (about 8-12 cm tall) depending on your yarn and hook tension.

Can I use different yarn weights for this pattern?

Yes, you can use different yarn weights but this will change the final size; adjust your hook to suit the yarn and check gauge by making a small head piece.

Do I need prior crochet experience for this pattern?

This pattern is beginner friendly and uses single crochet, increases and decreases; basic knowledge of these stitches will help you follow the rounds.

How long does this project typically take to complete?

Most crocheters finish this mini amigurumi in about 2-3 hours, though time may vary with experience and how detailed you embroider the face.