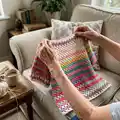
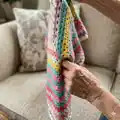
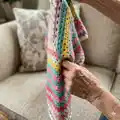
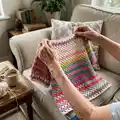
About This Crochet Short Sleeved Top Pattern
This pattern creates a relaxed, short-sleeved crochet top worked in a repeating granny stripe pattern for a light, textured fabric. The design uses Caron Skinny Cakes for easy color changes and a playful striped look without cutting yarn. It includes instructions for sizes XS/S through 4/5XL and a schematic to guide shaping and finishing.
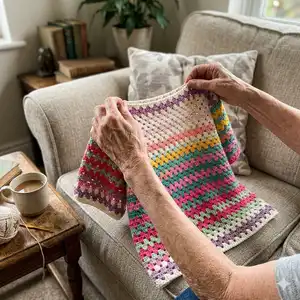
Worked flat for Front and Back pieces and sewn together with set-in sleeves to form square armholes, this top is beginner-friendly and quick to make. The pattern shows exact stitch counts and color guidance across sizes for consistent results.
Why You'll Love This Crochet Short Sleeved Top Pattern
I absolutely love this pattern because the granny stripe creates a cheery, textured fabric with very little effort and no complicated stitch work. I enjoy how the Caron Skinny Cakes color shifts give a professional-looking gradient without multiple ends to weave in. Sewing the pieces together to form square armholes gives a modern silhouette that is flattering and comfortable. It is a satisfying, quick project that gives you a wearable result perfect for gifting or personal use.
Switch Things Up
I like to swap the color order in the Caron Skinny Cakes to create a different striped effect, moving brighter colors to the hem for emphasis.
I sometimes substitute a solid worsted weight yarn for parts of the top for a more subtle color block look while keeping the granny stripe texture.
Want a longer tunic? I make the front and back longer by repeating the 3rd-6th rows additional times until the desired length is reached before shaping armholes.
I make a cropped version by stopping 2-4 pattern repeats earlier and adding a ribbed hem with sc rounds for a modern crop silhouette.
I change sleeve length easily: for a sleeveless top skip the sleeve section and finish armhole edges with a round of sc; for long sleeves, extend sleeve length in granny stripe repeats before finishing.
I often add embroidered details on the front after finishing to personalize the garment with initials or small motifs using leftover yarn.
To make a child's size, I reduce starting chain proportionally and follow the same granny stripe repeats, checking gauge and adjusting as needed for fit.
I swap the neck edging to a taller collar by working 2-3 rounds of sc instead of 1 for a slightly raised neckline and cozy finish.
I sometimes use small metal or wooden buttons at the shoulder seams and work a button loop of ch and sl st to create a functional shoulder opening for easier dressing.
I recommend blocking the panels gently after finishing to even out stitch tension and align the stripes before sewing seams for the cleanest final look.
Common Mistakes & How to Fix Them
✗ Skipping the stitch count conversion for larger sizes leads to incorrect shaping; always refer to the size numbers in parentheses and follow the color-coded counts for your chosen size.
✗ Breaking yarn at every color change creates many loose ends to weave in later; carry unused colors loosely up the side and change by yoh with the new color on the last two loops of the previous dc.
✗ Not checking gauge will result in a garment with the wrong fit; make the 4" (10 cm) gauge swatch (15 sc and 16 rows or 5 dc-groups and 9 rows) and adjust hook size if needed.
✗ Stuffing or sewing sleeves incorrectly can create uneven seams; pin sleeves into the square armholes and baste-check placement before sewing permanent seams for accurate alignment.
✗ Failing to count groups of 3 dc accurately in the granny stripe causes misalignment across rows; mark every 10 groups while counting and recount at the end of each row to stay consistent.