🧢 Beautiful ✨ Detailed πŸ’ Adorable

Bonnie Beanie Pattern

Bonnie Beanie Pattern
4.4β˜… Rating
2-3 Hours Time Needed
2.2K Made This
βœ‚οΈ

Beginner Friendly Level

Perfect for those just starting their crochet journey, with clear instructions and simple techniques

⏱️

Bite-Sized Project

Finishes in 2-4 hoursβ€”perfect for an afternoon of creative relaxation.

πŸ‘•

Casual Chic

Relaxed style with a modern twist, perfect for everyday wear while maintaining that handcrafted uniqueness.

About This Bonnie Beanie Pattern

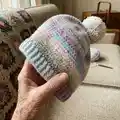
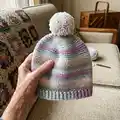
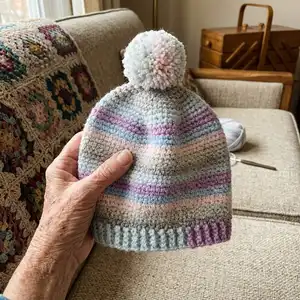
This pattern creates a cosy, striped baby beanie worked in continuous rounds with an added ribbed brim and pom-pom. It is written for several baby sizes and uses US terminology with UK equivalents where needed. The pattern showcases Paintbox Baby DK Prints for pretty self-striping effects and quick results.

Bonnie Beanie Pattern crochet pattern - detailed view of completed project

Clear round-by-round instructions make it accessible for beginners, while the brim technique gives a neat professional finish. Perfect for quick gifts and baby showers.

Why You'll Love This Bonnie Beanie Pattern

I absolutely love this pattern because it turns a single ball of self-striping Baby DK yarn into a charming, finished beanie with very little fuss. I enjoy how the simple increase rounds create a perfect dome shape, and the ribbed brim looks polished without complicated stitches. Making a small pom-pom to finish the hat always adds a delightful handmade touch that I cant resist. This is one of those patterns I make again and again because it is fast, forgiving and always well received.

Bonnie Beanie Pattern step 1 - construction progress Bonnie Beanie Pattern step 2 - assembly progress Bonnie Beanie Pattern step 3 - details and accessories Bonnie Beanie Pattern step 4 - final assembly and finishing

Switch Things Up

I love swapping yarn colours to change the whole look of this beanie; try bright solids, muted pastels or speckled DK for different moods.

If you want a bigger version, I change to a thicker yarn and a larger hook and adjust rounds slightly while keeping the increase pattern consistent.

To make a mini keyring-sized version, use fingering weight yarn and a much smaller hook for a tiny, adorable beanie.

I often replace the pom pom with a crocheted flower or small button for a different finish, which is great for gifting.

Experiment with ombre or gradient yarns to create subtle colour shifts without changing balls mid-project.

Try embroidering a small motif on the brim for personalization β€” initials or a tiny heart work beautifully.

For a snugger fit, crochet one row less before beginning the brim, or for a slouchier style add extra rounds to the body.

I sometimes make earflaps and ties for toddler versions using extra rounds and simple triangular shaping at the sides.

Swap the ribbed brim for a folded brim by working extra rows then folding and sewing for a double-thickness band.

Play with texture by substituting alternating rows of hdc for some rows to create soft ridges across the hat body.

Dont be afraid to mix solids with variegated yarn β€” a solid brim paired with a self-striping body can look very polished and modern.

Common Mistakes & How to Fix Them

βœ— Skipping the magic ring setup can leave a hole at the crown; start with a tidy MR and pull it closed securely to avoid gaps. βœ— Forgetting to place or move the place marker makes rounds hard to track; use a marker at the last stitch and move it each round. βœ— Working the brim with the wrong hook size will change tension and fit; switch to the specified US D/3 (3mm) hook for the brim rows. βœ— Ignoring the continuous rounds method creates joining ridges and uneven fabric; work in continuous rounds as instructed for a smooth finish.

Bonnie Beanie Pattern

Make a sweet, soft baby beanie with this beginner-friendly Bonnie Beanie pattern. Youll love the simple construction, cozy ribbed brim and the option to add a playful pom-pom. This pattern uses Paintbox Baby DK Prints for beautiful self-striping colours that work up quickly.

Beginner Friendly 2-3 Hours

Materials Needed for Bonnie Beanie Pattern

β€” Main Fabric

  • 01
    Paintbox Yarns Baby DK Prints (Baby DK weight) 1 3/4oz/50g balls
  • 02
    Quantity by size: 0-3 months - 1 ball; 3-6 months - 1 ball; 6-12 months - 1 ball; 12-18 months - 2 balls; 18-24 months - 2 balls
  • 03
    Colour options: Mermaid, Misty Forest or Pastel Party

β€” Tools Required

  • 01
    US E/4 (3.5mm) crochet hook
  • 02
    US D/3 (3mm) crochet hook for brim
  • 03
    1 place marker

Progress Tracker

0% Complete

β€” Hat :

Info :

Make a MR using US E/4 (3.5mm) crochet hook.

1st round (right side) :

1 ch (does not count as st), 6 sc (dc) in MR, do not join or turn. | 6 sts.

2nd round :

2 sc (dc) in each st around. | 12 sts.

Info :

PM in last st of round and move up as you work each round.

3rd round :

[2 sc (dc) in next st, 1 sc (dc) in next st] 6 times. | 18 sts.

4th round :

[2 sc (dc) in next st, 1 sc (dc) in next 2 sts] 6 times. | 24 sts.

5th round :

[2 sc (dc) in next st, 1 sc (dc) in next 3 sts] 6 times. | 30 sts.

6th round :

[2 sc (dc) in next st, 1 sc (dc) in next 4 sts] 6 times. | 36 sts.

7th round :

[2 sc (dc) in next st, 1 sc (dc) in next 5 sts] 6 times. | 42 sts.

8th round :

[2 sc (dc) in next st, 1 sc (dc) in next 6 sts] 6 times. | 48 sts.

9th round :

[2 sc (dc) in next st, 1 sc (dc) in next 7 sts] 6 times. | 54 sts.

10th round :

[2 sc (dc) in next st, 1 sc (dc) in next 8 sts] 6 times. | 60 sts.

11th round :

[2 sc (dc) in next st, 1 sc (dc) in next 9 sts] 6 times. | 66 sts.

12th round :

[2 sc (dc) in next st, 1 sc (dc) in next 10 sts] 6 times. | 72 sts.

For size 0-3 months only :

13th - 32nd rounds 1 sc (dc) in each st around. | 72 sts. Continue to brim.

For size 3-6 months only :

13th round [2 sc (dc) in first st, 1 sc (dc) in next 11 sts] 6 times. | 78 sts. 14th - 35th rounds 1 sc (dc) in each st around. Continue to brim.

For size 6-12 mths only :

13th round [2 sc (dc) in first st, 1 sc (dc) in next 11 sts] 6 times. | 78 sts. 14th round [2 sc (dc) in first st, 1 sc (dc) in next 12 sts] 6 times. | 84 sts. 15th - 38th rounds 1 sc (dc) in each st around. Continue to brim.

For size 12-18 months only :

13th round [2 sc (dc) in first st, 1 sc (dc) in next 11 sts] 6 times. | 78 sts. 14th round [2 sc (dc) in first st, 1 sc (dc) in next 12 sts] 6 times. | 84 sts. 15th round [2 sc (dc) in first st, 1 sc (dc) in next 13 sts] 6 times. | 90 sts. 16th - 40th rounds 1 sc (dc) in each st around. Continue to brim.

For size 18-24 months only :

13th round [2 sc (dc) in first st, 1 sc (dc) in next 11 sts] 6 times. | 78 sts. 14th round [2 sc (dc) in first st, 1 sc (dc) in next 12 sts] 6 times. | 84 sts. 15th round [2 sc (dc) in first st, 1 sc (dc) in next 13 sts] 6 times. | 90 sts. 16th round [2 sc (dc) in first st, 1 sc (dc) in next 14 sts] 6 times. | 96 sts. 17th - 42nd rounds 1 sc (dc) in each st around. Continue to brim.

β€” Brim :

Info :

For all sizes Without fastening off, ss in next st at end of final round of hat body, turn to work at right angles to the hat body and continue as follows: Using US D/3 (3mm) hook, make 6 ch.

1st row (right side) :

1 sc (dc) in second ch from hook and in each of next 4 ch, ss in next st on final round of hat body, turn. 5 sc (dc) and 1 ss.

2nd row :

Miss 1 ss, 1 sc (dc) in BLO of next 5 sts, turn. 5 sc (dc) BLO.

3rd row :

1 ch (does not count as st throughout), 1 sc (dc) in BLO of next 5 sts, ss in next 2 sts on final round of body, turn. 5 sc (dc) BLO and 2 ss.

4th row :

Miss 2 ss, 1 sc (dc) in BLO of next 5 sts, turn. 5 sc (dc) BLO.

Info :

Repeat 3rd and 4th rows around the bottom of the hat finishing on a 4th row.

To join the brim :

Working on the wrong side from the outside edge back towards the body of the hat, ss in FLO of each st of previous row and BLO of each corresponding ch from 1st row. Fasten off and weave in ends.

β€” To Finish :

Info :

Make a small pom pom and sew securely into the centre of the magic ring at the crown. Sew in any remaining ends.

Assembly Instructions

  • Join the brim by working on the wrong side from the outside edge back towards the hat body, slip stitch in FLO of each st of previous row and BLO of each corresponding chain from the 1st row, then fasten off and weave in ends.
  • Make a small pom pom and sew securely into the centre of the magic ring at the crown using yarn tail or needle, ensuring it is fastened firmly.
  • Weave in any remaining yarn ends neatly on the wrong side so the hat sits smoothly and trim excess yarn.
  • Use a place marker at the last stitch of each round and move it up each round to keep track of the start and maintain correct stitch count.

Important Notes

  • πŸ’‘Use the specified US E/4 (3.5mm) hook for the hat body and US D/3 (3mm) hook for the brim to achieve correct gauge and fit.
  • πŸ’‘Work in continuous rounds for a smooth fabric; do not join or turn unless instructed at the brim.
  • πŸ’‘Instructions are written for the smallest size with changes for larger sizes given in round brackets and square brackets indicate repeat counts.

This Bonnie Beanie makes a lovely, quick gift thats soft and snuggly for little ones. Use the gorgeous Paintbox Baby DK Prints for beautiful colour changes with no fuss. Perfect for baby showers or a last-minute handmade present. 🧢🧸

You ask,

we answer.

FAQs

What size will the finished piece be?

Finished circumference and length vary by size: 0-3 months = 12in (30cm) circumference, length 5Β½in (14cm); 18-24 months = 16in (40cm) circumference, length 6ΒΎin (17cm).

Can I use different yarn weights for this pattern?

You can, but it will affect the finished size and gauge; if you change yarn weight, adjust your hook size and check gauge to reach the required 24 sts and 27 rows over 4in/10cm.

Do I need prior crochet experience for this pattern?

This pattern is rated beginner friendly, so basic knowledge of single (double) crochet, magic ring and working in rounds is helpful for best results.

How long does this project typically take to complete?

Most crocheters finish a single baby beanie in about 2-3 hours, though time may vary depending on experience and chosen size.