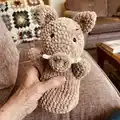
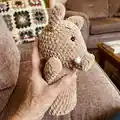
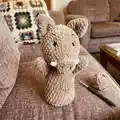
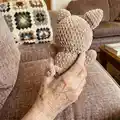
About This Boar Hand Puppet Amigurumi Pattern
This pattern teaches you how to crochet a soft boar hand puppet using plush yarn and simple shaping techniques. You will create a head, ears, fangs, arms and a body, then assemble and embroider facial details. Clear round-by-round instructions and helpful finishing tips make the process straightforward and satisfying.
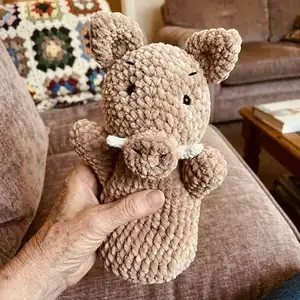
Perfect for crafters who like quick, giftable projects with personality. The puppet measures about 28 cm (11") and is made with widely available yarns and tools.
Why You'll Love This Boar Hand Puppet Amigurumi Pattern
I absolutely love this pattern because it transforms simple materials into a playful, characterful puppet that kids and adults adore. I enjoy how quickly you can see progress — the head and body take shape fast with clear rounds. The pattern lets me practice shaping and small embroidery details, which gives each puppet a unique expression. I also appreciate that the design is forgiving and adaptable, so I can change eyes, mouth or colors to create endless variations.
Switch Things Up
I love customizing this pattern by swapping yarn colors — try a gray or brown plush yarn for different boar looks.
I often change the eye type: use safety eyes for a glossy look or embroider small eyes for a softer, child-safe version.
To make a mini keychain puppet, I use thinner yarn and a smaller hook to shrink the pattern proportionally.
I also experiment with facial expressions by adjusting eyebrow placement and nostril embroidery to give each puppet its own personality.
For a more durable puppet, I sometimes insert a small piece of felt inside the mouth area to keep shape and make it easier to move fingers.
I like adding accessories like tiny crocheted hats or scarves using leftover yarn for a seasonal touch.
If I want posable arms, I thread thin wire inside the arm tubes before closing and secure ends well inside the body.
I suggest trying contrasting yarn for fangs and eyebrows to make features pop — white fangs and dark eyebrows look very expressive.
For gifts, I sew a small hanging loop inside the back to hang the puppet as decor when not in use.
When making multiples I keep a master template of eye and ear placement so each puppet has consistent, symmetrical features.
Common Mistakes & How to Fix Them
✗ Not placing safety eyes before final stuffing can make positioning difficult; insert and secure the eyes between rounds 11 and 12 before stuffing to ensure correct placement.
✗ Skipping stitch counts during increases and decreases leads to uneven shaping; count your stitches after each round and mark round starts with a stitch marker to stay accurate.
✗ Overstuffing the head makes sewing and indentation tricky; stuff gradually and test shape frequently to keep the head smooth and well-shaped.
✗ Sewing parts without pinning often results in misaligned features; pin ears and arms in place and check symmetry before sewing to achieve a balanced look.