๐Ÿงถ Beautiful โœจ Detailed ๐Ÿ’ Adorable

Bernat Pipsqueak Star Blanket Pattern

Bernat Pipsqueak Star Blanket Pattern
3.9โ˜… Rating
12-15 Hours Time Needed
2.7K Made This
โœ‚๏ธ

Intermediate Level

Ideal for those with basic crochet experience, featuring slightly more advanced stitches and techniques to expand your skills.

โฑ๏ธ

Multi-Day Project

A rewarding 12+ hour journeyโ€”perfect for dedicated crafters who love detailed work.

๐Ÿค—

Soft Hug

Gentle, plush, and full of warmth, creating a sense of comfort and coziness wherever they find a home.

About This Bernat Pipsqueak Star Blanket Pattern

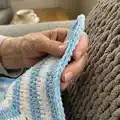
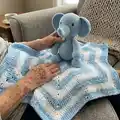
This pattern makes a star-shaped baby blanket worked in rounds with contrasting colors for a striped star effect. It uses Bernat Pipsqueak, a plush chenille-style yarn, and introduces sc2tog shaping for soft decreases. The blanket finishes approximately 40 inches (101.5 cm) from point to point and is ideal for nursery decor or thoughtful handmade gifts.

Bernat Pipsqueak Star Blanket Pattern crochet pattern - detailed view of completed project

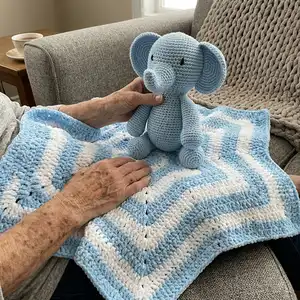
Worked from the centre outward, the pattern alternates two colors to create bold star points and chevron-like stripes. Clear round-by-round instructions make shaping and color changes easy to follow.

Why You'll Love This Bernat Pipsqueak Star Blanket Pattern

I absolutely love this pattern because the plush Bernat Pipsqueak yarn makes the blanket unbelievably soft and snuggly. I enjoy the visual impact of the star shapingโ€”each round builds the points so the design grows quickly and satisfyingly. The alternating color rounds create a striking striped effect that feels both modern and cozy. I also appreciate that the pattern includes clear instructions for sc2tog shaping, so the blanket keeps a smooth, rounded edge while maintaining the star points.

Bernat Pipsqueak Star Blanket Pattern step 1 - construction progress Bernat Pipsqueak Star Blanket Pattern step 2 - assembly progress Bernat Pipsqueak Star Blanket Pattern step 3 - details and accessories Bernat Pipsqueak Star Blanket Pattern step 4 - final assembly and finishing

Switch Things Up

I love customizing this pattern by changing the color sequence to create different visual effects; try three colors instead of two for a layered look.

If you want a smaller or larger blanket I change my yarn weight and hook size and watch the gauge carefully to alter finished dimensions.

I sometimes add a simple single crochet or crab stitch border to give the edge a neat, finished look and extra stability.

For a vintage vibe I use muted, pastel tones and for a modern nursery I pick bold, contrasting colors to make the star pop.

You can substitute a softer or washable chenille yarn if you want a machine-washable version, adjusting hook size to match gauge.

I recommend trying a small swatch with sc2tog practice to make your decreases look smooth before working on the full blanket.

To make a mini version as a lovey or toy mat I use DK yarn and a smaller hook, keeping the same round increases for the star shape.

I sometimes embroider a small initial or applique a tiny heart in the center for a personalized gift that feels hand-touched.

If you prefer a reversible look consider planning color changes so stripes are consistent on both sides, or work a single-color reversible border.

For more texture, try substituting some rounds with hdc or puff stitches while maintaining the increase pattern at the points to keep the star shape.

Common Mistakes & How to Fix Them

โœ— Skipping the note about ch 3 at the beginning of rounds will change stitch counts; always treat ch 3 as the first dc throughout. โœ— Not joining color B or A exactly where directed may shift the stripe pattern; join each contrast yarn with a sl st to the specified stitch to keep stripes aligned. โœ— Forgetting to make sc2tog exactly as written can create uneven decreases; draw up a loop in each designated stitch and yarn over to draw through all loops to form a proper sc2tog. โœ— Ignoring gauge leads to an incorrectly sized blanket; check 10 dc and 6 rows = 4 ins [10 cm] and adjust hook size until gauge is met. โœ— Missing the instruction to miss specified stitches causes extra stitches and distorts star points; follow the 'Miss next st.' directions carefully when shaping.

Bernat Pipsqueak Star Blanket Pattern

Make a soft, star-shaped baby blanket using plush Bernat Pipsqueak yarn. This pattern guides you through color changes and star-point shaping so you can create a cozy, heirloom-quality blanket. Perfect for gifting or snuggling, the finished piece measures about 40 inches from point to point.

Intermediate 12-15 Hours

Materials Needed for Bernat Pipsqueak Star Blanket Pattern

โ€” Main Fabric

  • 01
    Bernat Pipsqueak (100 g/3.5 oz; 109 m/120 yds) - Contrast A and Contrast B as specified
  • 02
    3 balls of A and 2 balls of B (for the 100 g skein option)
  • 03
    Alternative larger quantity option: (250 g/8.8 oz; 274 m/300 yds) - 1 ball each of A and B (as noted in pattern)
  • 04
    Contrast A: 58730 or 59730 Silly Sea - 259 m / 283 yds
  • 05
    Contrast B: 58005 or 59005 Whitey White - 208 m / 227 yds

โ€” Tools Required

  • 01
    Crochet hook size 6.5 mm (U.S. K or 10ยฝ) or size needed to obtain gauge
  • 02
    Scissors
  • 03
    Yarn needle for weaving in ends
  • 04
    Stitch markers (recommended for tracking rounds)
  • 05
    Tape measure to check gauge and finished dimensions

Progress Tracker

0% Complete

โ€” Star Blanket :

Info :

MEASUREMENT: Approx 40 ins [101.5 cm] from point to point.

Info :

MATERIALS Bernatยฎ Pipsqueak (100 g/3.5 oz; 109 m/120 yds) 3 balls of A and 2 balls of B or (250 g/8.8 oz; 274 m/300 yds) 1 ball each of A and B Contrast A (58730 or 59730 Silly Sea) 259 m / 283 yds Contrast B (58005 or 59005 Whitey White) 208 m / 227 yds

Info :

Size 6.5 mm (U.S. K or 10ยฝ) crochet hook or size needed to obtain gauge.

Info :

GAUGE: 10 dc and 6 rows = 4 ins [10 cm].

Info :

ABBREVIATIONS: www.bernat.com/abbreviations

Info :

INSTRUCTIONS Note: Ch 3 at beg of rnd counts as dc throughout.

Info :

Beg at center, with A, ch 5. Join with sl st to form ring.

Round 1 :

Ch 2 (does not count as st). 12 hdc in ring. Join with sl st to first hdc. 12 hdc.

Round 2 :

Ch 1. 1 sc in same sp as last sl st. *3 dc in next hdc. 1 sc in next hdc. Rep from * around to last hdc. 3 hdc in last hdc. Join B with sl st to first sc.

Round 3 :

With B, sl st in next dc. Ch 3. (2 dc. Ch 2. 2 dc) in next dc. 1 dc in next dc. *Miss next sc. 1 dc in next dc. (2 dc. Ch 2. 2 dc) in next dc. 1 dc in next dc. Rep from * 4 times more. Join A with sl st to top of ch 3.

Round 4 :

With A, sl st in next dc. Ch 3. 1 dc in next dc. *(2 dc. Ch 2. 2 dc) in next ch-2 sp. 1 dc in each of next 2 dc.** Draw up a loop in each of next 2 dc. Yoh and draw through all loops on hook โ€“ sc2tog made. 1 dc in each of next 2 dc. Rep from * 4 times more, then from * to ** once. Sc2tog over last 2 sts. Join with sl st to top of ch 3.

Round 5 :

Ch 3. 1 dc in each of next 3 dc. *(2 dc. Ch 2. 2 dc) in next ch-2 sp. 1 dc in each of next 4 dc.** Miss next st. 1 dc in each of next 4 dc. Rep from * 4 times more, then from * to ** once. Miss last st. Join B with sl st to top of ch 3.

Round 6 :

With B, sl st in next dc. Ch 3. 1 dc in each of next 4 dc. *(2 dc. Ch 2. 2 dc) in next ch-2 sp. 1 dc in each of next 5 dc.** Sc2tog over next 2 dc. 1 dc in each of next 5 dc. Rep from * 4 times more, then from * to ** once. Sc2tog over last 2 dc. Join A with sl st to top of ch 3.

Round 7 :

With A, ch 3. 1 dc in each of next 6 dc. *(2 dc. Ch 2. 2 dc) in next ch-2 sp. 1 dc in each of next 7 dc.** Miss next st. 1 dc in each of next 7 dc. Rep from * 4 times more, then from * to ** once. Miss last st. Join with sl st to top of ch 3.

Round 8 :

Sl st in next dc. Ch 3. 1 dc in each of next 7 dc. *(2 dc. Ch 2. 2 dc) in next ch-2 sp. 1 dc in each of next 8 dc.** Sc2tog over next 2 dc. 1 dc in each of next 8 dc. Rep from * 4 times more, then from * to ** once. Sc2tog over last 2 dc. Join B with sl st to top of ch 3.

Round 9 :

With B, ch 3. 1 dc in each of next 9 dc. *(2 dc. Ch 2. 2 dc) in next ch-2 sp. 1 dc in each of next 10 dc.** Miss next st. 1 dc in each of next 10 dc. Rep from * 4 times more, then from * to ** once. Miss last st. Join A with sl st to top of ch 3.

Round 10 :

With A, sl st in next dc. Ch 3. 1 dc in each of next 10 dc. *(2 dc. Ch 2. 2 dc) in next ch-2 sp. 1 dc in each of next 11 dc.** Sc2tog over next 2 dc. 1 dc in each of next 11 dc. Rep from * 4 times more, then from * to ** once. Sc2tog over last 2 dc. Join with sl st to top of ch 3.

Round 11 :

Ch 3. 1 dc in each of next 12 dc. *(2 dc. Ch 2. 2 dc) in next ch-2 sp. 1 dc in each of next 13 dc.** Miss next st. 1 dc in each of next 13 dc. Rep from * 4 times more, then from * to ** once. Miss last st. Join B with sl st to top of ch 3.

Info :

Cont as established, (working 1 rnd B; 2 rnds A throughout) until work from center to outer point measures approx 20 ins [51 cm] ending with 2 rnds A. Fasten off.

Assembly Instructions

  • Weave in all loose ends securely on the wrong side of the blanket using a yarn needle, trimming excess yarn close to the work.
  • Block the finished blanket gently to even out stitches and shape the star points, pinning points to measurements and using a damp cloth if necessary.
  • When carrying color, twist yarns at color changes to avoid gaps and false seams and ensure stripe continuity at joins.
  • If you plan to add a border, pick up stitches evenly around the blanket edge after completing rounds and work the chosen edging following gauge.

Important Notes

  • ๐Ÿ’กUse stitch markers to mark the beginning of each round to keep track of where to join and maintain the pattern rhythm.
  • ๐Ÿ’กMaintain consistent tension with plush chenille yarn to avoid uneven spots; Pipsqueak can compress so work gently.
  • ๐Ÿ’กCheck gauge before starting and adjust hook size if necessary to achieve 10 dc and 6 rows = 4 ins [10 cm].
  • ๐Ÿ’กWhen making sc2tog decreases, draw up loops completely and finish the decrease cleanly to keep points neat.

This star blanket pattern is a cozy, plush project made with Bernat Pipsqueak for a soft, snuggly finish. Whether you make it in classic neutrals or bright contrasts, the star shape and striped rounds create a beautiful heirloom piece. Perfect for baby showers, nursery decor, or a thoughtful gift to warm little hearts. ๐Ÿงถโœจ๐Ÿ›๏ธ

You ask,

we answer.

FAQs

What size will the finished blanket be?

The finished blanket measures approximately 40 inches (101.5 cm) from point to point when using the recommended yarn and hook size.

Can I use a different yarn weight for this pattern?

Yes, but switching yarn weight will change the finished size and drape; adjust your hook size and check gauge to maintain correct dimensions.

Do I need to know sc2tog before starting?

Basic knowledge of decreases is helpful; the pattern explains sc2tog as drawing up loops in two stitches and completing the decrease by drawing through all loops.

How long will this blanket take to make?

This is a multi-day project and typically takes about 12-15 hours depending on your speed and how many rounds you complete per session.